Painting again! And Damn it feels good!

I’ve been using my new workspace and it’s been awesome. I’ve jumped back into my Aleph force I started last fall and with the release of the OSS Sectorial I’ve been stoked to the gills.

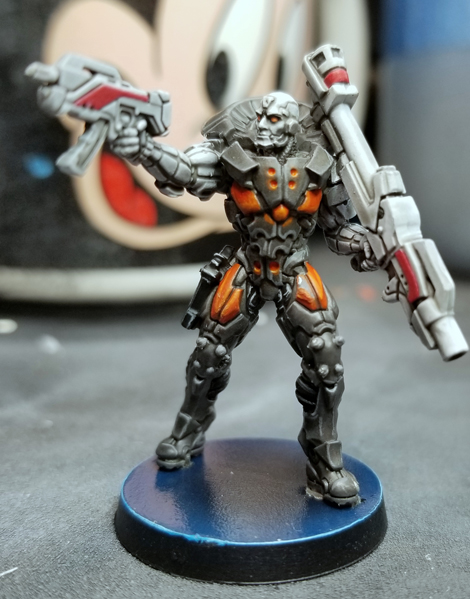
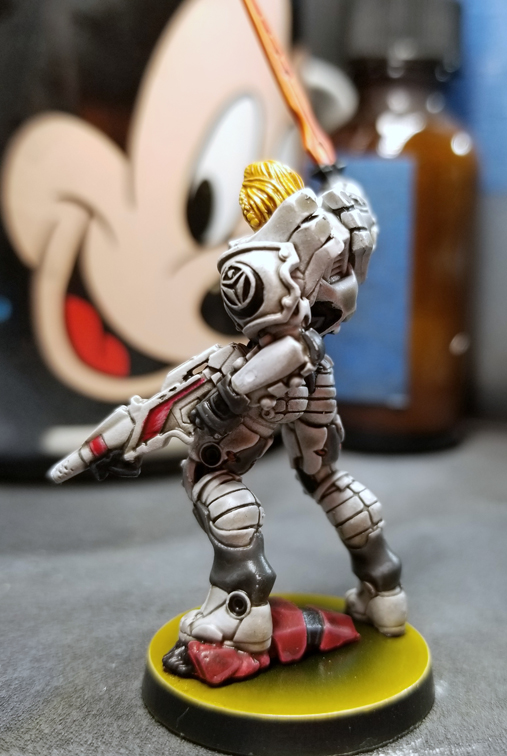
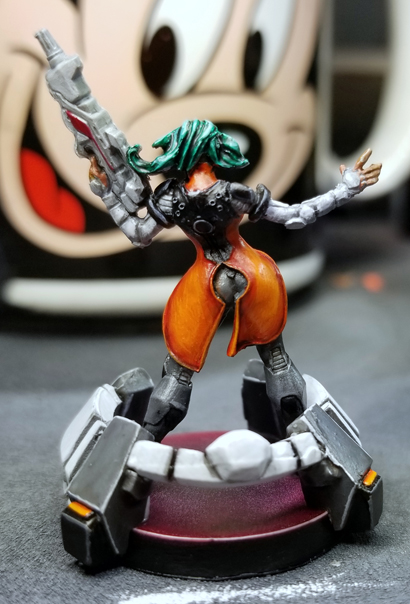
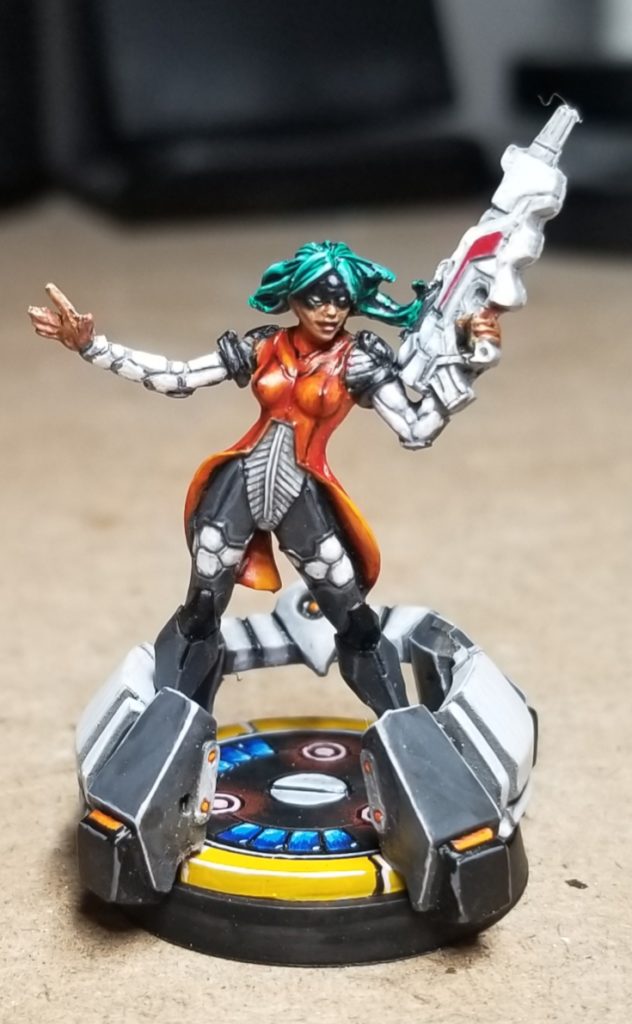
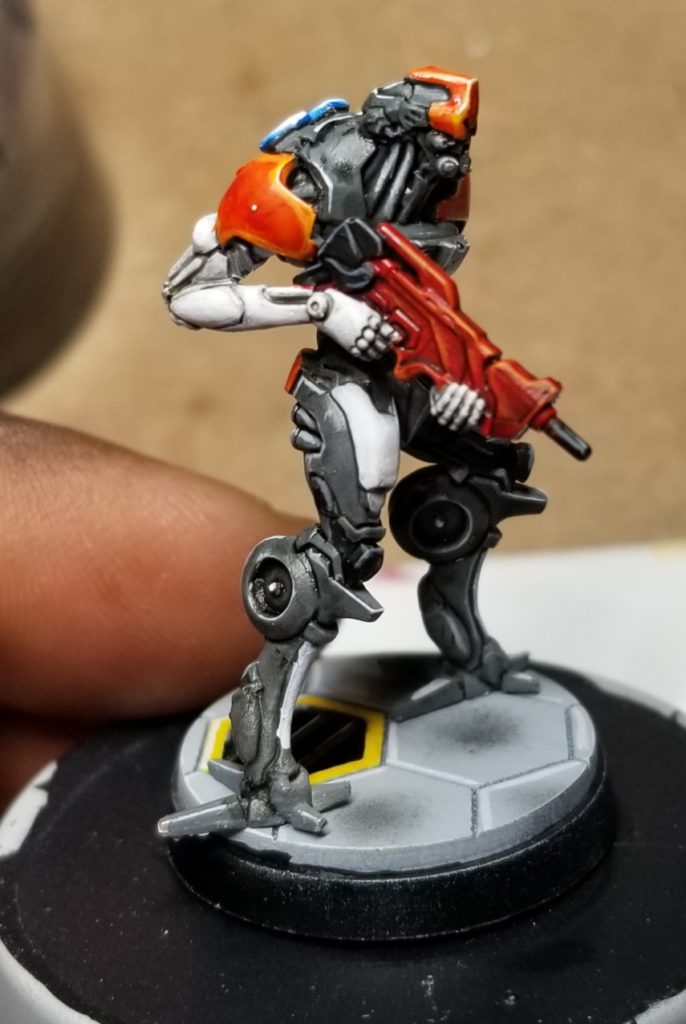
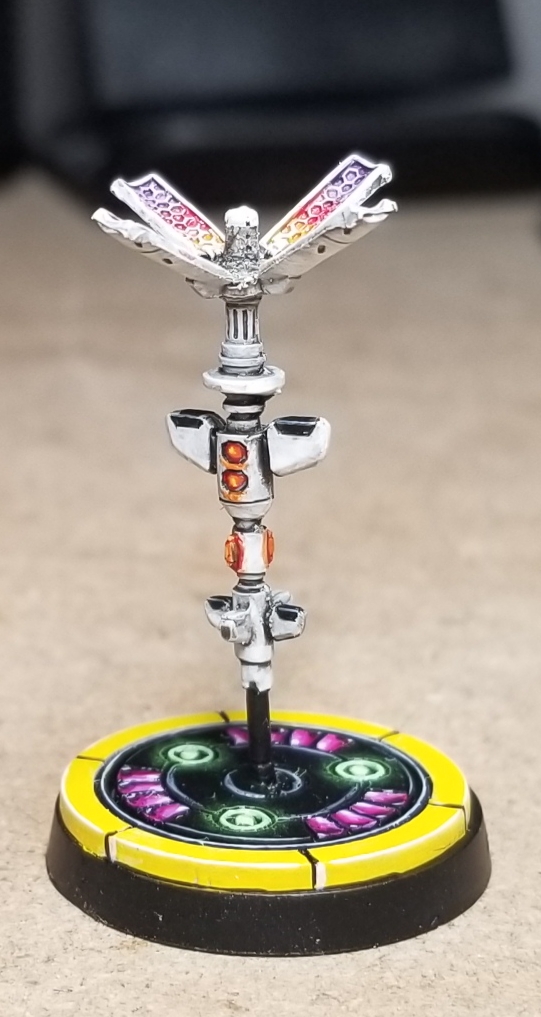
I made some revision to the scheme and army style/layout I originally came up with. First, I’ve abandoned the glowing base design I was using. While I found it clever, it required way too much work per model then I want to deal with now. On top of that, it only would have looked complete with the custom display I was planning. I like the concept but for now it’s shelved. I’ve also tightened up the paint scheme as well. I’ve dropped the white guns with the red stripe. The arms and gun blended together and I hated it. I’ve added more orange and have pinned down solid grey to the overall scheme and I think this way better. Doubt I’ll be retouching the older minis too much though. They’ll just be what they are.

New Bases

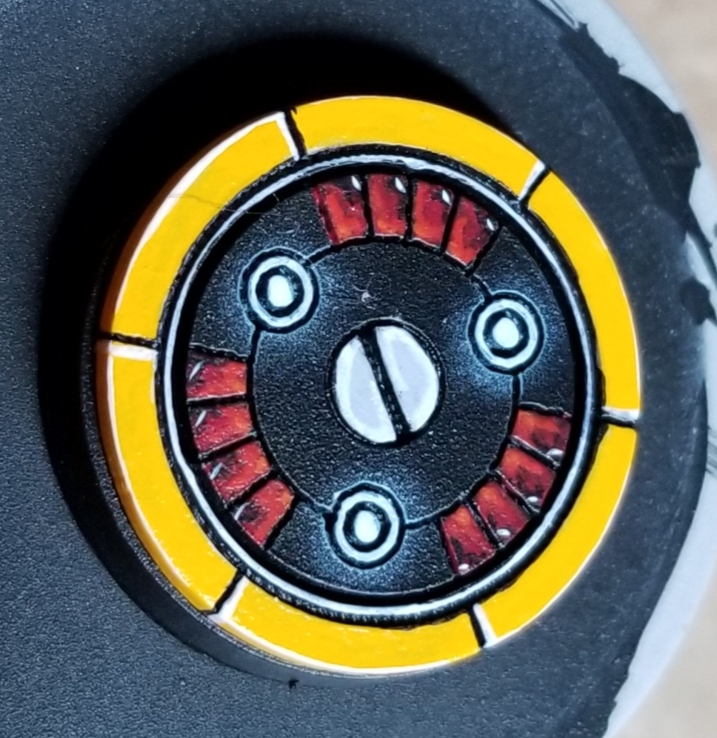
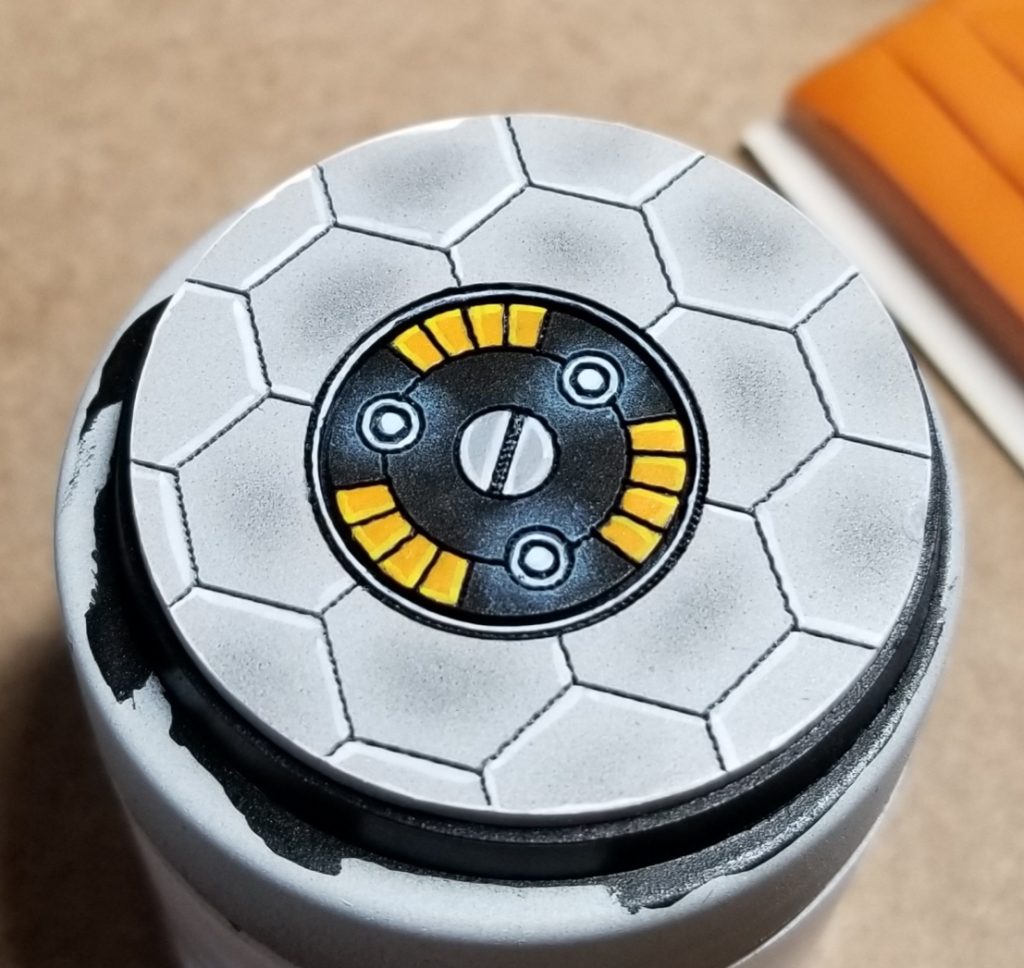
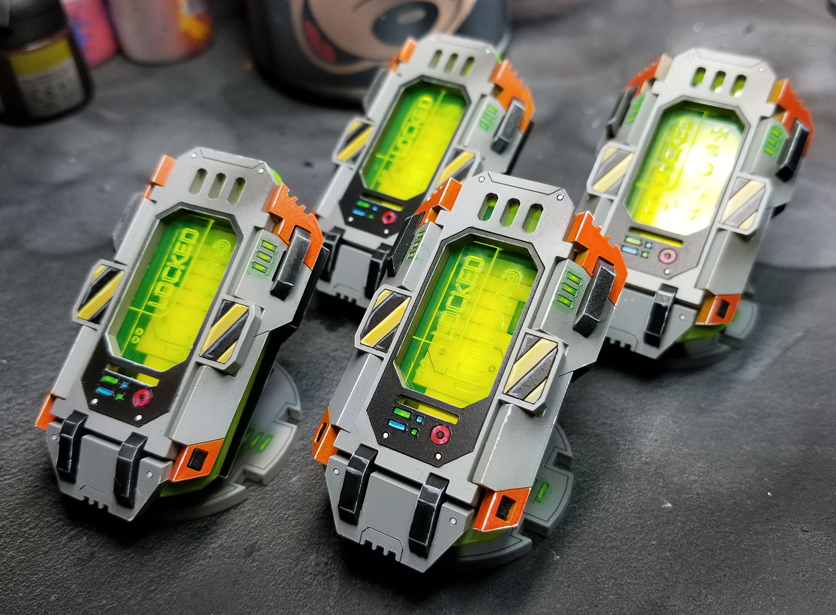
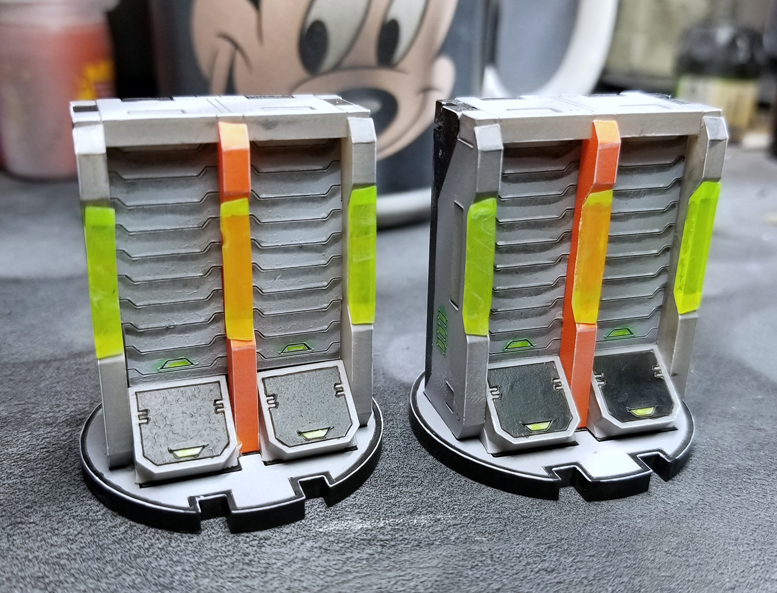
Bases have never been a strong point for me. I could never really get them to look the way I wanted. I’m not a big fan of resin bases so that limited the pool. After a bit of research, I found some bases I liked from Death Ray Designs.

Base inserts are a new concept for me. They have the detail of cast bases but use the base the mini comes with. Touch of glue and you’re done. I think I’ll be doing a small tutorial on how I prep/paint these. What I REALLY love about these things are the cost. 51 bases for 25 shmeckles. Can’t beat that.

Re-based Minis

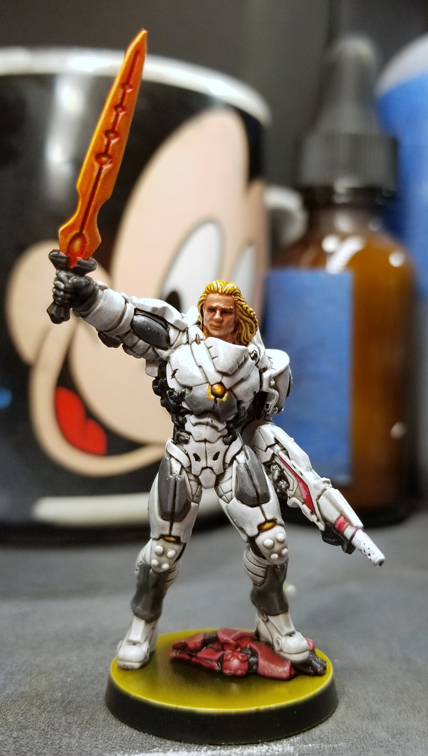
I’ve been focusing on re-basing the minis that are available in OSS. Thankfully I hadn’t painted to many Steel Phalanx troopers so most of my previous work can be repurposed.
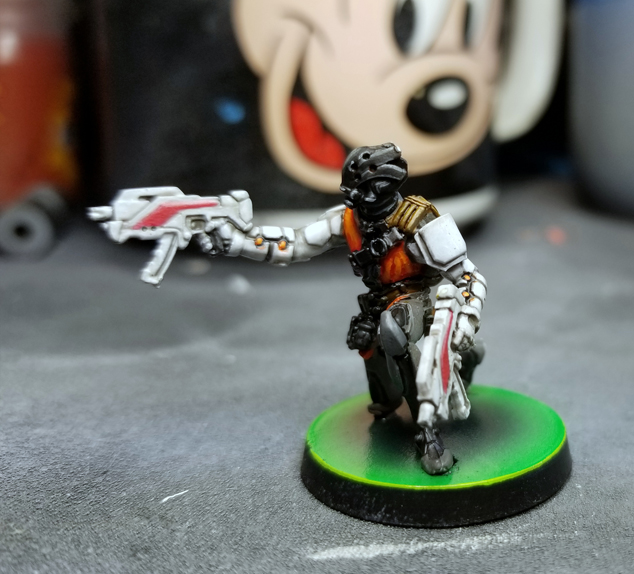
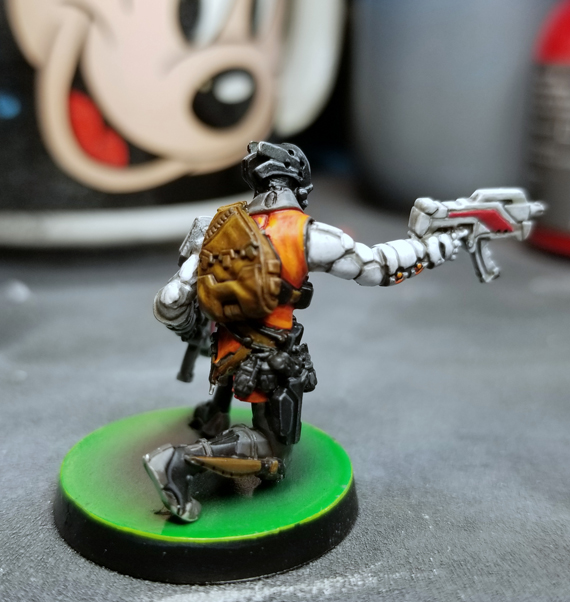
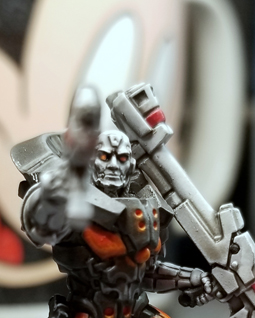
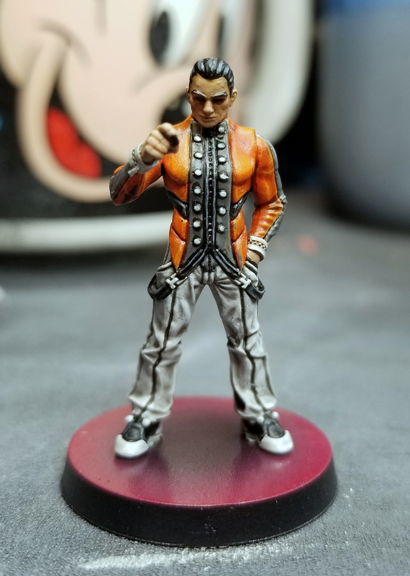
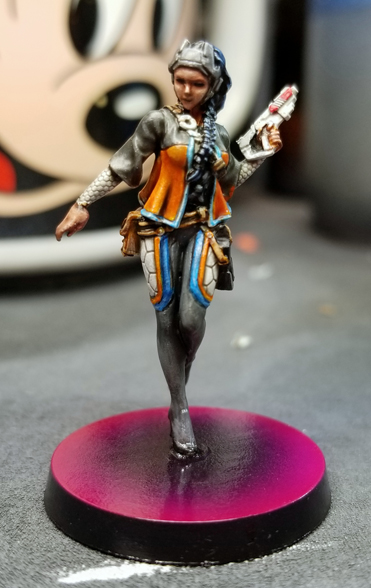
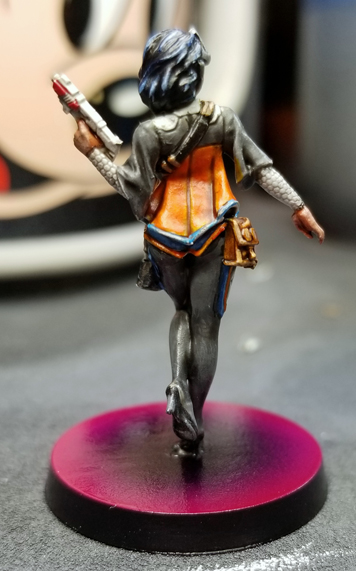
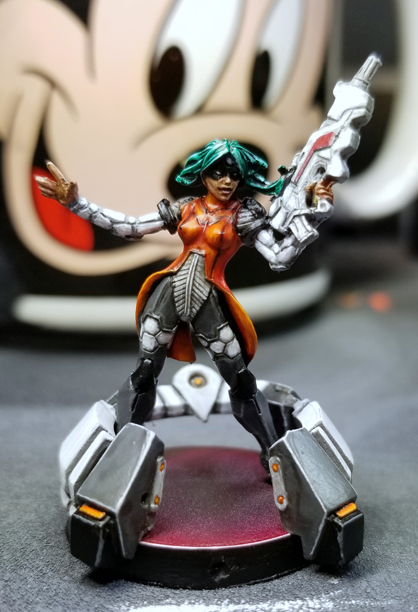
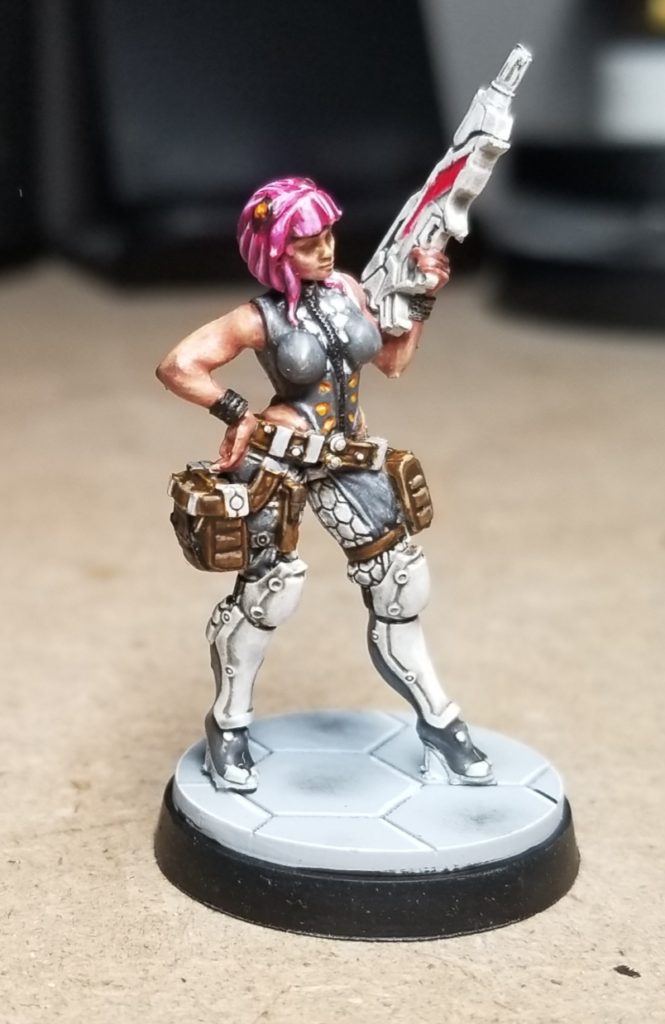
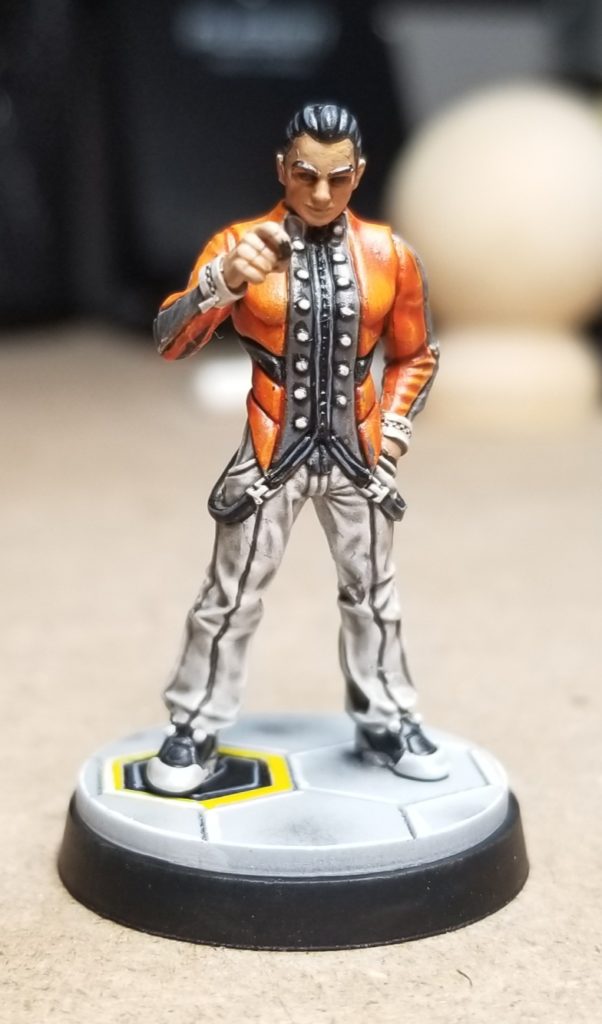
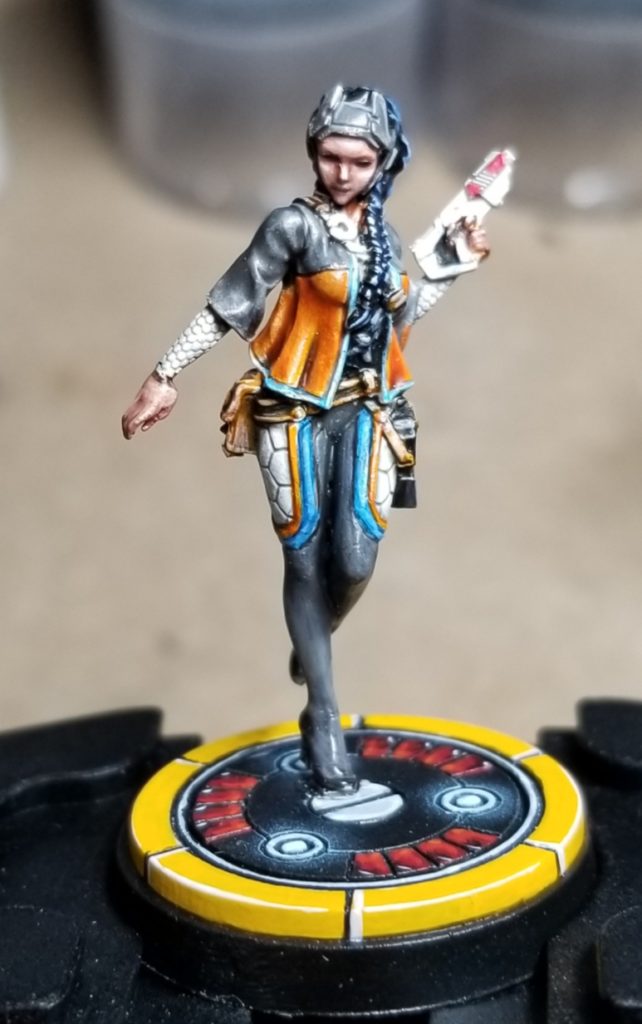
New OSS Troops

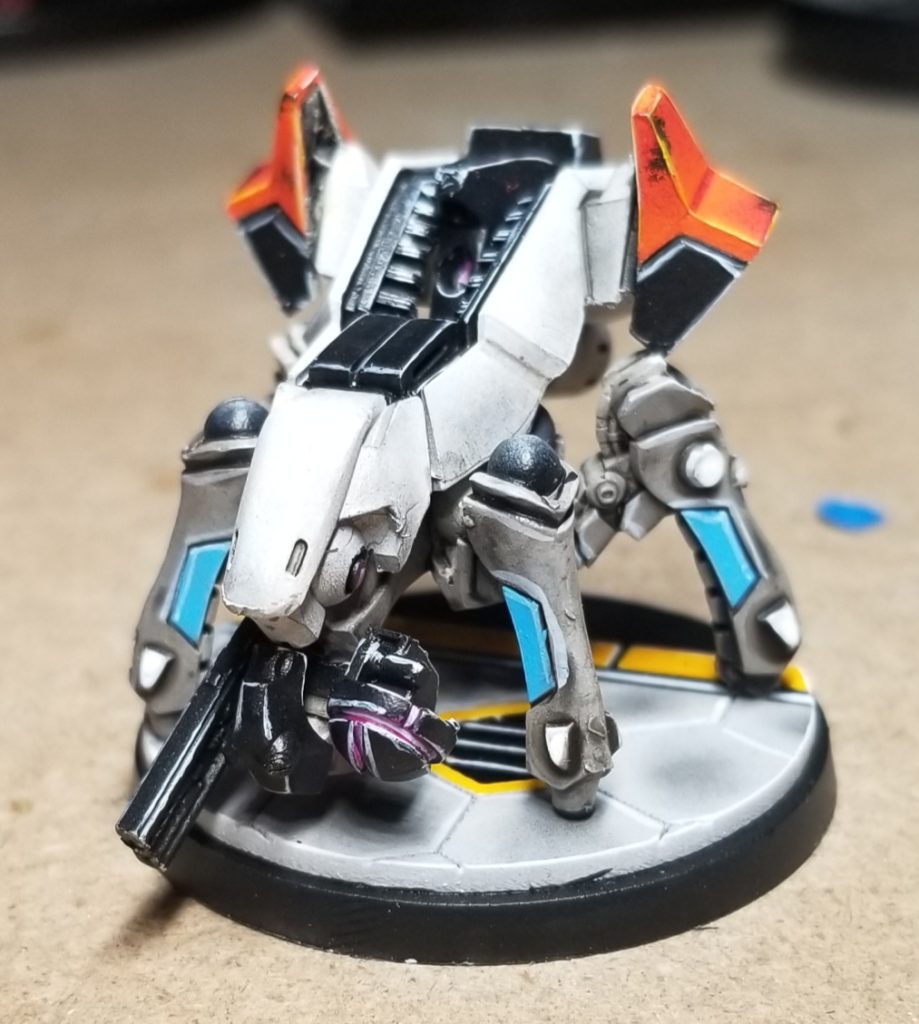
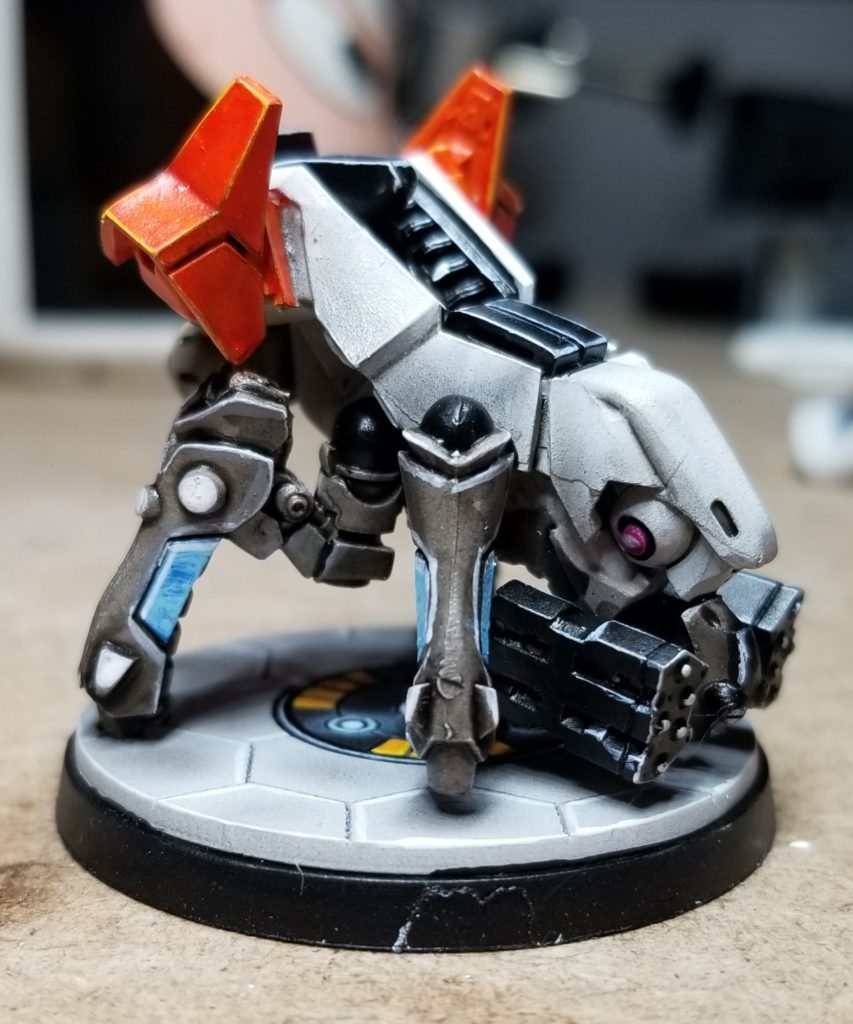
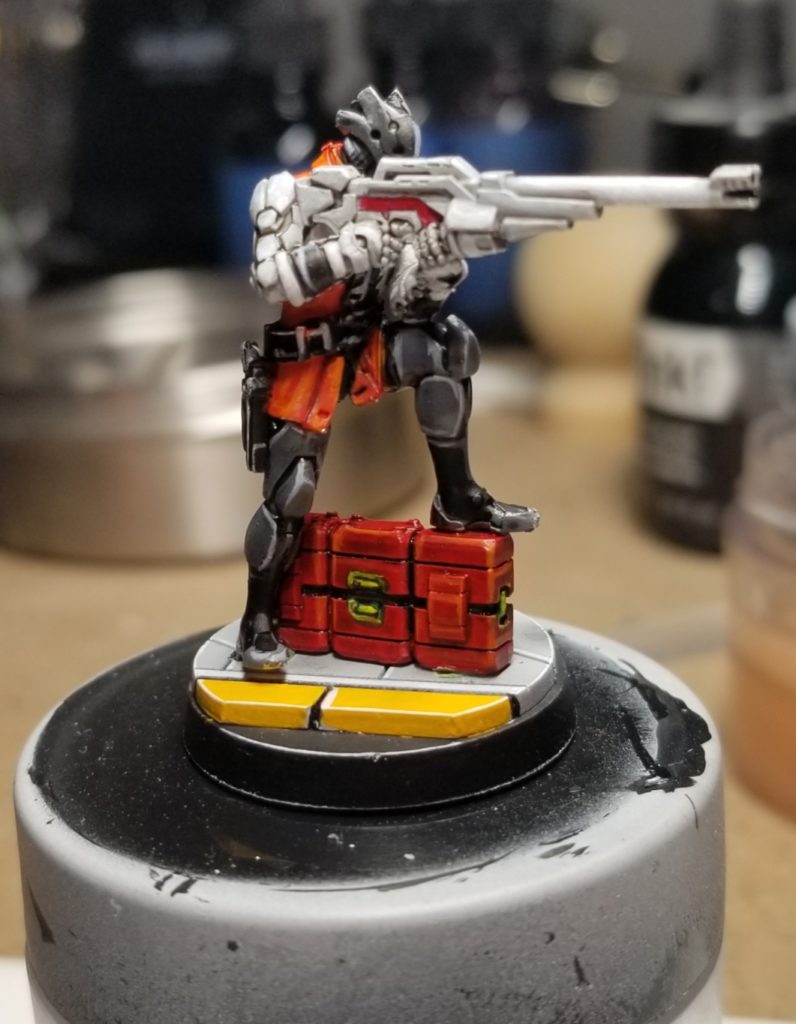
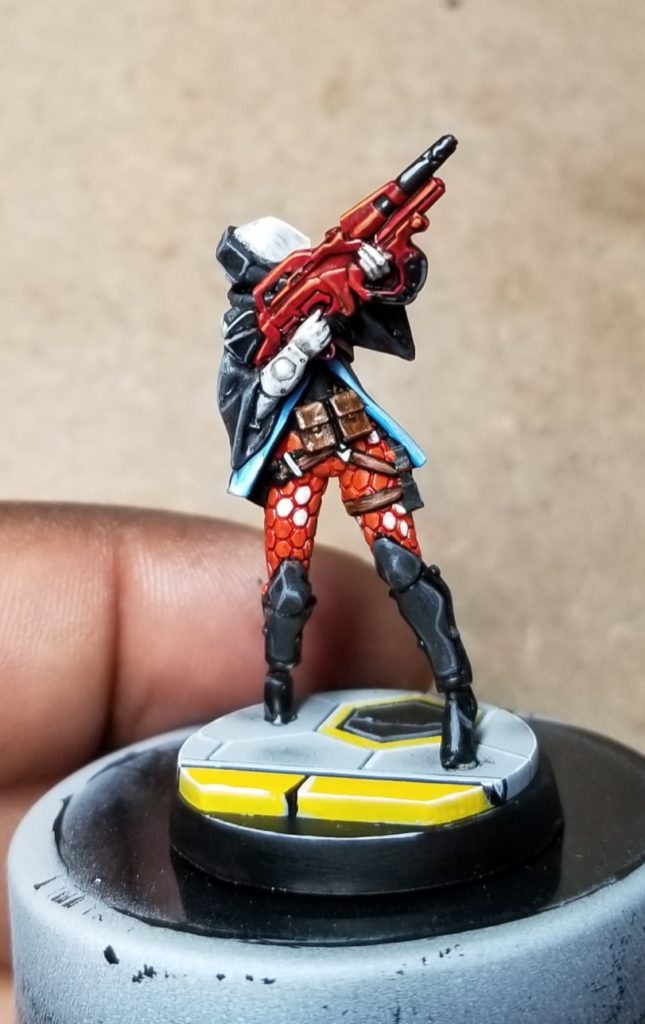
Here are some of the new minis I’ve finished from the new line. I also did some older troops I hadn’t gotten around to.

I’m having a blast painting again. It’s been too long.

Shawn G. (SoI)

New Workstation Complete – Sort of…

So, I’ve been a busy little bastard since my last update. My workstation is complete and I’ve been using it for a few weeks now. Here’s the skinny on what was added:

  • Airbrush booth w/ lighting
  • Custom booth venting system
  • Vallejo paint holder
  • Tabletop and wall mount paint racks
  • Magnetic Board

Airbrush Booth w/ Lighting

Airbrush Booth - With Lighting

I picked up a Paasche HSSB-22-16 from Amazon. I designed my desk to be roomy so I went with larger booth. I had some cabinet lighting we bought from Ikea years ago to light our cabinets in the old house. I kept them figuring they would come in handy eventually. I was right!

Custom Booth Venting

Spray Booth Filter Spray Booth Filter Spray Booth Filter
Spray Both Filter - 4

I really didn’t care about my workspace in the last house. I had airbrush dust EVERYWHERE. Not very smart Shawn… Anyway, this time I have a space I would like to keep clean so I need to vent my fumes better. The window above my space is poorly designed for my use so I did some research and found system that allows me to trap my fumes indoors.

I first drilled a hole into the back corner of MDF surface. Then connected some dryer vent tubing that curved behind it and under the desk. I rigged a bucket I got from Home Depot to catch my fumes using these hand drawn plans by a genius – Homemade Spray Booth & Filter.

My tweak is instead of wrapping the filters around the vent tubing, I used the bucket to cut perfect circles out of my filters and then cut a hole through the middle to run the tubing through. The fumes vent into the bottom of the bucket and then blows up through 9 layers of carbon filtration to escape from the top of the bucket. I tested it using incense and could smell nothing coming out of the bucket. Worked BEAUTIFULLY. That said, I still use my mask when working and leave the fan running for about 5 minutes after spraying. Can’t be too safe.

Vallejo Paint Holder

This was made using PVC pipe from Home Depot. Each 10’ pipe yielded 29 4” tubes. Glued them together with a glue gun and spray painted it black. Holds 203. And yes, I had to color coordinate the pots. The beast of compulsion demands sacrifice…

Paint Racks

Paint Rack - 2 Paint Rack - 3

Got some nail polish racks from Amazon. These hold all my inks and Badge airbrush paints. Good to have all my paints, well most, within reach.

Magnetic Board

Magnetic Board

On a side note I added a magnetic board to store my bits and such. I need to give them a good cleaning before putting them up.

I’m jazzed as hell over this new layout. Been working very well for me. I’ll continue to tweak it over the weeks. The only think lacking now is shelving/storage.

Custom Hobby Desk Project Part III

After testing this desk design on the short side, I was ready to tackle the long side. The process went the same: Mount wall strip, mount flanges and support legs onto frame, attach the leveling blocks to frame, mount desk to wall. The two desk halves were connected via steel deck brackets.


Next came the trim. I used some ¼” oak trim to add a little beauty to the table. Trim was cut at 45° and affixed to the frame via ‘C’ clamps & nail gun. And with that it was done!


I forgot to mention. I designed this table to allow for the easy replacement of the MDF work surface. The trim is mounted to the frame not them MDF. When it gets completely banged up, and it will, I can opt to flip it over to use the undamaged side and when that gets ruined I can just get buy another 8’x4’ MDF board from Home Depot for $22 and cut two tops from that.


Kind of proud of myself for this project. Looking forward to other custom furniture projects in the future.

 Takeaways:

  • As stated before, this project would have been easier using Kee Klamps. Screwing it in and hoping they lined up is (was) just asking for trouble.
  •  I have some concerns on the deck brackets I used to mount this onto the wall. I think they are the weakest point of this layout so I’m going to need to make improvements before I put any real weight on it. I think I’m going to get another oak plank and mount that to the drywall. I’ll then mount the brackets to the oak board.
  • I need to use longer pieces of trim. Home depot didn’t, as far as I saw, have any pieces of trim aver 4 feet. Longer trim would have made the process easier and seamless.

 Well that’s it! Desk done! I have my new airbrush hood being delivered on Sunday and a new infinity table en route from LosBlock that I’m really stoked for. More to come.

 Shawn G. (SoI)


Custom Hobby Desk Project Part II

Well I decided to skip the trim for the second phase and move onto building the table itself. I’ve opted to go with a wall mounted design using steel pipe.


This project will come across a little dis-jointed. I had to completely build ½ of the desk to make sure my design was functional. The short side was built first and then replicated on the long side. Bear with me.


I wanted the desk to have some semi-aesthetic elements that would help it to blend into our basements redesign. The oak strips and trim have been finished in Dutch Oil to bring out the grain. The wood would also look smexy as hell with the black steel pipe.


The first thing I did was mount the oak strip to the wall. I used a wall stud to prop the board off the ground. The 3.5” height of the wall stud is perfect as it will allow me to install the baseboard trim later. After some wall stud hunting & pilot hole drilling, I mounted the oak board onto the wall.

Mounting Short Side Mounting Short Side Mounting Short Side
Mounting Short Side


The next part was a real pain. I used threaded steel pipe and fixtures to build the support elements. The design uses a 45° support leg made from ½” pipe cut to 30” with a flange/nipple/elbow combo on both ends. One flange will be mounted onto the wall via the oak strip, and the other drilled into the table frame. The table will have three support legs on the long side and two on the short. The pain comes from trying to get all the legs level. As these must be screwed onto each other it’s a total crap-shoot trying to screw each part together the exact same way. I had to eyeball it and I hate doing that…


This is a rather imperfect method as it’s nearly impossible to get all the support pipes to be perfectly in line with each other. In retrospect, I should have used Kee Klamps and straight pipe for this purpose. It would have been really precise and easier to be sure. But what ya gonna do?


After affixing the support legs to the frame, I checked it against the wall. Problem. The combination of the oak board and the mounting flange combo made the top unlevel. To get it level I had to mount some 1.5” square boards to the back of my frames. This worked in my favor as not only did this make the desk level, it also gave me space for power cords. These new additions to my frame design also provided a perfect area to mount the frame to the wall.

Short side down Short side down


After checking for level again, I drilled my pilot holes into the oak strip for the base mounting and into the drywall and stud for the wall mounting. The frame mounted to the wall nice and level. I then dropped the pre-cut MDF top to see how it would look pre-trim. Pretty damn nice. And it’s really sturdy.


Onto the next side!

Custom Hobby Desk Project

Greetifications! Been a while since I’ve posted here (September 17). Sorry for the long delay but it has been one CRAZY year so far.

Highlights:

  • Bought a house and moved in back in December.
  • Had to breakdown my old painting setup. That desk would not have survived the trip. All my stuff is in boxes since mid-November.
  • Sump pump in new house drowns in the May monsoon in WV flooding my new sexy basement. Thank god for insurance…
  • Basement no longer sexy.

With reconstruction at about 80% done (insulation, drywall, spackle & paint down) I can now start construction of my hobby space. I tell you what, I have SEVERELY missed being able to build and paint. 11 months is WAY too long.

I’ve decided to make my first post after my hiatus to be the construction of my custom painting station. Let’s get started!

Materials
8’ Wall studs (2×4) – x4
8’ Oak board (4x.5) – x1
4’ Oak board (4x.5) – x1
4’ Oak trim (2.5x.25) – x6
MDF sheet 4’x8’ (.75” thick)
½” Pipe Flanges – x10
½” Pipe Elbow – x10
½” Pipe Nipple – x10
½” pipe cut to 40” – x5
Small “L” Deck braces – x10

Tools
Pocket Jig (Kreg)
Pocket screws
3” Wood clamp (Kreg)
Screwdriver
Miter saw
L & T squares
Pencil
Danish oil
Wood glue

Here are the pics from my build session yesterday:

Custom Workstation Frame 3


I had the MDF sheet cut down to 72”x24.5” & 52”x24.5” panels. These will be the work surfaces for the table. The wall studs are cut to 72” and 52” for the long sides and 17.5” for the short sides.

Assembly was pretty easy using the pocket jig. Seriously get one of these things. They make getting into wood shop projects easy and it’s lots of fun.

Frames are built! Next phase will be the trim.