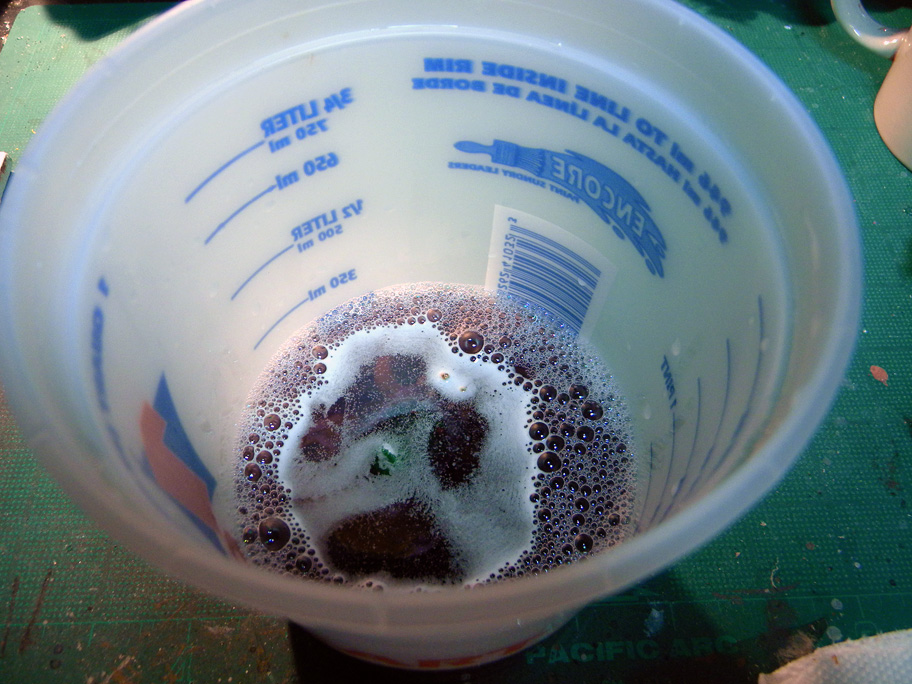
Now that I’ve discussed this marvelous formula, it’s time I showed you how to use it. I’ll be using an old Forgeworld bust I bought years ago and quasi-painted. I let it soak for 24 hours.
Here’s what you’ll need:
Zep Insrustrial Degreaser
Plastic paint pot (paint section from Lowes)
Old Toothbrush
Rubber gloves
Place the mini in the pot on its side and fill with Purple Goodness enough to cover.
Wait.
After digging it out (use a glove), run the model under warm water for a min or so to wash off the degreaser.
Take the toothbrush and scrub off the paint rinsing it off as you go. I like to use dish soap make sure all the degreaser has been cleaned off before letting it dry and repriming.
Cleaning minis is easy. You just need the right stuff to get the job done quickly without damaging the model. I use Zep Industrial Degreaser. It can be found in Home Depot.
I guess I can call myself lucky because this is the only cleaner I’ve ever used for model cleansing/repainting. I have heard horror tales of people loosing whole units to Simple Green shenanigans. You won’t have to worry about this stuff melting your precious hobby goodies.
Pros:
Strong – This stuff is really strong. With time Zep will breakdown super glue bindings. It won’t dissolve the glue mind you, it will just make it brittle and the parts will come apart.
Fast – It takes a few hours for this stuff to work its magic but you won’t have to wait long to get your minis back. Eight hours in this dip and your minis should be good to go. I tend to leave my models soaking for around 24. Longer then this and you’ll be in the zone where it will begin to have an effect on your glue and any sculpting work you’ve done.
Gentle – I have left models, both metal and plastic, soaking in this stuff for weeks at a time with no ill effects. The paint washed off with no scrubbing needed. It’s awesome!
Cheap – A 5 gallon bottle of this stuff will cost around $6 and last you for years. I’m only on my second one. Cons:
Use Gloves – I’m pretty sure you can use this stuff without gloves but you don’t want to. Without gloves your fingers will feel like they have some super slick oil/lube on them that doesn’t wash off with water and it’s kind of annoying. As a concentrated formula it sticks to your skin and takes several washings to get off.
Green Stuff – Zep’s only true negative. This stuff will damage your sculpt work if you leave the model soaking for too long. It softens the cured putty enough for your toothbrush to be able to scratch it. I don’t clean sculpt work often enough to provide you with a gauge. I would not soak longer then 8 hours. Be careful.
Toxic – Do I really need to go over this? It’s used to clean car parts not to drink.
Get this stuff and give it a try. You won’t be disappointed.
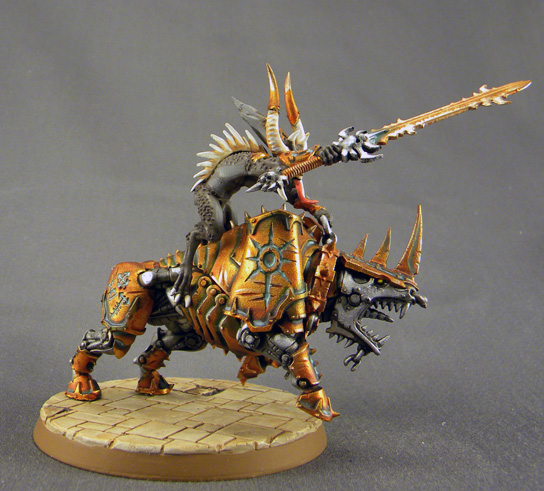
I’ve been asked how I did the gold look on my Juggernauts. Before starting those models, I had not touched a metal paint pot in years. I’ve been trying to develop my NMM (non-metallic metal) technique sot I forbid myself from using metal paints to force myself to get better. I still suck at it though. >.<
Anyway, I didn’t feel like painting those bastards in NMM as that would drive me crazy so I used a style I gleaned from a tutorial on J-Runes site. I’m still developing how to do patina properly so I’ll save that method for a later tutorial.
What you’ll need:
Tamiya Clear Orange
Citadel Gryphonne Sepia (GW)
Vallejo Game Color Bronze (72057)
Citadel Mithril Silver (GW)
Paint Palate (Bath Tile)
Step I: I started with a black prime and applied a nice coat of VGC Bronze. I watered the paint down some so I had to apply two coats for proper coverage. Make sure the coat is solid and even as the 2 washes will make imperfections very apparent.
Step II: The first wash is 2/1 Tamiya Clear Orange to water. Tamiya washes are alcohol based so you’ll need to be a little careful as it will dry faster on the palate then you may expect. This wash gives the bronze a rich orange hue. The one problem I have with this wash is it’s very glossy. That’s where the Sepia comes in.
Note – Be sure to allow the Tamiya plenty of time to dry. It will need to be fully dried before you move onto the next step. Check one of the pooling areas with the tip of a brush, if it’s soft give it another 10-15min.
Step III: Wash the model in Gryphonne Sepia being sure to get complete coverage. The wash will tone down the orange of the Tamiya a touch and kill the glossiness. Use the wash straight out of the pot with no dilution. Be sure to go back and soak up any heavy pooling spots with your brush before they dry.
Go make yourself a sandwich and watch some TV as this stuff takes forever to dry and I have a halogen lamp…
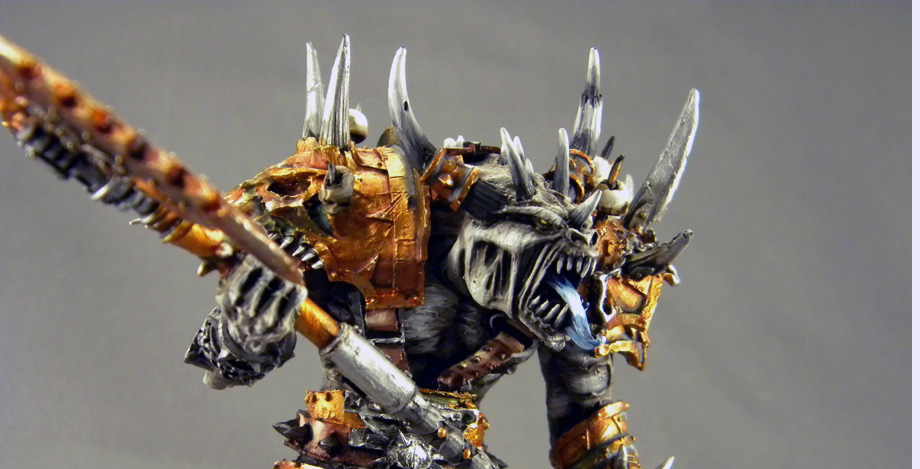
Step IV: Highlighting is simple. Hit your highpoints with VGC bronze, 1/1 Bronze to Mithril Silver, then if you are feeling really froggy pure Mithril on the sharp edges.
Potential Issue – Highlighting brings some shininess back to the gold. From a distance (♫) this should not be a problem but if you are neurotic as I am sometimes you may want to hit the model with some matte varnish to kill the shine. I hate glossy minis.
I was given the Bloodcrushers & Daemon Prince I did for my local Hobby Shop back in August. But I needed to re-base them so they would fit into my army.
After some internal debate I decided to re-base them for 40k. I really prefer Flamers in WHF and really had no interest in building and painting another 3 or so crushers to fill this unit out. Besides they look really cool on the round bases. I used the 60mm rounds from Dragon Forge’s Sanctuary line.
Again, MAD respect to Jeff Wilhelm. Love his work!
This model was a marathon of painting. Every time I finished a section/part I found 10 more points of detail that needed attention. Towards the end I found myself not giving three damns about several detail locations and how they looked as I just wanted to get this bastard done and off of my plate.
I originally based this guy on a 50mm square for fantasy but he just didn’t fit in. As I’m painting this army for 40K/Fantasy I picked up some rounds from Dragon Forge and he looks at home.