If you’ve ever purchased a GW plastic vehicle kit you will be familiar with all the leftover bits that you can’t use. Example; a Space Marine Predator comes with all the parts to make a Rhino, but you can’t make the transport because the sponson mounts use up the two side exit ports. Build enough vehicles and you’ll amass a considerable pile of mostly useless bits. This is where a little planning and some rare-earth magnets can come through and save you some cash. Modular units FTW!
I decided to take advantage of me assembling a FW Dreadnought for a friend as a nice intro to the concept of modularization. This method can expanded on to produce some pretty cool results and allow you to take full advantage of all the elements of many plastic kits.
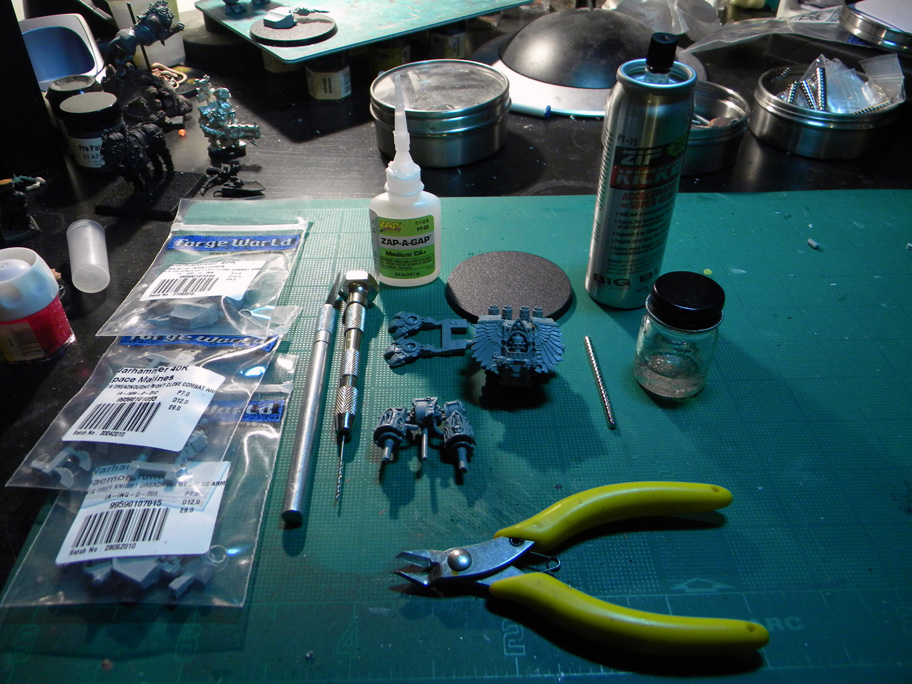
Here’s what you’ll need:

- Rare-earth magnets (D203 from K&J Magnetics)
- Superglue
- Glue accelerant (to save on time)
- Side cutters
- Hobby drill
- Dremel (1/8” dia)


Step I: use your hobby drill to bore a starter indentation into center of the body’s arm joint. This is to provide a guide for the Dremel to drill straight.
As a side note, all the drilling in this tutorial can all be done manually with just a hobby drill. You will have a lot more control over how deep/shallow you make your holes but it will take a lot longer to do. As this is a Forgeworld resin kit that is a viable option, but if this were a metal dread you would want to kill yourself halfway through this project.


Step II: Grab your Dremel and using light pressure, drill a hole into the center of the body arm joint. Make sure it’s deep enough for the magnet to fit almost flush into the hole. You’ll have to eyeball this as this drill bit is designed for the magnet to fit in the hole like a glove and you’ll have a damn hard time getting it out. If you are unsure, make the hole slightly deeper then you think you’ll need. After doing this several times you’ll be able to eyeball this process flawlessly.
As a point of safety I need to inform you about safe Dremeling. Never drill towards your hands and fingers. Holding a model in the center of your hand and using a power tool is the path to blood and tears. In that order. I’m serious people. A hobby vice is not a bad investment when using the God of Hobby tools.


Step III: Add a dab of superglue and install your magnet. I like to tip the model on its side and use the surface of my desk to press the magnet in. You’ll see that it fits snugly into the hole. Again it does not have to be flush.


Step IV: Complete these three steps on both sides of the Dreadnought.


Step V: Just like in the shoulder joint of the body piece, drill a starter indent into the center of the arm piece.


Step VI: Using the Dremel, drill your magnet hole again. You’ll need to be EXTRA careful on this step as the Dremel tool is very strong and this material is very light and you can end up drilling completely through the arm. Take your time, go slow on the slowest setting and you should be fine. Make sure it’s deep enough for the magnet to fit but flushness is not necessary.


Step VII: Sit a magnet on the outside of the one installed in the body. The strength of the magnets will cause them to align themselves correctly. Then all you have to do is add a dab of glue into the arm hole and press the arm firmly onto the body to make it fit. Pull the arm off and hit it with some accelerant to cure the glue and that’s it.
Now comes the cool part, any additional arms you may have can be added to this model. You just have to start at Step V.
The possibilities are endless.
Could you do a tut on how to do it on a CSM a regular one?Thanks if possible.
This was done with a Forge World model. The process of doing this with a CSM resin model is exactly the same. Unless you are meaning a regular metal CSM Dread.
Shawn G. (SoI)