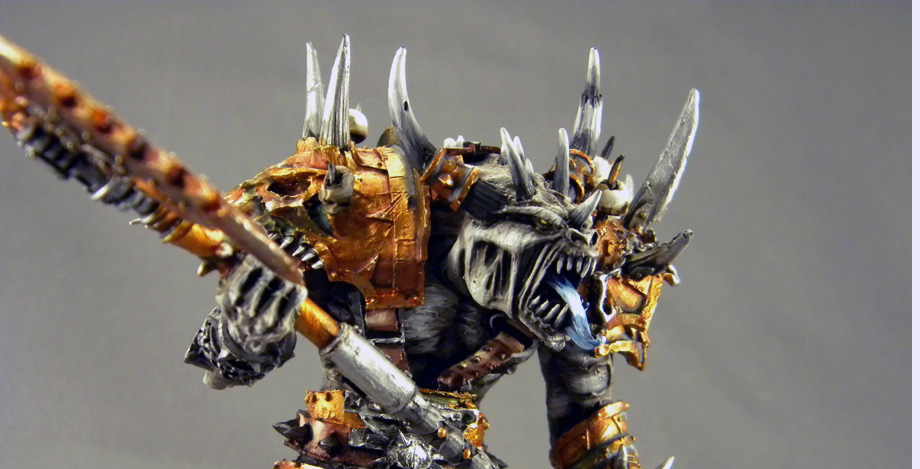
This model was a marathon of painting. Every time I finished a section/part I found 10 more points of detail that needed attention. Towards the end I found myself not giving three damns about several detail locations and how they looked as I just wanted to get this bastard done and off of my plate.
I originally based this guy on a 50mm square for fantasy but he just didn’t fit in. As I’m painting this army for 40K/Fantasy I picked up some rounds from Dragon Forge and he looks at home.
I received a question a few days back on how I did the egg sac look on the back of my Tervigon. The question came at a perfect time because I had some spare green stuff from a small project I’ve been working on. So I decided to answer his question tutorial style!
Here ya go Emilio!
When I started to build my Tervigon a few months back I tried to follow the hobbyist genius that is Hydra of Warpshadow. I just could not get the glue/tissue method that he had developed to work right so I changed direction. The base form of the beast was perfect and since I had already hollowed out his (her?) back for the egg pods I needed my own process.
My design mirrors the interesting albeit gross reproduction habits of the Surinam Toad (read and educate yo self foo!). Eggs suspended in the spongy tissue in the Tyranid brood beast’s back was so perfectly alien I had to do it. And it was easy as hell to do!
Here’s what you’ll need:
Tub-o-Egg Sacs
Green Stuff
Sculpting tool
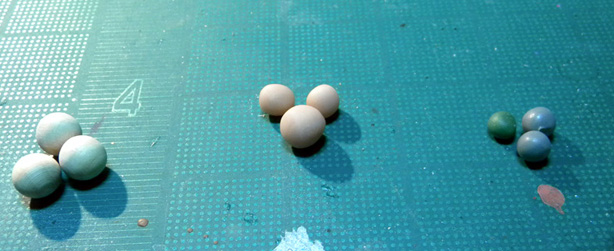
You have a choice of materials you can use for your egg sacs. Here is an example of 3 mediums I keep for potential projects:
Tub-o-Egg Sacs
Wooden - Sculpy - Putty
Wooden Spheres – Bought from Michael’s. Perfect size but they are all the same dimension. Varying sizes will fit this project better.
Handmade from Sculpy – These are what I went with. You can crank out a score of these little bastards in about 10 min and they are cheap as hell too! Just roll them up, bake them for a few minutes and you’ll be ready. Vary the sizes so you have options.
Green/Grey Stuff – Have you ever had some spare green stuff leftover from a sculpting project that you had no use for? Roll it into a ball and keep it! You’d be surprised how useful that sphere will be a few weeks/months down the road.
Once you have your sacs in hand (gigity) the sculpting work is damn simple.
Green Stuff
Roll up some greenstuff.
Push egg......into putty
Don't hurt yourself...
Push your sac into the putty (gigity) and grab your sculpting tool.
Pock MarksMoar Pocks
That's it!
Prick the putty making a pock-like surface. You can push the putty around into new places to make the sac appear to be pushing out of the tissue.
A Slice of Advise
It would be rather expensive to fill the whole back of a Tervigon with just green stuff. I suggest you use a cheaper medium to fill most of the space and then finish with green stuff egg process. I filled most of the back of my beast with Apoxy Sculpt and added the sacs after it cured.
My content posting has slowed down somewhat over the last few weeks but it has not been due to laziness. Well not entirely at least…
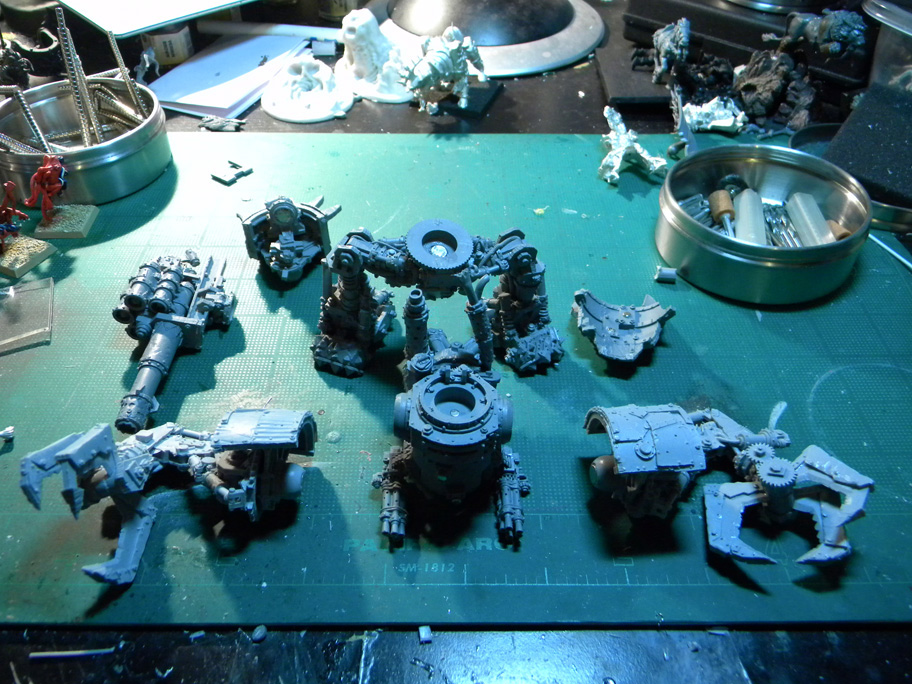
Here are 2 of the big baddies I’ve been working on for my demonic horde. I’ll have better pictures when they are done. My wife annexed the lamp I was going to use for extra lighting. I’ll need to get another one.
I’m also finishing up my old school horror unit (30 deep) and I have a unit of bloodletters that I must complete that I’m dreading (also 30 deep). I hate painting them! They never come out the way I want!
I’ve been a busy bastard lately. I looked at all the armies I own and realized that I have not had a completely painted army since ’04. Heresy! With this fact in mind I decided to focus on getting the one army that I have had sitting around 80% for years now complete; my Tzeentch Demonic Horde. I’ll post more on that later.
This conversion(?) came together while in Michaels. I had been looking for a suitable disk for the scribes for some time and found the perfect example in a cheap metal pendant in their beads aisle. The tome comes from the Covenant of Menoth, with some extra terrain bits I had kicking about.
I was going to add a slew of scrolls and crap around the disk as arcane clutter but changed my mind in the end. I felt it would be too distracting. I’m not finished with this piece. I still have to add the text into the tome as my Prima art pens have yet to arrive. I’ll then flat coat (Krylon Crystal Clear Flat) the model and pick out the gems in gloss varnish. The base comes from Dragon Forge’s Temple line. Thanks again Jeff. Love your work.
I tried to complete this for a Tournament at last Friday’s Vets night and I almost pulled it off. The model was well received but I placed poorly. Really poorly…
Here’s another example of how rare-earth magnets can be used to create some pretty cool custom setups. I’ve built this kit for my friend Dave G. to pay him back for the Forgeworld Hive Tyrant he gave me a few months back. This monstrosity and the Librarian Dreadnoughts are his.
This model is a HATEFULL piece when it comes down to painting. As is testament to Forgeworld kits, there’s 5x the amount of detail needed for a nice model. They go overboard sometimes and it can be a real pain in the arse to paint. With that in mind I decided to set this kit up to allow Dave some piece of mind when painting time comes around.
If you’ve ever purchased a GW plastic vehicle kit you will be familiar with all the leftover bits that you can’t use. Example; a Space Marine Predator comes with all the parts to make a Rhino, but you can’t make the transport because the sponson mounts use up the two side exit ports. Build enough vehicles and you’ll amass a considerable pile of mostly useless bits. This is where a little planning and some rare-earth magnets can come through and save you some cash. Modular units FTW!
I decided to take advantage of me assembling a FW Dreadnought for a friend as a nice intro to the concept of modularization. This method can expanded on to produce some pretty cool results and allow you to take full advantage of all the elements of many plastic kits.
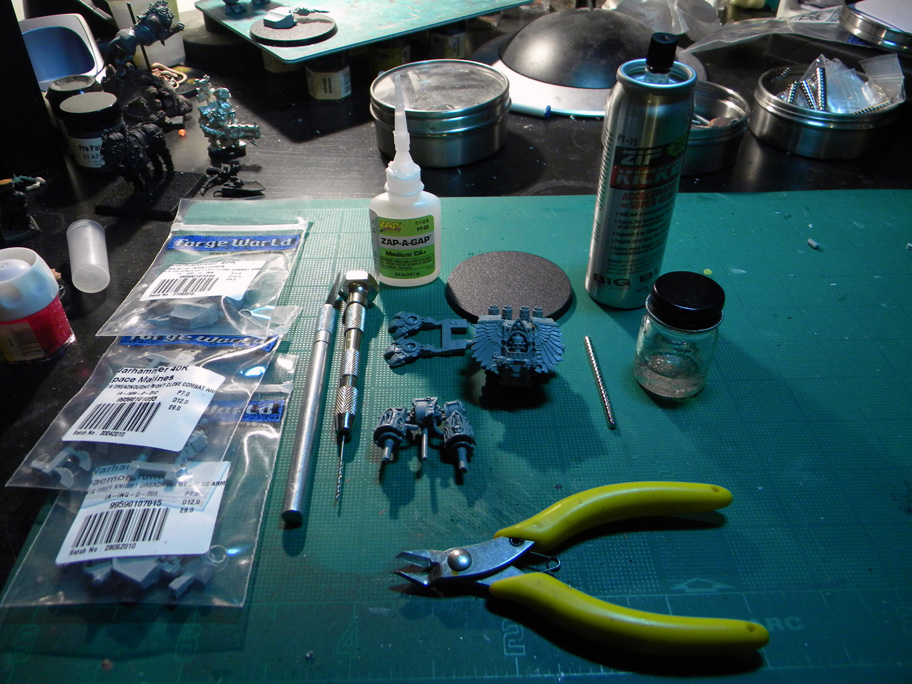
Here’s what you’ll need:
Rare-earth magnets (D203 from K&J Magnetics)
Superglue
Glue accelerant (to save on time)
Side cutters
Hobby drill
Dremel (1/8” dia)
Step - Ia
Step - 1b
Step I: use your hobby drill to bore a starter indentation into center of the body’s arm joint. This is to provide a guide for the Dremel to drill straight.
As a side note, all the drilling in this tutorial can all be done manually with just a hobby drill. You will have a lot more control over how deep/shallow you make your holes but it will take a lot longer to do. As this is a Forgeworld resin kit that is a viable option, but if this were a metal dread you would want to kill yourself halfway through this project.
Step - IIa
Step - IIb
Step II: Grab your Dremel and using light pressure, drill a hole into the center of the body arm joint. Make sure it’s deep enough for the magnet to fit almost flush into the hole. You’ll have to eyeball this as this drill bit is designed for the magnet to fit in the hole like a glove and you’ll have a damn hard time getting it out. If you are unsure, make the hole slightly deeper then you think you’ll need. After doing this several times you’ll be able to eyeball this process flawlessly.
As a point of safety I need to inform you about safe Dremeling. Never drill towards your hands and fingers. Holding a model in the center of your hand and using a power tool is the path to blood and tears. In that order. I’m serious people. A hobby vice is not a bad investment when using the God of Hobby tools.
Step - IIIa
Step - IIIb
Step III: Add a dab of superglue and install your magnet. I like to tip the model on its side and use the surface of my desk to press the magnet in. You’ll see that it fits snugly into the hole. Again it does not have to be flush.
Step - IVaStep - IVb
Step - IVc
Step IV: Complete these three steps on both sides of the Dreadnought.
Step - Va
Step - Vb
Step V: Just like in the shoulder joint of the body piece, drill a starter indent into the center of the arm piece.
Step - VIa
Step - VIb
Step VI: Using the Dremel, drill your magnet hole again. You’ll need to be EXTRA careful on this step as the Dremel tool is very strong and this material is very light and you can end up drilling completely through the arm. Take your time, go slow on the slowest setting and you should be fine. Make sure it’s deep enough for the magnet to fit but flushness is not necessary.
Step - VIIaStep - VIIb
Step - VIIc
Step VII: Sit a magnet on the outside of the one installed in the body. The strength of the magnets will cause them to align themselves correctly. Then all you have to do is add a dab of glue into the arm hole and press the arm firmly onto the body to make it fit. Pull the arm off and hit it with some accelerant to cure the glue and that’s it.
Now comes the cool part, any additional arms you may have can be added to this model. You just have to start at Step V.
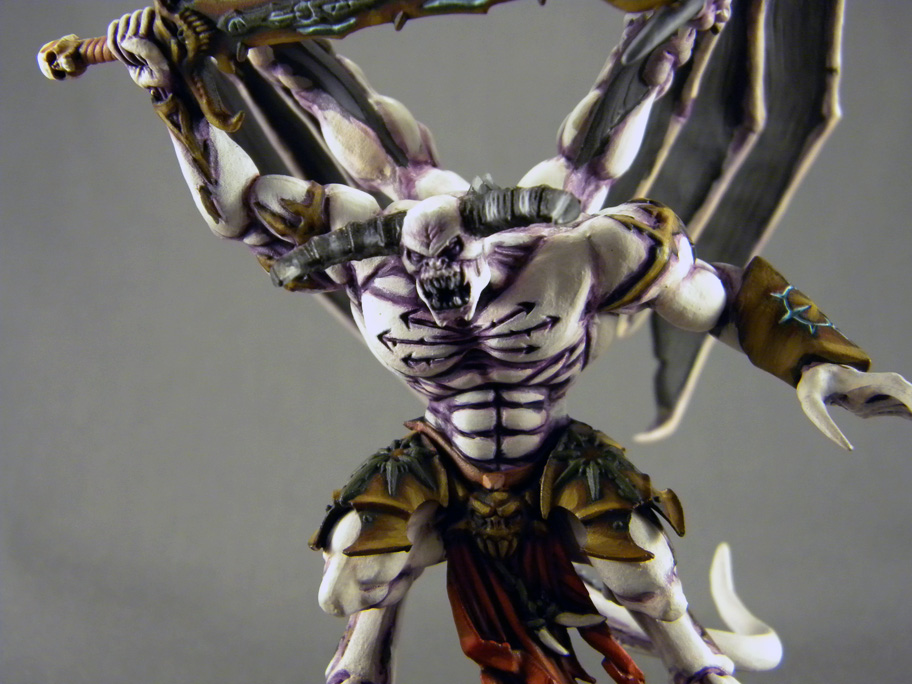
Since I was on a limited schedule I could not take the time I normally would to plot out every section of the piece. I’m proud of it, but I think I went in to many directions color-wise. I like to keep my palate limited. The NMM bronze did not come out fully to my liking either but I’ve yet to master that technique. If I could go back in time I would do the sword in a lava theme to tie the Prince to the base.
All nitpicking aside, I really had a blast painting this mini for my hobby shop. GW has outdone itself with this new kit.
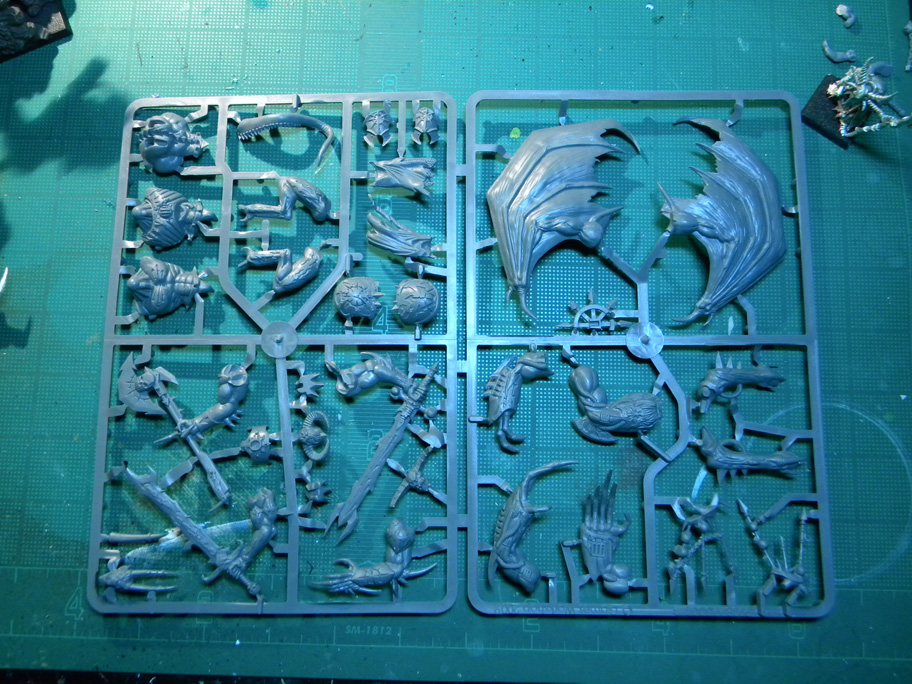
So my local GW shop got a black box in Friday containing the new plastic Bloodcrushers, Pleasure Seekers, and Demon Prince!
I volunteered, begged to be truthful, for Bing to allow me to paint one of them and he handed me the Demon Prince. This model will be a modeler’s dream come true. So much detail!
I’ll he’ll be dedicated to one of the Four, but I don’t know which one…
So excited! Is my geek showing?
Top ViewTop View (reverse)Close-upClose-upFlippin' the Bird...
I’ve seen this technique on several sites and I’ve noticed that people are having trouble replicating it. Some sources require that you locate and use bicarbonate of soda instead of baking soda because the former does not fizz up as much. They are the same thing people, Sodium bicarbonate. The reason I’ve found that separates success from fizzy failure is active vs. stale bicarbonate.
I am no chemist, but as far as I understand, baking soda that has been sitting around too long or has been kept in warm or damp places will lose its carbon dioxide making it closer to sodium carbonate or washing soda/soda ash. The trick to this technique is you need stale baking soda.
When I first tried this basing technique, I was fortunate enough to have an old box of Arm & Hammer (A&H) sitting in my pantry. It had been used once, but I have no clue how long it had dwelled there awaiting its true calling.
I will experiment with this method using a fresh box of A&H vs. a box that I’ve staled and post it as an addendum to this tutorial. I need to make sure I know what I’m talking about because we all know that there be R-Tards out there scouring the interwebs for ill-informed articles to correct. So stay tuned.
Anyway, here’s a rundown on making your bases appear like your army marches through a land gripped by a harsh winter. It’s really quite easy.
Here’s what you’ll need:
Ingredients
Small mixing cup (a box of Dixie Cups would be perfect)
Sculpting tool
White PVA glue
Baking Soda
Teaspoon
Shallow plastic container
Soft bristled paint brush
Step IStep II
Step III
Step I: Squirt a measure of PVA ( I used white Elmer’s Glue All) into your mixing cup. I filled the bottom of my Dixie cup about 1/4th of an inch.
Step II: Grab your teaspoon and add a spoonful of baking soda to your glue.
Step III: Grab your sculpting tool and stir. It will ball up on the side of your cup at first but as the soda becomes saturated with PVA it will settle down on the bottom of the cup like a thick paste.
Add PVA till you get a smooth thick paste with stiff peaks. You will know you have the right mixture when the paste turns damp and shiny when allowed to settle. This quality is required for Step V so be sure it’s mixed well.
Step IVStep V
Step VI
Step IV: With the flat end of your sculpting tool scoop your paste onto the base and a position it as you see fit. If it was made to the right consistency it will level out some but won’t spread off your base.
Step V: This is the most important step!Place your base into the shallow container and cover it with several heaping teaspoons of baking soda. Make sure the entire base is covered. Set your container aside and let it dry.
You need to allow the PVA plenty of time to dry before moving on to the final step. I don’t handle my bases for at least 5 hours to allow complete drying time. That may seem like overkill but trust me, if you move onto the next step with the PVA still damp you are going to be royally pissed off when it does dry. The damp quality needed in Step III is what makes this technique look so cool when it’s done. As the PVA dries it absorbs more soda onto its surface. This process continues until the glue is completely dried. Removing the excess soda while the PVA is still moist can cause the base to cure with a glossy texture and your base will appear to be covered in white slime. So set them up and go to bed, visit some friends, knit a quilt, anything just leave the damn bases alone.
Step VI: Knock off the excess soda into your drying container and dust off the remaining soda with your brush. And you’re done! The soda even sparkles in light like real fresh snow. Pretty damn cool eh? You can still use that soda from your drying box so don’t discard it!
A model’s base is the one part that can make or break a project. I’ve seen many great minis ruined by a sub-par base, and just as many average paint jobs elevated by an excellent display base. Try to put as much thought into your basing as you do your project and you really can’t go wrong.
Hazard Stripes are a requirement to complete the look of an Iron Warriors Army. They are surprisingly easy to do, and they look great everywhere, especially on chain swords, power fists, and bolters. This technique takes a carful hand so take your time.
Here’s what you‘ll need:
Chaos Black, Vomit Brown, Golden Yellow, Sunburst Yellow, Skull White paints (GW)
Fine Detail Brush
Step-IStep-IIStep-IIIStep-IV
Step-V
Step I: Paint the area you want the stripes to be black. Next paint on several diagonal stripes in Vomit Brown. Keep the lines as straight as possible. If you mess up, just clean it up with black.
Step II: Using Golden Yellow, paint a highlight stripe onto the Vomit Brown stripe but don’t cover it up all up.
Step III: Now using Sunburst Yellow, paint another highlight stripe on top of your Golden Yellow.
Step IV: Using Skull White, paint a fine line at the very edge of the hazard stripe bar on the Sunburst Yellow highlight you did in step 3.
Step V: Now using Codex Grey, paint a fine line on your black stripes. That’s it!