Category Archives: Tutorials

Sponge Weathering Technique

Salutations!

I have been receiving a great deal of requests for a tutorial on how I did the weathering on my Wild Lands table. Here’s a quick rundown:

I painted this terrain set using inks primarily. They are perfect for painting MDF terrain for two reasons; first, they go through an airbrush with no need for dilution. Second, the MDF is porous and absorbs the paint/ink cutting drying time.

Weathered Dice Box Weathered Dice Box

Color’s used:
Daller Rowney – Burnt Umber 223
Liquitex Ink – Carbon Black
Citadel (GW) – Mournfang Brown
Vallejo Game Color – Hot Orange 72009
Vallejo Model Color – Light Orange 70911
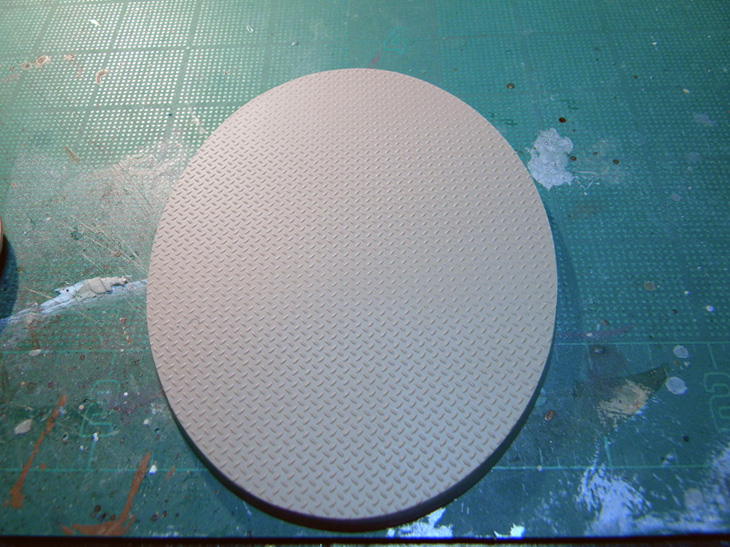
Vallejo Surface Primer – Gray

Materials Used:
Egg foam

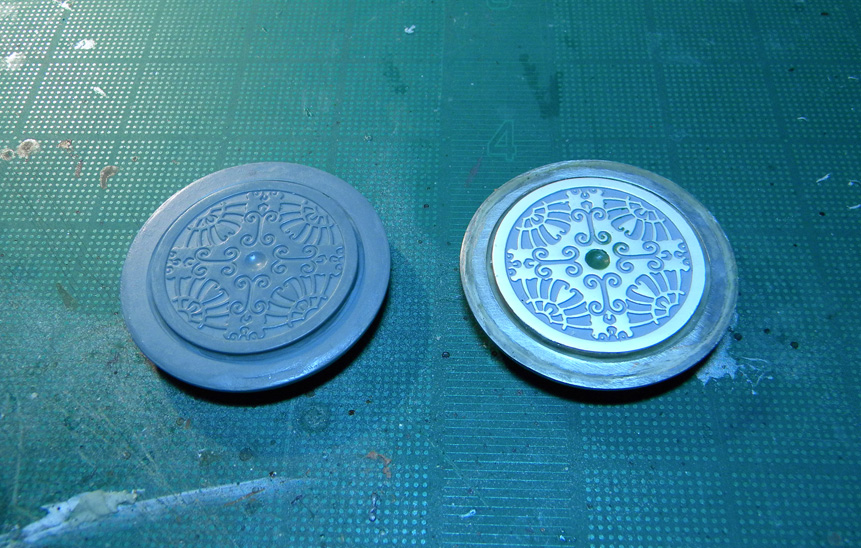
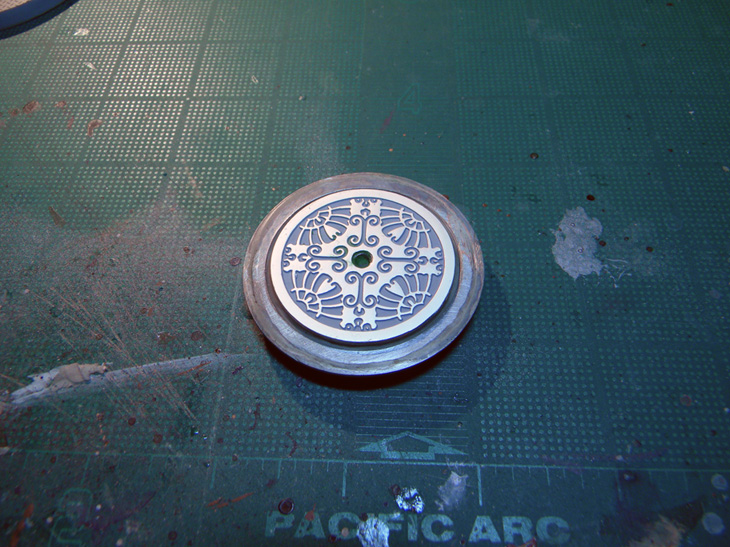
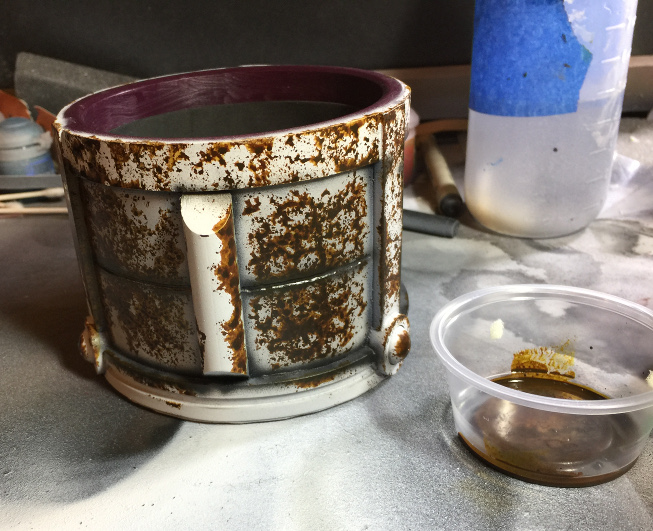
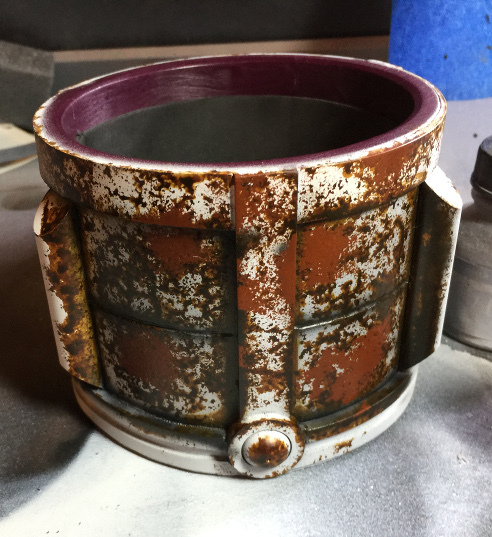
I currently don’t have any new terrain pieces prepped for painting so I’m using a cast of the dice box I made for my Necrons a few years ago. It was sitting around and looked like it would make a pretty cool cistern for my table.

Step I


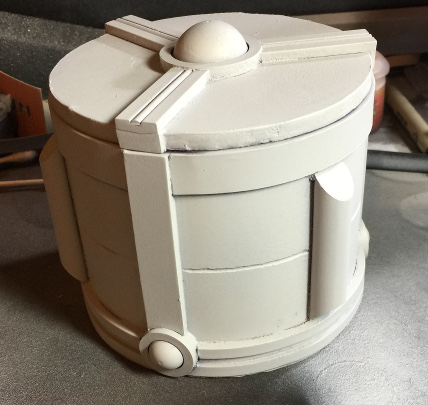
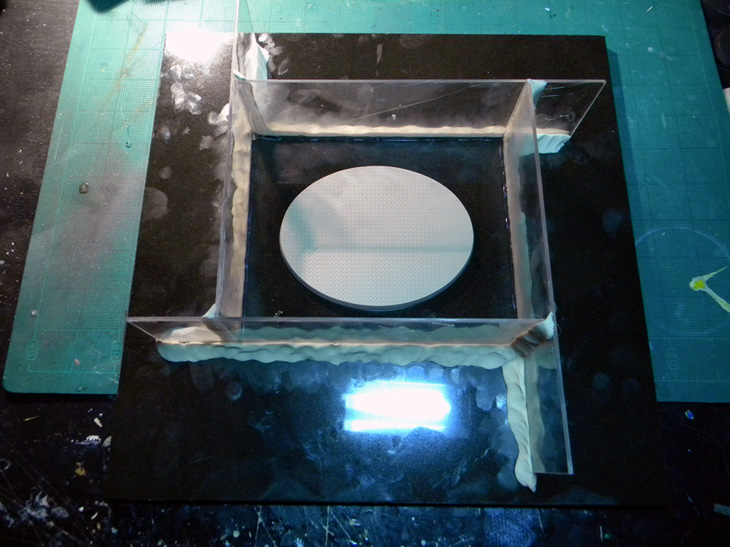
Step I – The box was primed gray. Since the cup is made out of resin it lacks the nice quick drying quality of MDF, I used a hairdryer to speed up the process. In fact I did the same thing with the MDF terrain. Really helps to keep stuff rolling.


Step II


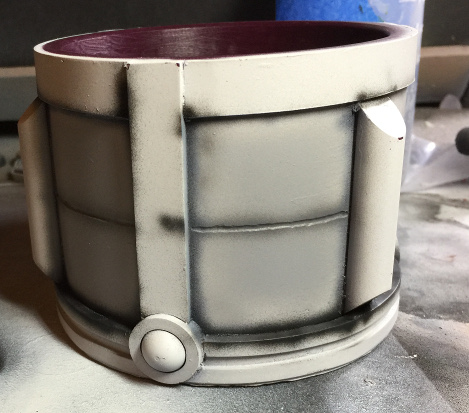
Step II – All the cracks & crevices were airbrushed in black. It looks heavy at the start but once you start weathering you’ll be glad for it.


Step III

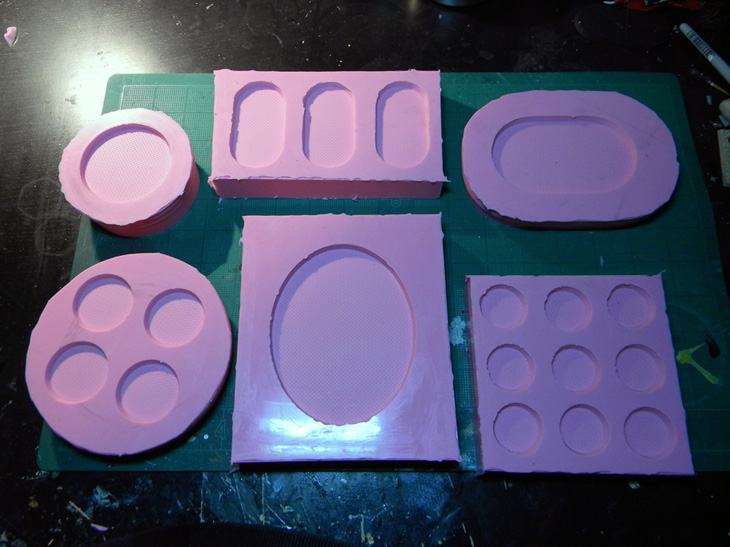
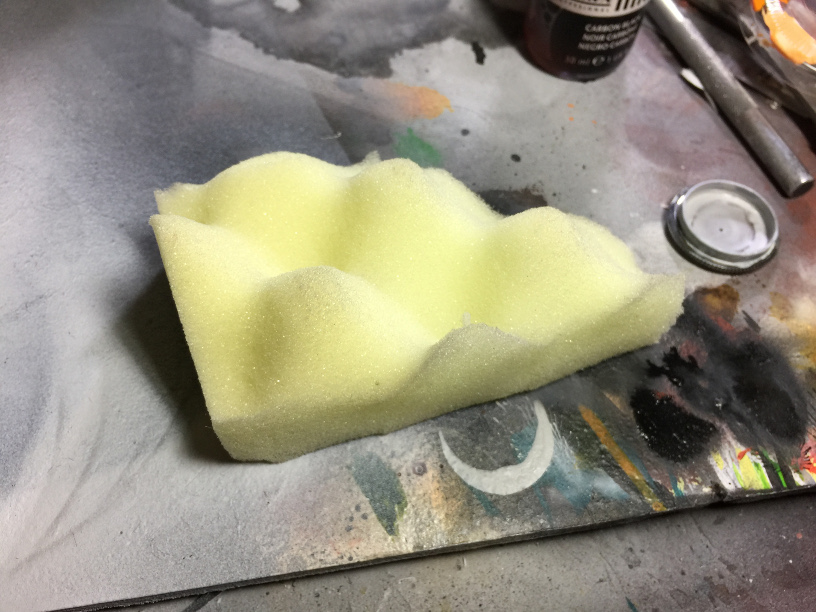
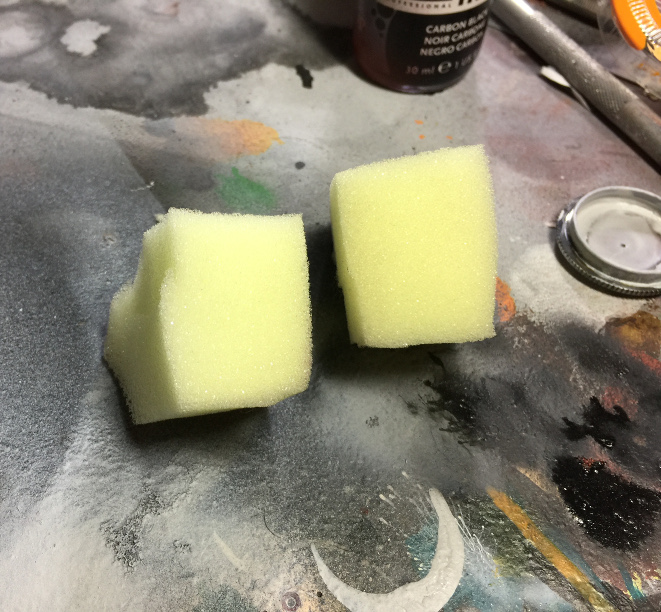
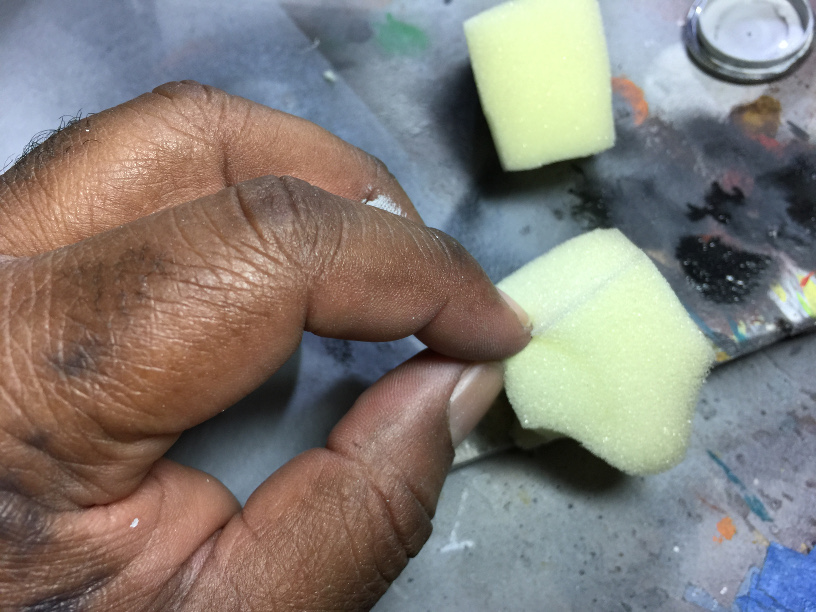
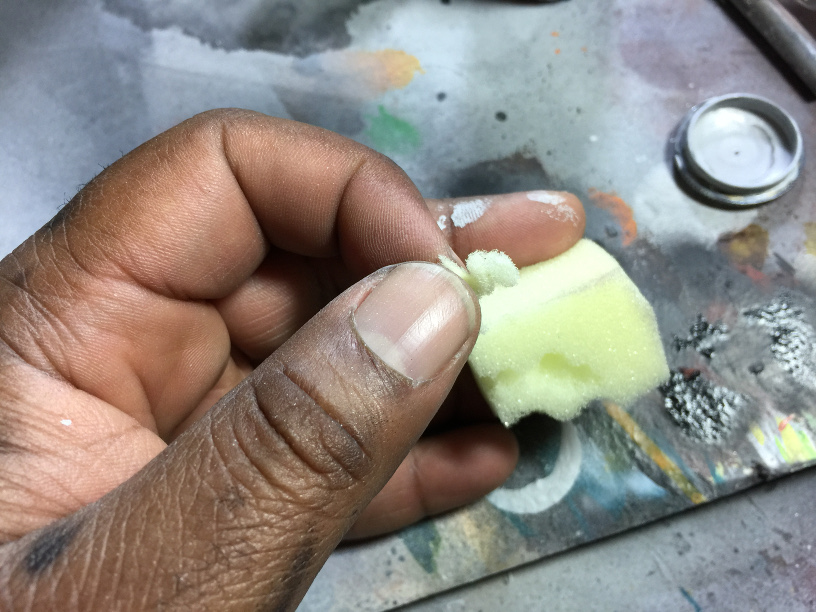
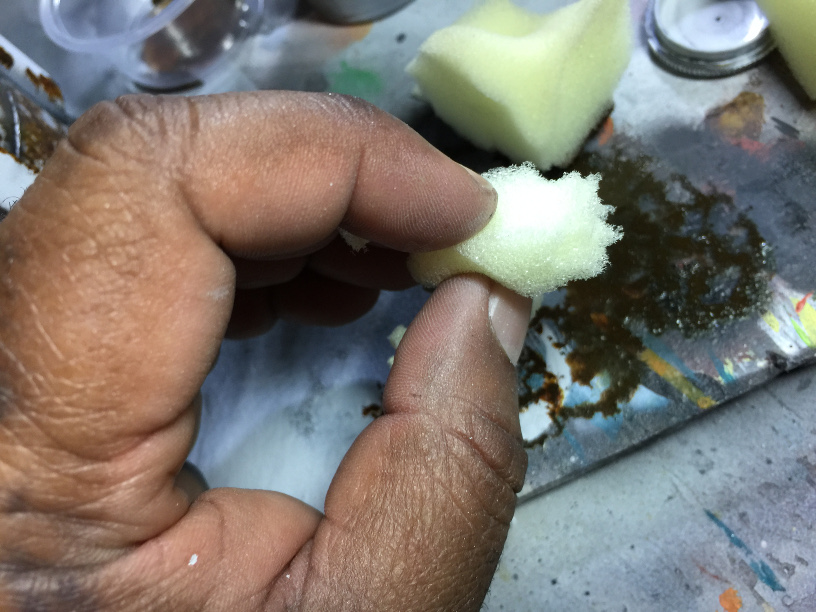
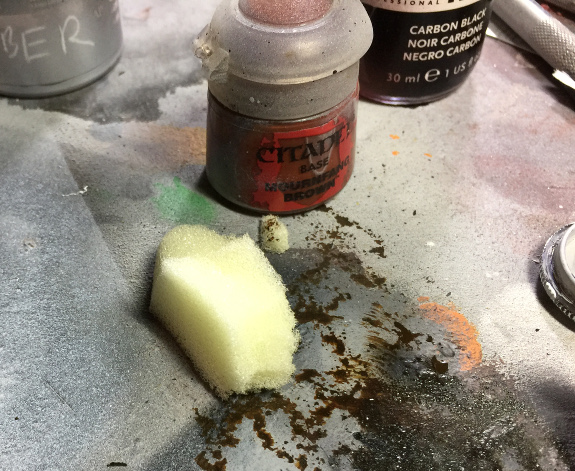
Step III – I took a piece of egg foam I had sitting around and cut it into pieces about 1 by 1.5 inches wide. Then, using my fingers I pulled plugs out of the flat side to make the surface uneven. It’s important to pull the edges as you don’t want a ‘square’ sides on the sponge. I like using the egg foam for this process as the ridged side have little finger holds.


Step IV

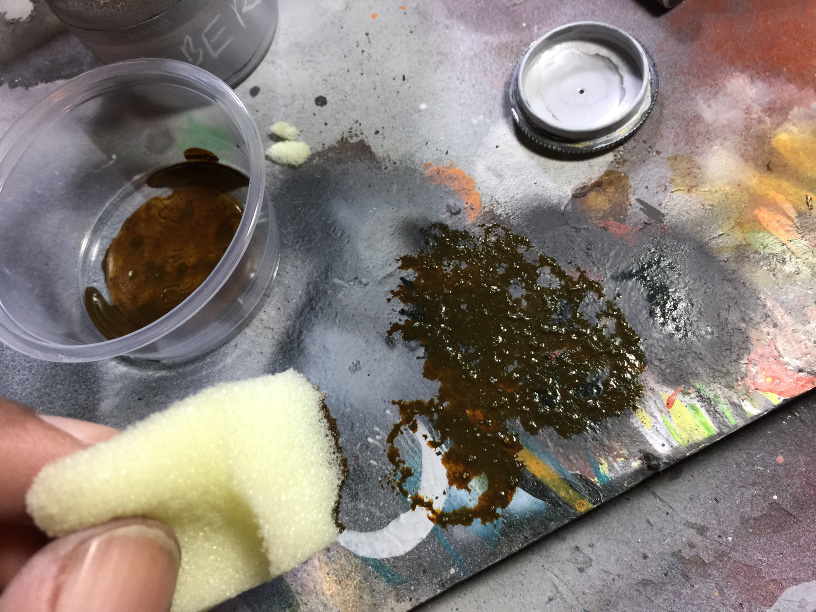
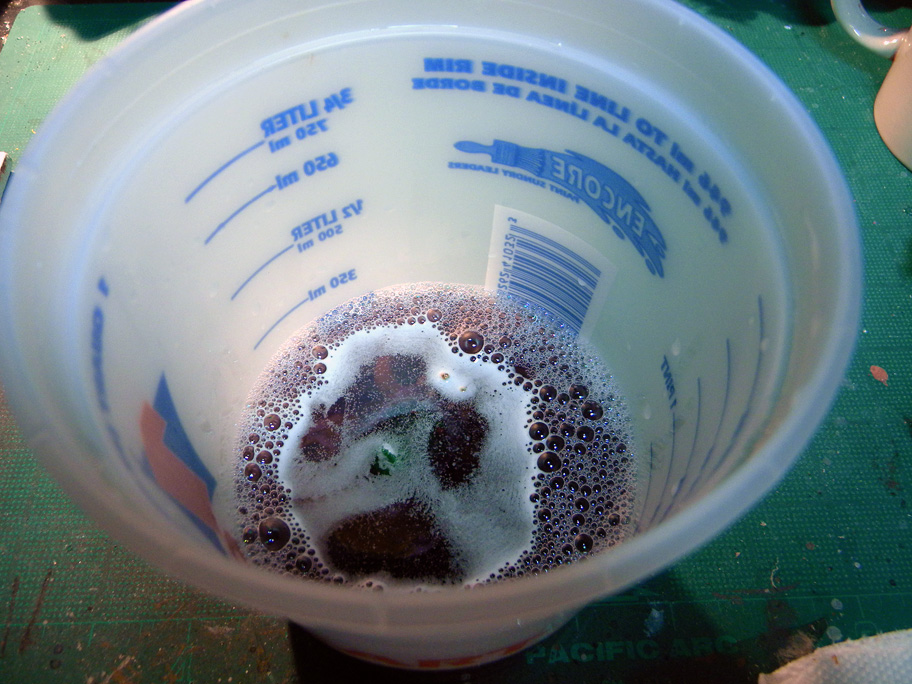
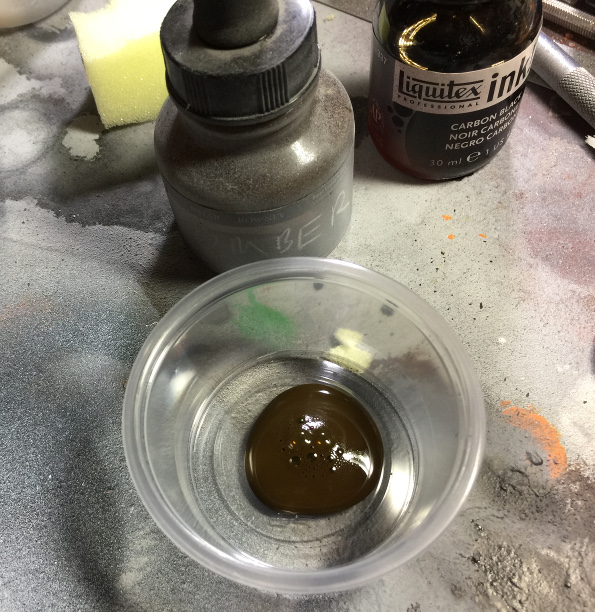
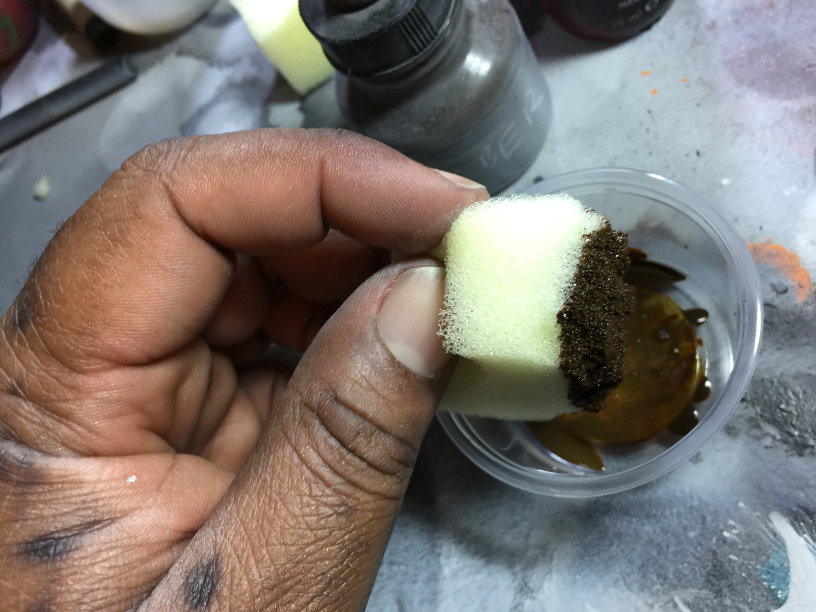
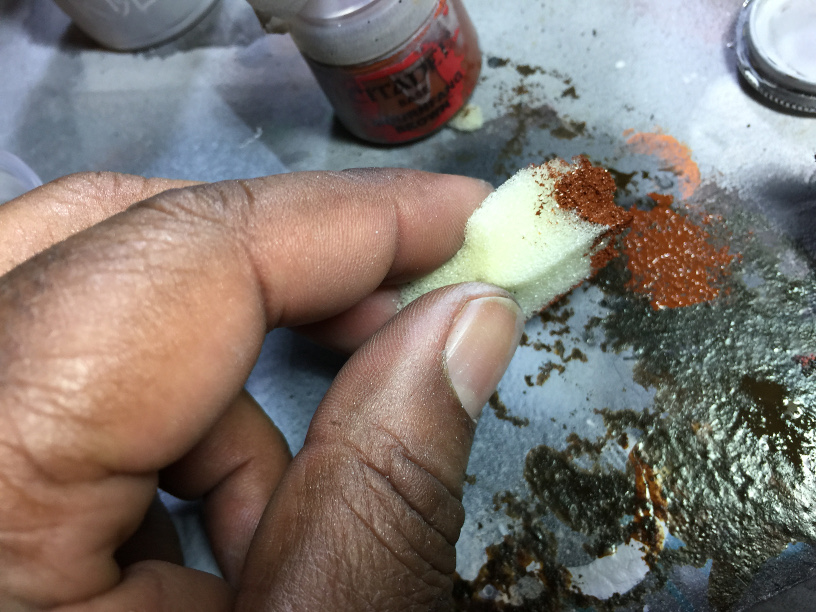
Step IV – Break out the burnt umber. I used condiment cups for this but a palate is fine. Dip the textured end in the ink and place a few practice dabs on your palate to get full coverage on the sponge. These practice dabs also help to control the amount of ink on the sponge as it can be heavier then you expect and you don’t want to make any mistakes on your piece.


Step V

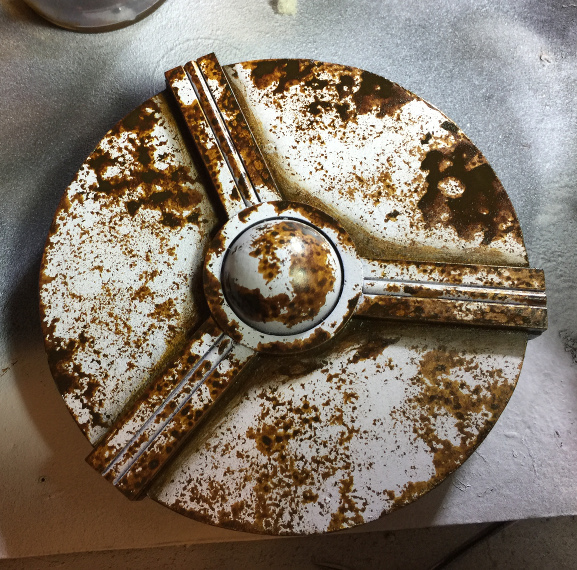
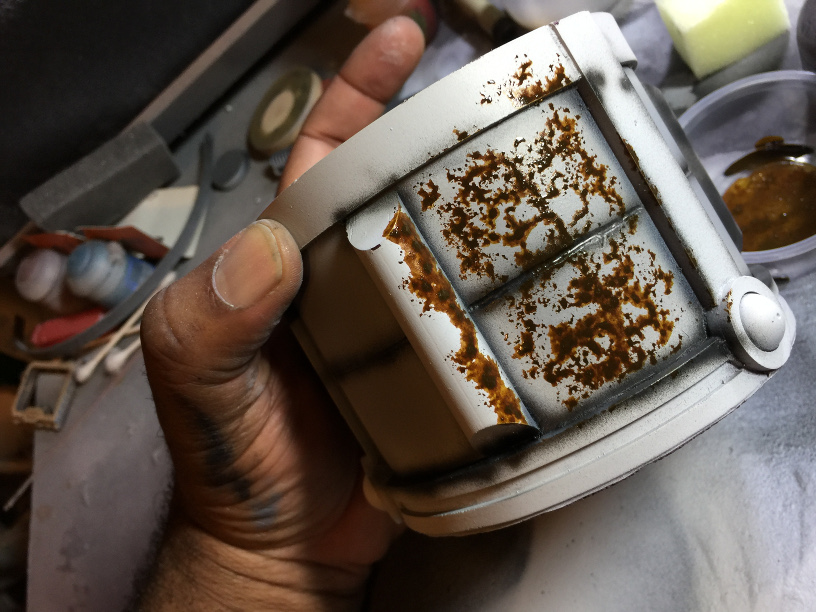
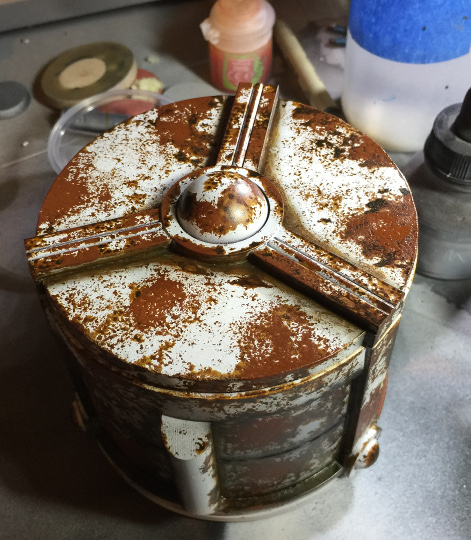
Step V – Lightly dab the surface you want weathered. I turn the sponge around to add to the randomness of the ‘splatter’ look. As this surface is not porous, I had to use the hairdryer between panels. I decided to go with a heavy rust/corrosion look on the cup. I went lighter on the buildings.

After the large panels were done I noticed I had a great deal of ‘white space’ along the edges. I ripped up a smaller sponge and used that to get ink in the corners/edges as that’s where rust would accumulate first. The smaller sponge was also used to color the rest of the box and to create some areas where the ink is applied heavily. These heavy splotches are needed for the next step.


Step VI

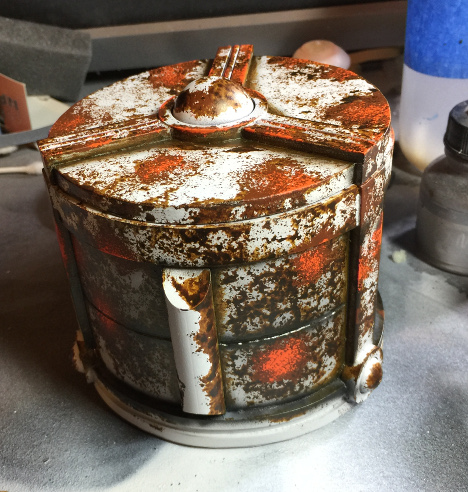
Step VI – Rip up an new small piece of sponge. You can also wash the smaller piece you made for the umber phase. Using the Mournfang Brown, add new splotch patches over the umber. You want to aim to cover the areas (not completely) where the umber was heavy as these spaces will represent your rust areas.


Step VII

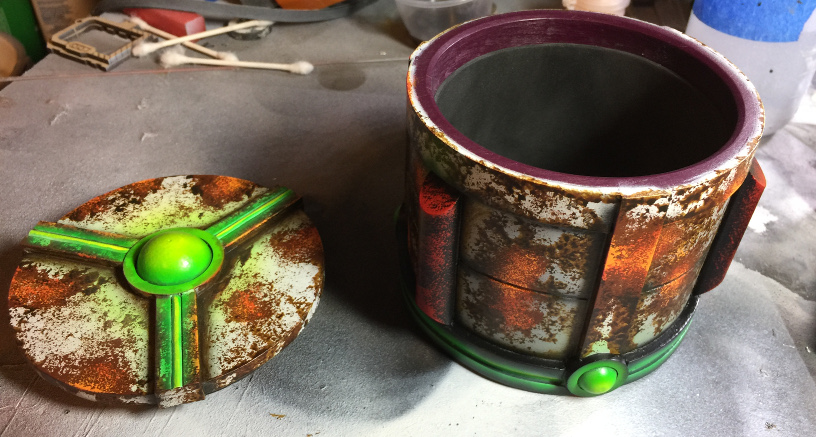
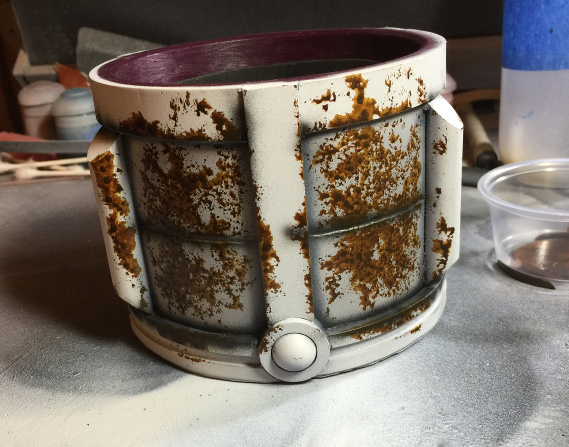
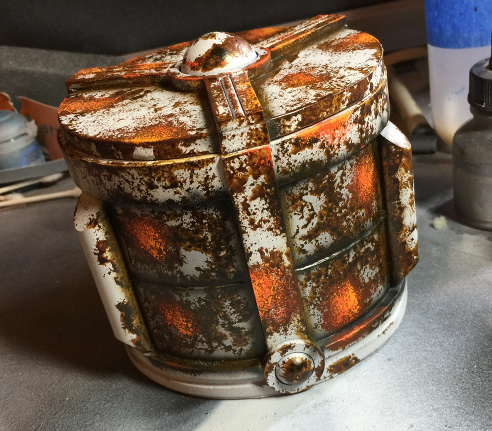
Step VII – These last steps go fast. Repeat the process you used for Step VI but this time using the Hot Orange followed by the Light Orange. Cover the brown with patches of orange but again not completely. You want the previous color to show underneath. The key to this phase is to go easy. Less is more.

And that’s it! I painted the rest of the cup with some glow effects and called it a day. The weathering process took about 10-15 minutes to complete and 20-25 minutes for the whole paint job. You’ll kick yourself at how easy this is to do in the end. Feel free to shoot me any questions.

Shawn G. (SoI)

My Thokt Necrons

I have heard the masses crying out for a tutorial on how I painted my Necrons. Ask and ye shall receive! I just hope this makes sense…

Thokt Necron Paint Scheme
Get this stuff!

Thokt Necron Paint Scheme
Seriously, get this stuff!

First let’s talk primer. I started miniature painting about 14 years ago, and most of that time was using GW’s primer. At first GW’s line of primer and paints were varied and reasonably priced, but somewhere along the line they got this wild notion that they could charge whatever they wanted. So over the years I’ve watched their primer creep from $5 to $15.75 a can. What the hell is in it? Magic? My favorite part is how they claim their primer has been engineered to work with their line of paints. WTF?

I was brought to the light from a friend in a local Hobby Shop of the existence of an alternative and I’ve never looked back. Enter Krylon spray paints.

This stuff is amazing. Not only does it bind to both plastic and metal, but also it goes on flat. This is the most matte paint I have ever used, and it works perfectly for all my projects. It’s also $4 a can.

Here we have a spray paint that is both reasonably priced, durable as hell, and can be found almost EVERYWHERE. Did I mention it comes in 6 colors? And this is just scratching the surface of the products that Krylon produces. My Dark Eldar scheme uses their Fusion line.

Get this stuff.

Now that I’m done ranting let’s get down to business! I decided to use a Canoptek Spider for this tutorial so you can see the techniques I used on a larger canvas.

Thokt Necron Paint Scheme
Paints used

Miniature Color Palatte:

  • VMC Black (70950) – Citadel Abaddon Black
  • VMC White (70951) – Citadel White Scar
  • VMC Sky Grey (70989) – Citadel Dawnstone
  • VMC Ivory (70918) – Citadel Ushabti Bone & White Scar
  • VGC Magic Blue (72021) – Citadel Kantor Blue

Base Color Palatte:

  • Citadel Scorched Brown (Rhinox Hide)
  • Citadel Calthan Brown (Mournfang Brown)
  • Citadel Dheneb Stone (Rakarth Flesh)


Thokt Necron Paint Scheme
Step Zero

Thokt Necron Paint Scheme
Step Zero

Step Zero – A nice even coat of primer. Make sure it’s not too humid outside so you don’t get that powered sand effect on your minis. I haven’t had that problem with the Krylon spray paints very often, but it can happen. Be carefull.

Thokt Necron Paint Scheme
Step I
Thokt Necron Paint Scheme
Step II

Thokt Necron Paint Scheme
Step III

Step I – I targeted all the glowing bits; cables, eyes, orbs, and leg joints with VGC Magic Blue. You can also use Citadel Enchanted Blue (Caledor Sky) as alternative. Don’t’ worry about staying within the lines. We’ll clean up later.

Step II – 1/1 mix of VMC White and VGC Magic Blue. Don’t completely cover up the previous shade. Leave a little behind for depth.

Step III – 10/1 mix of VMC White and VGC Magic Blue. I’m guesstimating here on the ratio as I normally just eyeball it. Just put some white down on your palate and add a slight tip-full of the blue. The aim is for a very pale white-blue. Mostly white.

Thokt Necron Paint Scheme
Step IV

Thokt Necron Paint Scheme
Step V

Step IV – Dheneb Stone for contrast. I use this color sparingly to break up the scheme. It usually takes 2-3 coats for full coverage over black. Make sure your paints are well diluted so you don’t lose detail.

Step V – Clean up phase. VMC Black was used to clean up my lines. I chose this black specifically because it is has a very matte finish, which syncs well with the flatness of the Krylon primer. You don’t have to use VMC paint here, but you will loose the effect if your paint is of a gloss or even satin finish.

Now for the step I assume everyone is looking for:

Thokt Necron Paint Scheme
Step VI

Thokt Necron Paint Scheme
Step VII

Step IV & VII – Edge highlights. VMC Sky Grey was painted onto all the hard edges of the model using the side, not the tip, of my brush. You’ll need a light touch to keep the line uniform but that’s it. Again, make sure your paints are well diluted so it goes on smoothly. You may need to apply two coats incase the line is not sharp. This technique is so easy you’ll kick yourself when you try it.

Thokt Necron Paint Scheme
Step VIII
Thokt Necron Paint Scheme
Step IX

Thokt Necron Paint Scheme
Step X

Step VIII – Highlight all the hard edges of the mini. The mandibles were a little finicky, but just focus on the edges. Clean up with black as needed. The inner ring under the back plate was highlighted using the brush tip. That’s a tricky spot so use a light hand and again, clean up with black as needed.

Step IX – Adding detail. I went back and added some more glowing blue effects on the spots I felt could use some detail. Just reapply steps I-III as needed.

Step X – Edge highlight using VMC Ivory on Dheneb plates. Line highlight were added to the edges of the detail on the abdomen as needed.

Canoptek Spider
Canoptek Spider
Canoptek Spider
Canoptek Spider

Canoptek Spider

And there you have it! My Tkokt paint scheme.

I try to create a video for this scheme. I will try to emulate Les Bursley’s brilliant tutorial style if I can. I’ve never made a video tutorial before so give me a little time to make sure I get it right.

I hope you found this helpful. Please leave me feedback so I can polish this tutorial for when I move to video.

Shawn G. (SoI)

Resin base Début!

I mentioned back in Jan that the reason I decided to create my own bases was to show off two paint schemes that I was proud of. Well, here’s one of them so you can see some of the bases in action!

Dark Eldar Ravager
Dark Eldar Ravager
Dark Eldar Ravager
Dark Eldar Ravager

Dark Eldar Ravager

Since I went with a white scheme I wanted a minimalist base design that would not distract the eye. I installed a magnet into the bottom of the Ravager so I could mount it on top of an acrylic rod.

I’ll be posting more Dark Eldar stuff shortly. This paint scheme is easy-mode!

Shawn G.

Custom Disk of Tzeentch Part II – Molding & First Cast

Part II of my Disk of Tzeentch project! I worked on this disk for about 2 days sanding, gap filling, and filing and sanding again. It took a while for me to get it to a acceptable standard for casting. I’ve never been more pleased with a projects outcome.

Custom Resin Disk of Tzeentch

Custom Resin Disk of Tzeentch

It did have some points of serious concern for molding. First of all, I was not completely sure it was watertight. I really didn’t want rubber flowing into the disk and screwing every thing up so I gap filled with Apoxy-Sculpt and filed it smooth where I could.

Second, it has a considerable undercut. This could pose a real problem with air bubbles and getting the resin out of the mold. The undercut does taper/slope towards the center so air bubbles were not a problem. The longer set time for the resin REALLY shined here and I was glad I made the switch. The rubber I chose is very strong so the undercut should was not an issue.

Molding was easy. I discovered there was a trapped air bubble in the rubber after demolding but I could see this would not be a problem.

Custom Resin Disk of Tzeentch

Custom Resin Disk of Tzeentch

I dared a cast last night, and it came out perfectly. I’ll need mold release as this resin sticks to my tiles with a death grip. I was lucky to get this off the tile while it was still barley soft. The first cast of my bases did not survive. They could not be removed from the tile. Had to throw it away. /sadpanda

I can’t wait to paint this up!!!!

Custom Resin Bases Part III – Molding/Demolding

Welcome to Part III of my custom resin base project. Mold Making!

Custom Resin Bases
Custom Resin Bases
Custom Resin Bases
Custom Resin Bases

Custom Resin Bases

I mixed up the rubber in a large plastic paint pot. Now this stuff usually needs a scale to measure out the 10:1 ratio but as I was using the whole trial kit that was not necessary. Each mold was poured slowly in a very thin stream into a corner (if it had one) so the rubber could work it’s own way around each base. This method prevents air bubbles.

It took 2.25 trail kits for these 7 molds (had to whip out the scale for the last bit). I made sure that each one had at least 3/4 ‘s of an inch of rubber padding. Each mold performed excellently and there were no leaks (I did spill a little on the side of a few). I allowed each base to cure for 22 hours. I usually give it a full day but I was really impatient this time.

Demolding was easy. I recovered the clay and saved it for future projects in a ziplock bag, then GENTLY pried the mold boxes of the round set off of the tile. The hot glue came away from the granite with ease. Be sure you take your time here. You don’t want to go yanking the molds up as you can tear the rubber and ruin the mold.

The acrylic boxes took a little more time. I had to cut the sides a little with an X-Acto and then peeled each side away. As expected rubber seeped under some of the bases and I had a bit of cleanup work to trim all that extra rubber away.

All and all, these came out well!

Casting to follow…

Shawn G.

Custom Resin Bases Part II – Mold Making

Welcome to Part II of my custom resin base project. I’ve been waiting for almost 2 months for this part and I couldn’t wait to get started, so here we go!

Custom Resin Bases

A few weeks back I picked up some granite tiles from Lowes for use in this project (and they worked perfectly). I plotted out real estate for each object to be casted on a tile.

Custom Resin Bases
Custom Resin Bases

After each was roughly in place, I placed their respective “mold boxes” down so I could gauge the room each would need. My mold boxes being a pair of plastic cups and old plastic bowls. The tops of each were cut off with a X-Acto knife.

Custom Resin Bases

With a hot glue gun affixed each set to the tile followed by each mold box. This part was pretty annoying as I had real difficulty getting the bases to lay flush on the tile without any gaps. I anticipated this problem and tried crazy glue but it would not cure for some damn reason (I assume it needs air to cure?). Gaps will allow for rubber to get under the object and give you cleanup work after the mold has set. I only managed to get the 40mm and 60mm sets to sit flush. All the others had small gaps. I’ll need to find a better solution…

Custom Resin Bases
Custom Resin Bases

Custom Resin Bases

I need again sing the praises of acrylic sheet. It makes for perfect mold box crafting material, as it’s cheap, easy to cut, and most importantly CLEAR. I used 3 10×8 inch sheets for the last three boxes and cut them into 2.5×10 inch strips. I glued the bases down (cursing the gaps), built/glued the boxes around them and sealed the edges with non-drying clay to prevent leaking.

I then brushed some mold release to avoid possible sticking.

Rubber pouring stage en route so stay tuned!

Shawn G.

Custom Disk of Tzeentch Part I – Master

I was asked back in November if I could recreate the Blue Scribes conversion I did for a in-store tournament in September.

Blue Scribes of Tzeentch

Blue Scribes of Tzeentch

Unfortunately the answer to that is no. The broach I used for the disk in that conversion is likely gone forever. I’ve gone back to Michael’s no less then 10 times trying to find it without success. I don’t think they sell it anymore. So screw them! I’m making my own!

The Disk of Tzeentch is a mount akin to Khorne’s Juggernaut or Slaanesh’s Boobworm, but the disk model GW has released is very uninspired IMO. This conversion will allow me to give the disk the appropriate amount of painting attention I feel it deserves.

I know this design is not very demonic but my logic is solid. By GW’s own fluff, Sorcerers have to catch and transform a screamer into a new form in order to gain this mount. I’m going with an arcane flying platform to represent my disks which I feel is fitting for a servant of Tchar.

Here is my current master:

Custom Resin Disk of Tzeentch
Top

Custom Resin Disk of Tzeentch
Bottom

I’m ordering some casting resin and silicone rubber this week for my resin bases and this project.

Stay Tuned!!

Custom Resin Bases Part I – Masters

Coming down from holiday business, a Warcraft expansion, and restarting school. Now it’s time to get this blog rollin’ again!

I wanted to take a stab at making my own resin bases. I have two paint schemes that I wanted to show off and the bases I have in mind would be perfect for displaying both. I’ve decided that my first, and likely only, base series will be a diamond plate design. I wanted a base that didn’t distract from the design so this style will be perfect.

Custom Resin Bases
Dragonforge Resin Blanks

I started with some resin blanks from Dragonforge. Jeff Wilhelm created some blanks for you to craft your own custom bases. I picked up some bike bases, 30mm rounds, and 2 large oval blanks for my set. The 25mm & 40mm will come from my base box.

Custom Resin Bases
Use a dust mask here.

I will be using plasti-card sheets with diamond plate detail for these bases (Plastruct PS-155). I needed the sheet to adhere to the bases as securely as possible so smoothed the top of each base with fine grade sandpaper.

Custom Resin Bases
Just enough sheet

I only had 1 whole sheet and 1/2 of another I needed to plot out carefully how many bases I could get from each. It turns out I had EXACTLY the amount I needed. Lucky me!

Custom Resin Bases
So far so good...

Using a T-Square I measured and cut enough for each base and glued them down with superglue. I used a paper towel to clean up excess glue under the sheets. The larger pieces were set to cure under a heavy book.

Custom Resin Bases
Perfect!

The next part was the easiest but most time consuming. I trimmed away most of the excess sheet with a fresh x-acto knife. I started with cutting the corners away then picking the bases up and trimming as close as I dared. I left a little rim of excess sheet because I don’t know about you but I find it difficult cutting a perfect circle with a razor blade. The rest of the styrene sheet was filed away with one of my flat hobby files. This allowed me to get a perfect seamless rim to all of my bases.

This part took forever, but the results were very satisfying! Take your time here and file in one direction down towards the bottom of the base. Going in the other direction will only pull off the sheet and piss you off rightly.

The next phase is the casting phase. I’ll be ordering some silicone rubber this week so I can make some molds of these bad boys. I think the time I took to get the edges smooth will pay out nicely with some seamless base edges.

Stay Tuned!!!!

Update – I took some detail pictures of my masters so you can get a closer look.

Custom Resin Bases
Master Lot
Custom Resin Bases
30mm
Custom Resin Bases
40mm
Custom Resin Bases
40mm x 75mm
Custom Resin Bases
60mm & 60mm x 100mm
Custom Resin Bases
120mm x 95mm

Mini Cleaning 101!

Now that I’ve discussed this marvelous formula, it’s time I showed you how to use it. I’ll be using an old Forgeworld bust I bought years ago and quasi-painted. I let it soak for 24 hours.

Mini Cleaning-1
Mini Cleaning-2

Mini Cleaning-

Here’s what you’ll need:

Zep Insrustrial Degreaser

  • Zep Insrustrial Degreaser
  • Plastic paint pot (paint section from Lowes)
  • Old Toothbrush
  • Rubber gloves


Mini Cleaning-4
Mini Cleaning-5

Mini Cleaning-6

Place the mini in the pot on its side and fill with Purple Goodness enough to cover.

Wait.

Mini Cleaning-7


After digging it out (use a glove), run the model under warm water for a min or so to wash off the degreaser.

Take the toothbrush and scrub off the paint rinsing it off as you go. I like to use dish soap make sure all the degreaser has been cleaned off before letting it dry and repriming.

Done.

Mini Cleaning-8
Mini Cleaning-9
Mini Cleaning-10
Mini Cleaning-11

Mini Cleaning-12

Pretty simple huh?

Shawn

Rich Golds

I’ve been asked how I did the gold look on my Juggernauts. Before starting those models, I had not touched a metal paint pot in years. I’ve been trying to develop my NMM (non-metallic metal) technique sot I forbid myself from using metal paints to force myself to get better. I still suck at it though. >.<

Anyway, I didn’t feel like painting those bastards in NMM as that would drive me crazy so I used a style I gleaned from a tutorial on J-Runes site. I’m still developing how to do patina properly so I’ll save that method for a later tutorial.

What you’ll need:

Rich Golds-0

  • Tamiya Clear Orange
  • Citadel Gryphonne Sepia (GW)
  • Vallejo Game Color Bronze (72057)
  • Citadel Mithril Silver (GW)
  • Paint Palate (Bath Tile)


Rich Golds-1

Rich Golds-2

Step I: I started with a black prime and applied a nice coat of VGC Bronze. I watered the paint down some so I had to apply two coats for proper coverage. Make sure the coat is solid and even as the 2 washes will make imperfections very apparent.

Rich Golds-3
Rich Golds-4

Rich Golds-6

Step II: The first wash is 2/1 Tamiya Clear Orange to water. Tamiya washes are alcohol based so you’ll need to be a little careful as it will dry faster on the palate then you may expect. This wash gives the bronze a rich orange hue. The one problem I have with this wash is it’s very glossy. That’s where the Sepia comes in.

Note – Be sure to allow the Tamiya plenty of time to dry. It will need to be fully dried before you move onto the next step. Check one of the pooling areas with the tip of a brush, if it’s soft give it another 10-15min.

Rich Golds-7
Rich Golds-8

Rich Golds-9

Step III: Wash the model in Gryphonne Sepia being sure to get complete coverage. The wash will tone down the orange of the Tamiya a touch and kill the glossiness. Use the wash straight out of the pot with no dilution. Be sure to go back and soak up any heavy pooling spots with your brush before they dry.

Go make yourself a sandwich and watch some TV as this stuff takes forever to dry and I have a halogen lamp…

Rich Golds-10
Rich Golds-11

Rich Golds-12

Step IV: Highlighting is simple. Hit your highpoints with VGC bronze, 1/1 Bronze to Mithril Silver, then if you are feeling really froggy pure Mithril on the sharp edges.

Potential Issue – Highlighting brings some shininess back to the gold. From a distance (♫) this should not be a problem but if you are neurotic as I am sometimes you may want to hit the model with some matte varnish to kill the shine. I hate glossy minis.

Shawn