Finished this morning.
 |
 |
I love painting sprees!
Shawn G. (SoI)
Finished this morning.
|
|
I love painting sprees!
Shawn G. (SoI)
I think I’m getting my painting legs back!
 |
 |
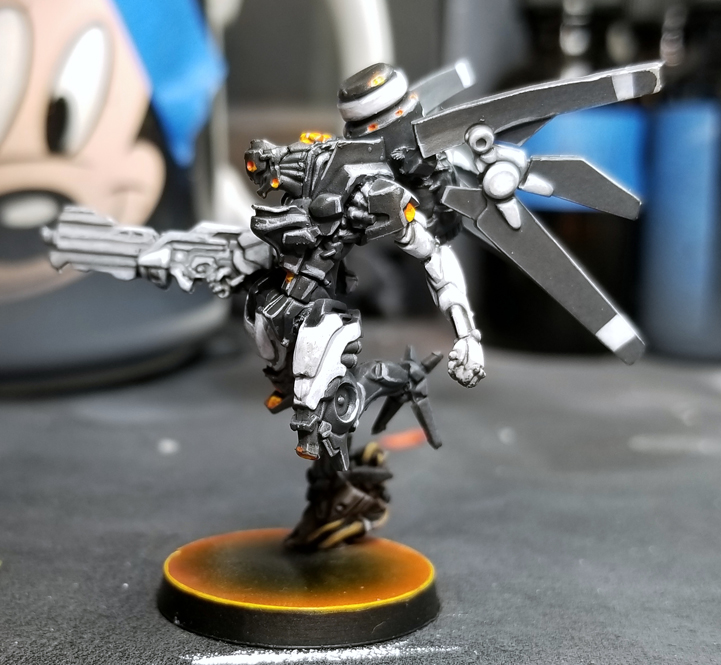 |
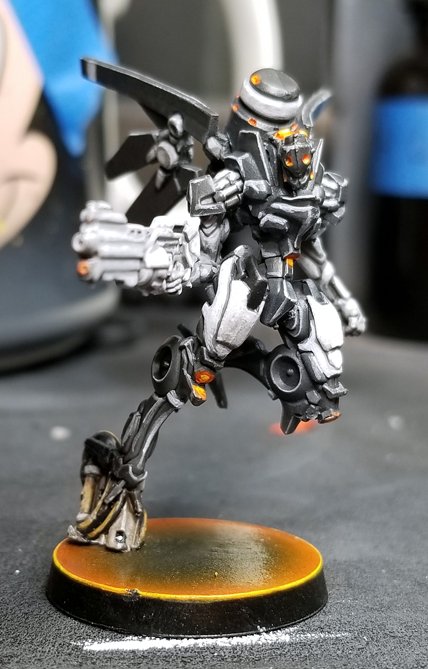
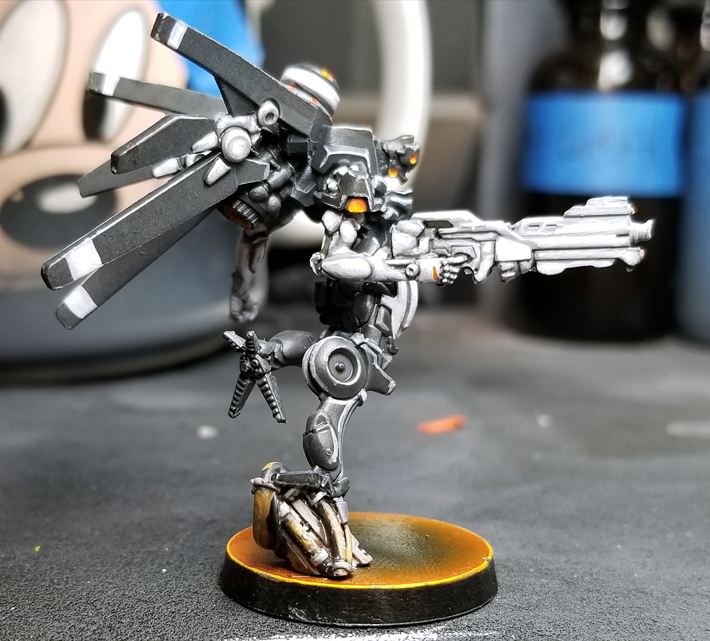
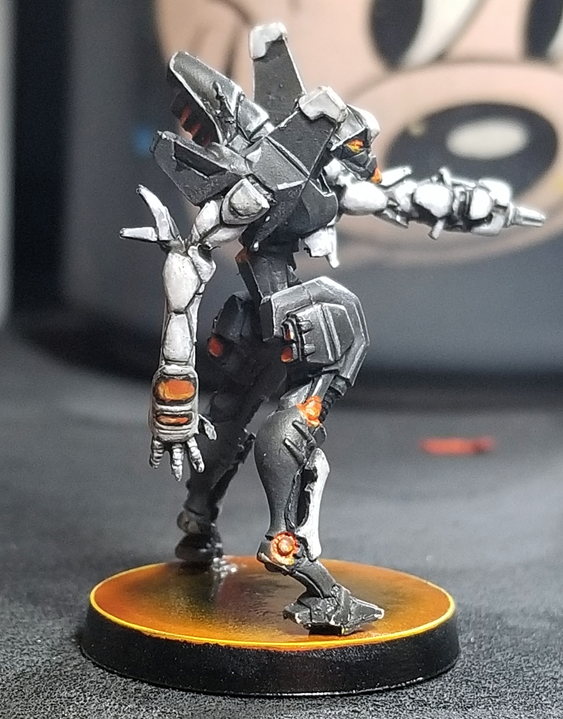
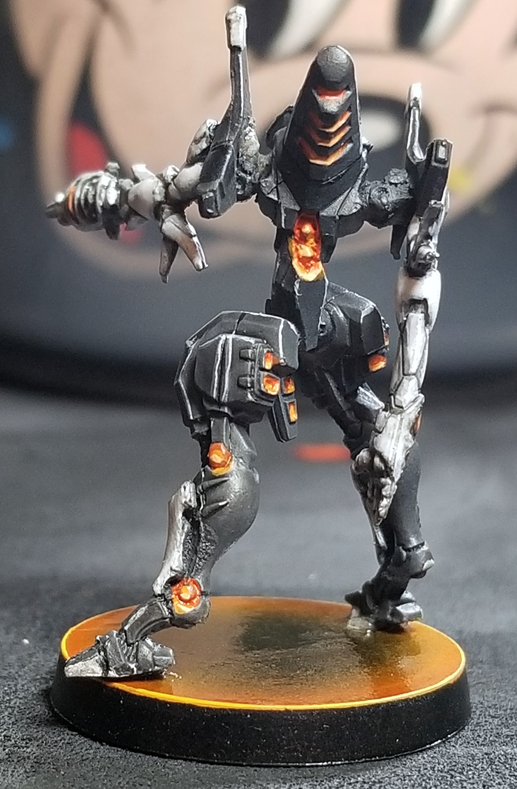
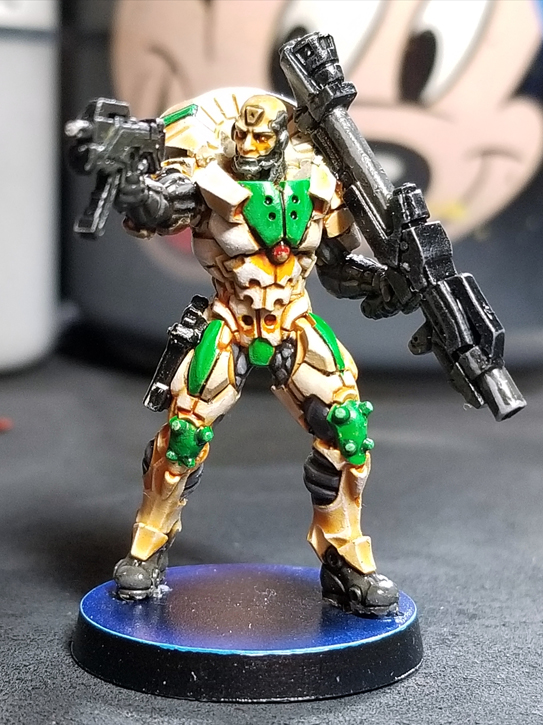
The Garuda has detail all over the place and I wanted to stick to my darker theme without using too much white. I think I found a nice balance.
 |
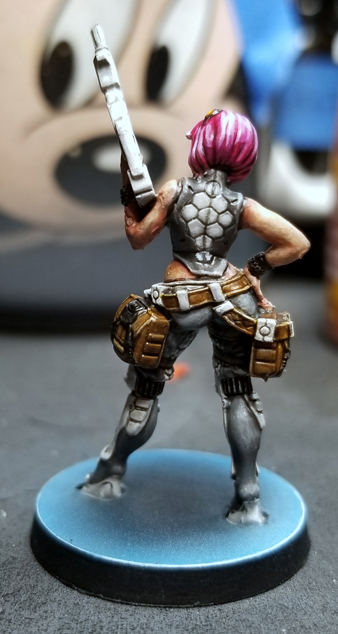 |
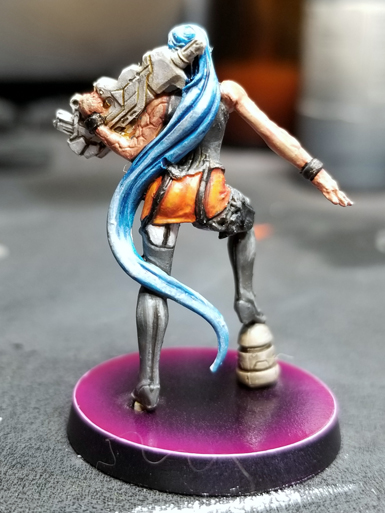
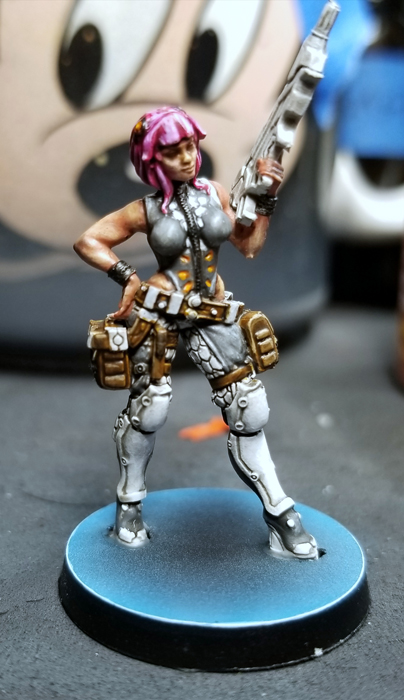
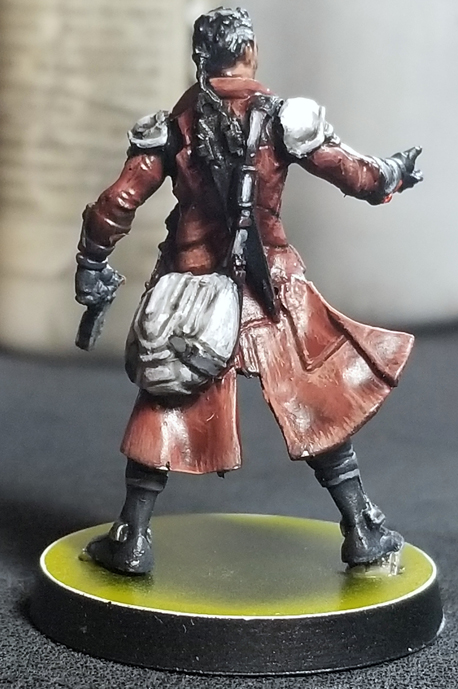
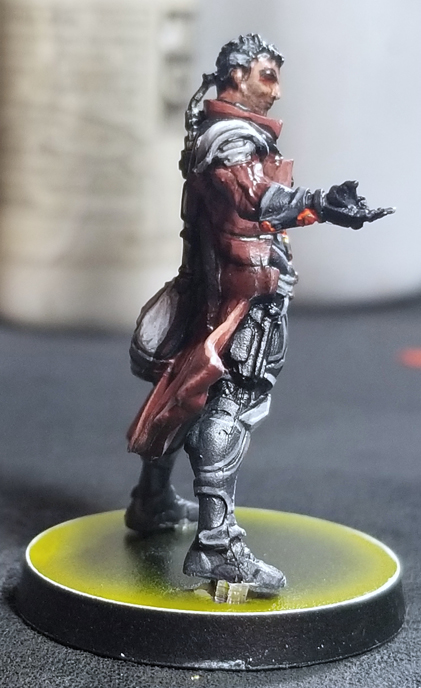
The Dactlys has been calling me to paint her for months now and I finally submitted about 10pm last night after finishing the Garuda. I love the detail of this mini and I was itching at another shot at painting skin tones. She would not let me put her down until she was complete (about 2am) and I’m glad I finished. I think this is the best painted Infinity mini I have done to date.
More to come as I progress.
ShawnG (SoI)
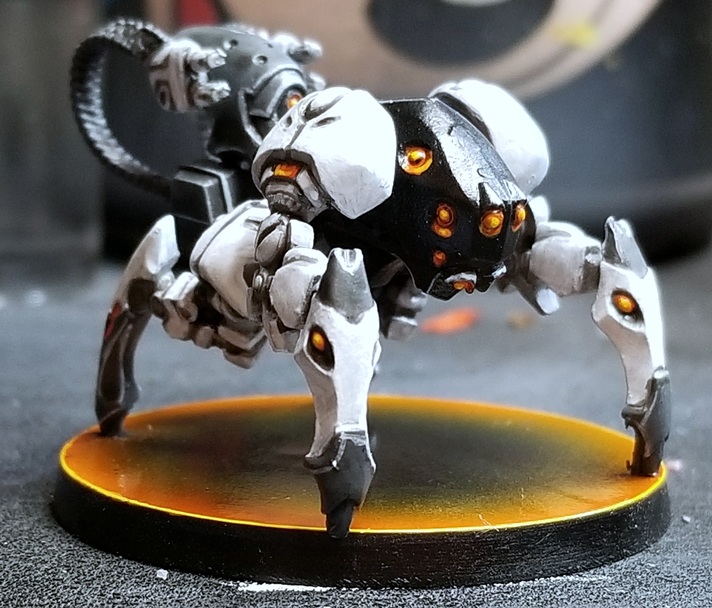
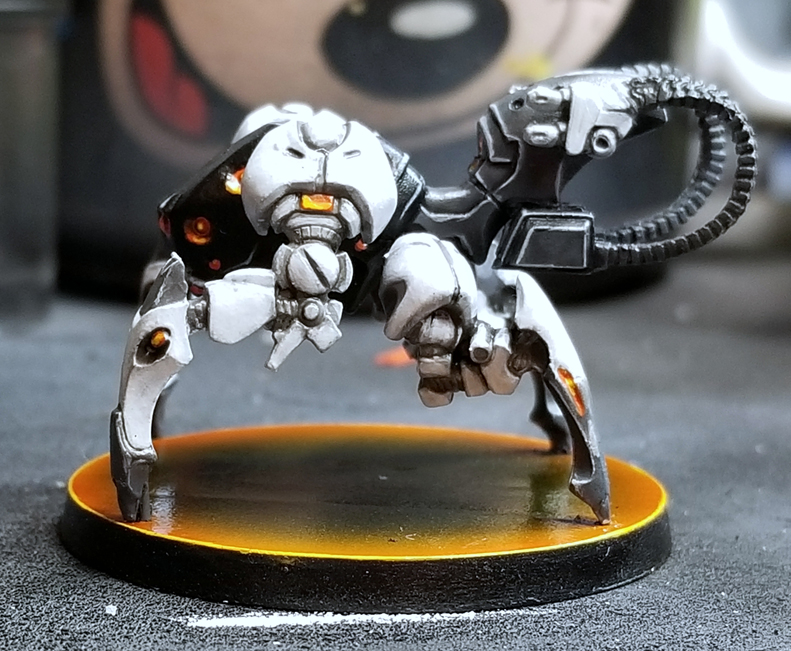
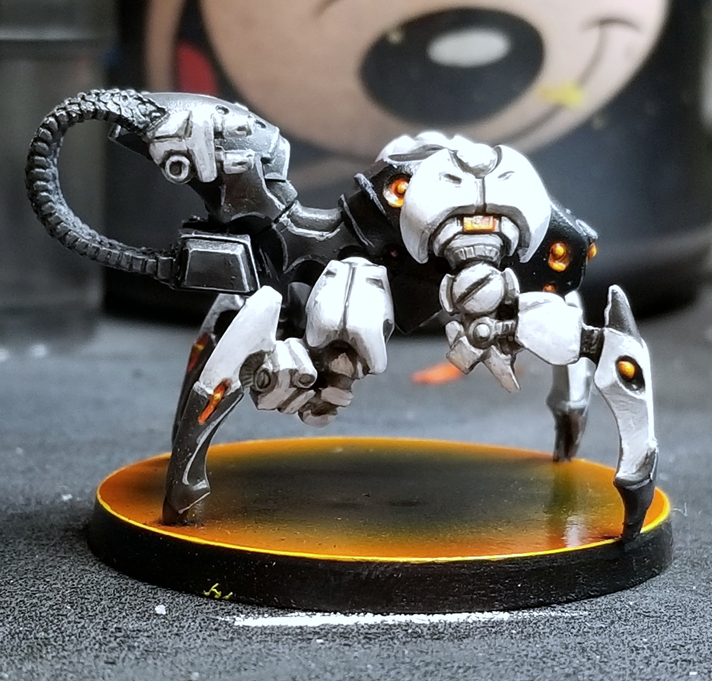
First larger model for this army. Started picking at this guy yesterday and finished him up this evening. Color scheme seems to to be holding together. I really like the orange of the base. All of my inorganic models will have that color.
 |
 |
 |
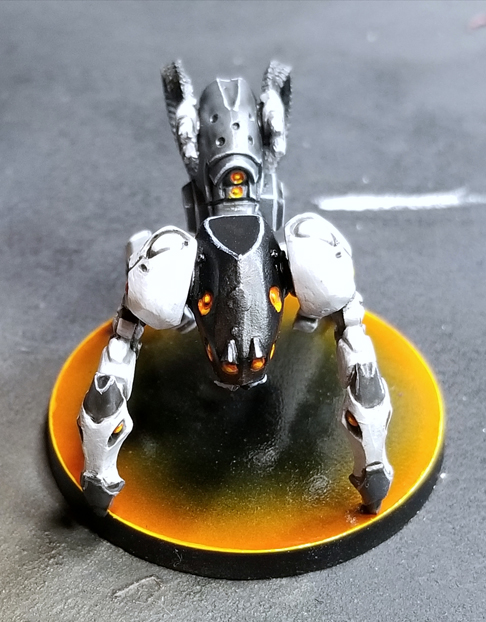 |
More to come as I progress.
Shawn G. (SoI)
Greetifications!
I’m currently working on a new paint project for Infinity. I have not painted anything serious since my Yu Jing mining table back at the start of the year. I’ve decided to buckle down and start another paint project and this time it’s Aleph!
Color Scheme:
For the bases I’m trying something new. Basing has never been one of my strong points (look at my Arkhan Tomb Kings). I’m trying a style I’ve never seen before that my friend Robert suggested. First of all all the bases will blank save for a airbrushed tone. All of my army will be broken into color types. Here are the shades I’ve chosen so far.
I have a pretty damn cool idea for a display when all this is finished but I need to get there first.
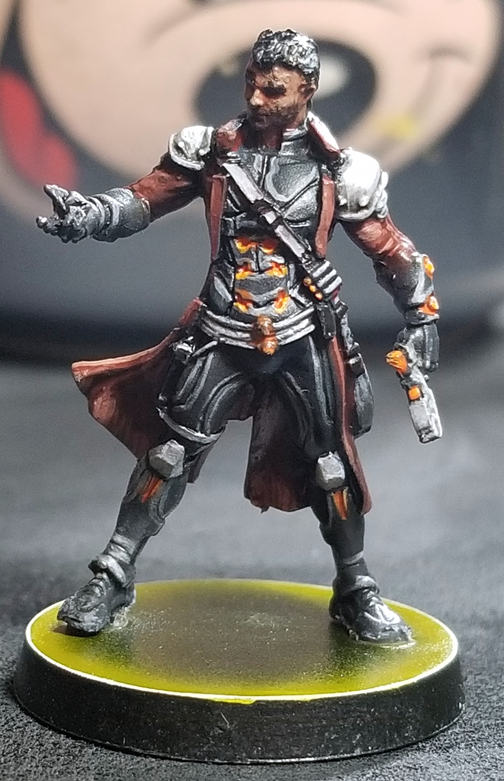
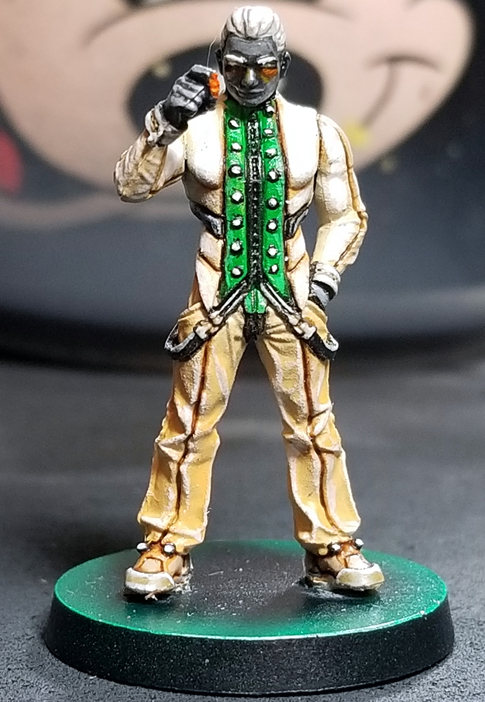
First model up is the test model Myrmidon Doctor-Officer Machaon. I like how this guy came out. The scheme gels with me and uses my favorite colors. ‘m forcing myself to get good with faces. While not perfect, I managed a semblance of 5 o’clock shadow on Machaon. Sorry for the image quality. I really need to get/build a photo light box.
 |
 |
 |
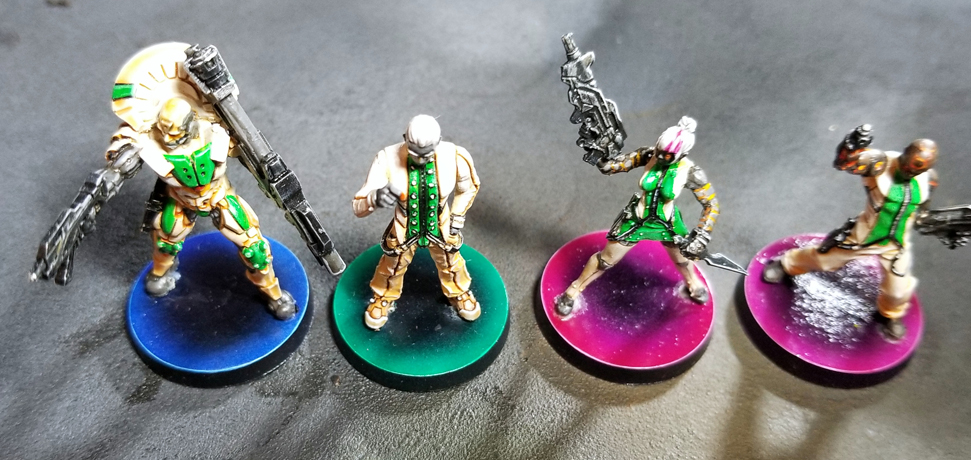
Next up is one of my line troops a Dakini Tactbot. No duster to paint on this mini so I didn’t have to paint leather. Brought the white theme from the shoulders on Machaon all the way down the arms. I think I will keep that in the scheme. Lighting came out half decent as well. Need more practice there.These models are a right pain to put together. I hope they update the kit soon. Need to be on the level of sexiness that is the Garuda.
 |
 |
 |
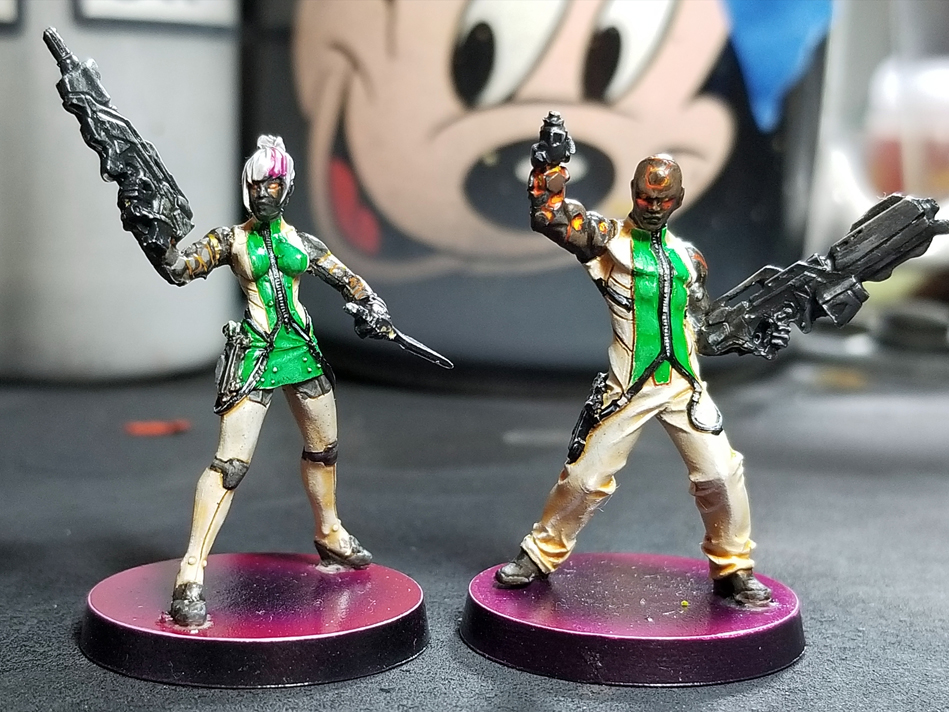
Here are the models from the previous scheme I was attempting. I think I will keep these as experiments in color and for display purposes. I like the scheme and it’s colors. It has nice contrast, but was not fun to pain. Didn’t gel with me. These models also show off the basing design I’m trying out. I believe it will really begin to stand out when I have more then 4 finished.
 |
 |
 |
 |
That’s all I got. More to come as I progress.
Shawn G. (SoI)
Salutations!
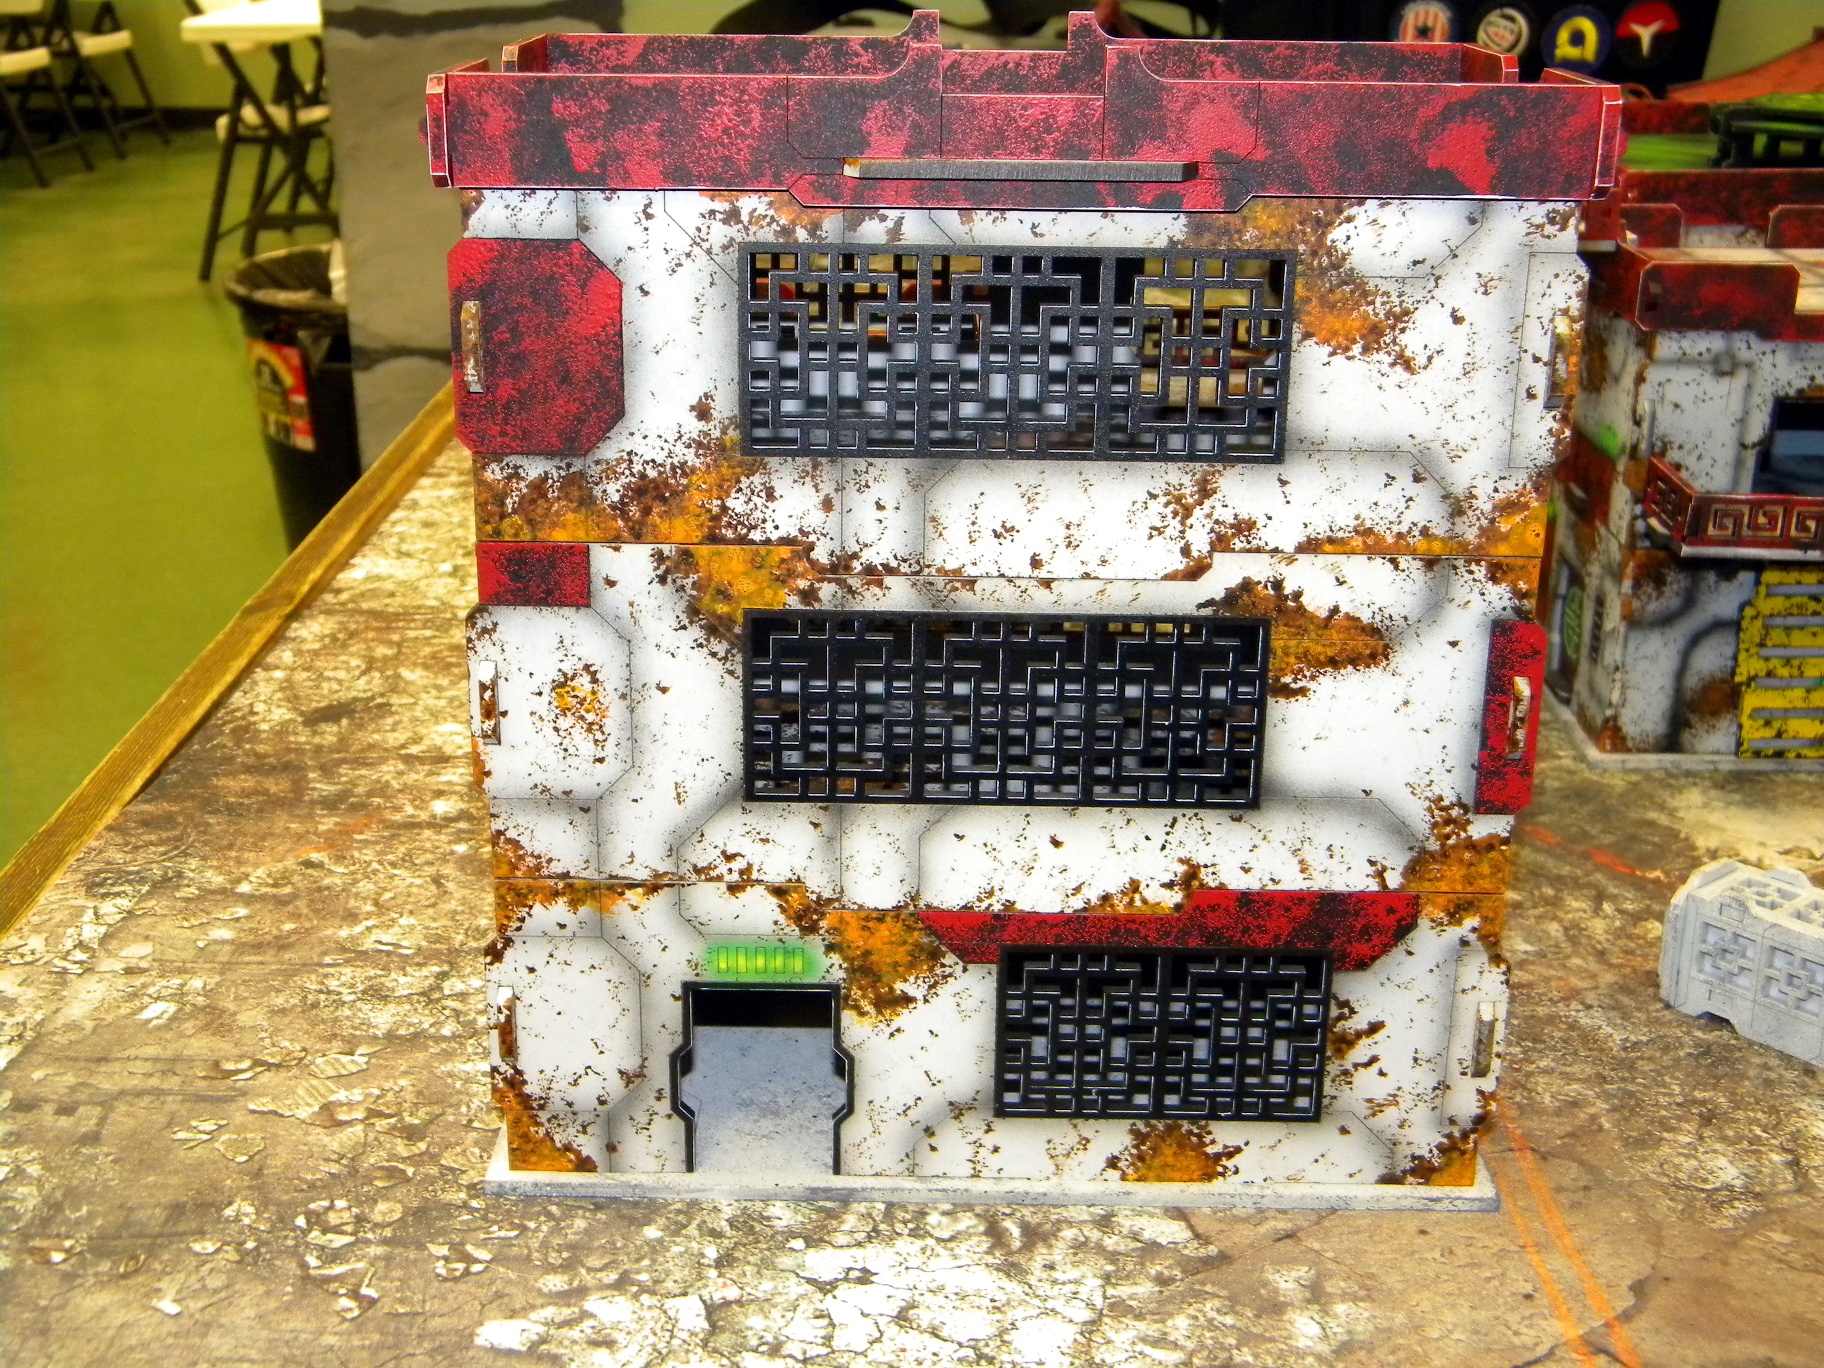
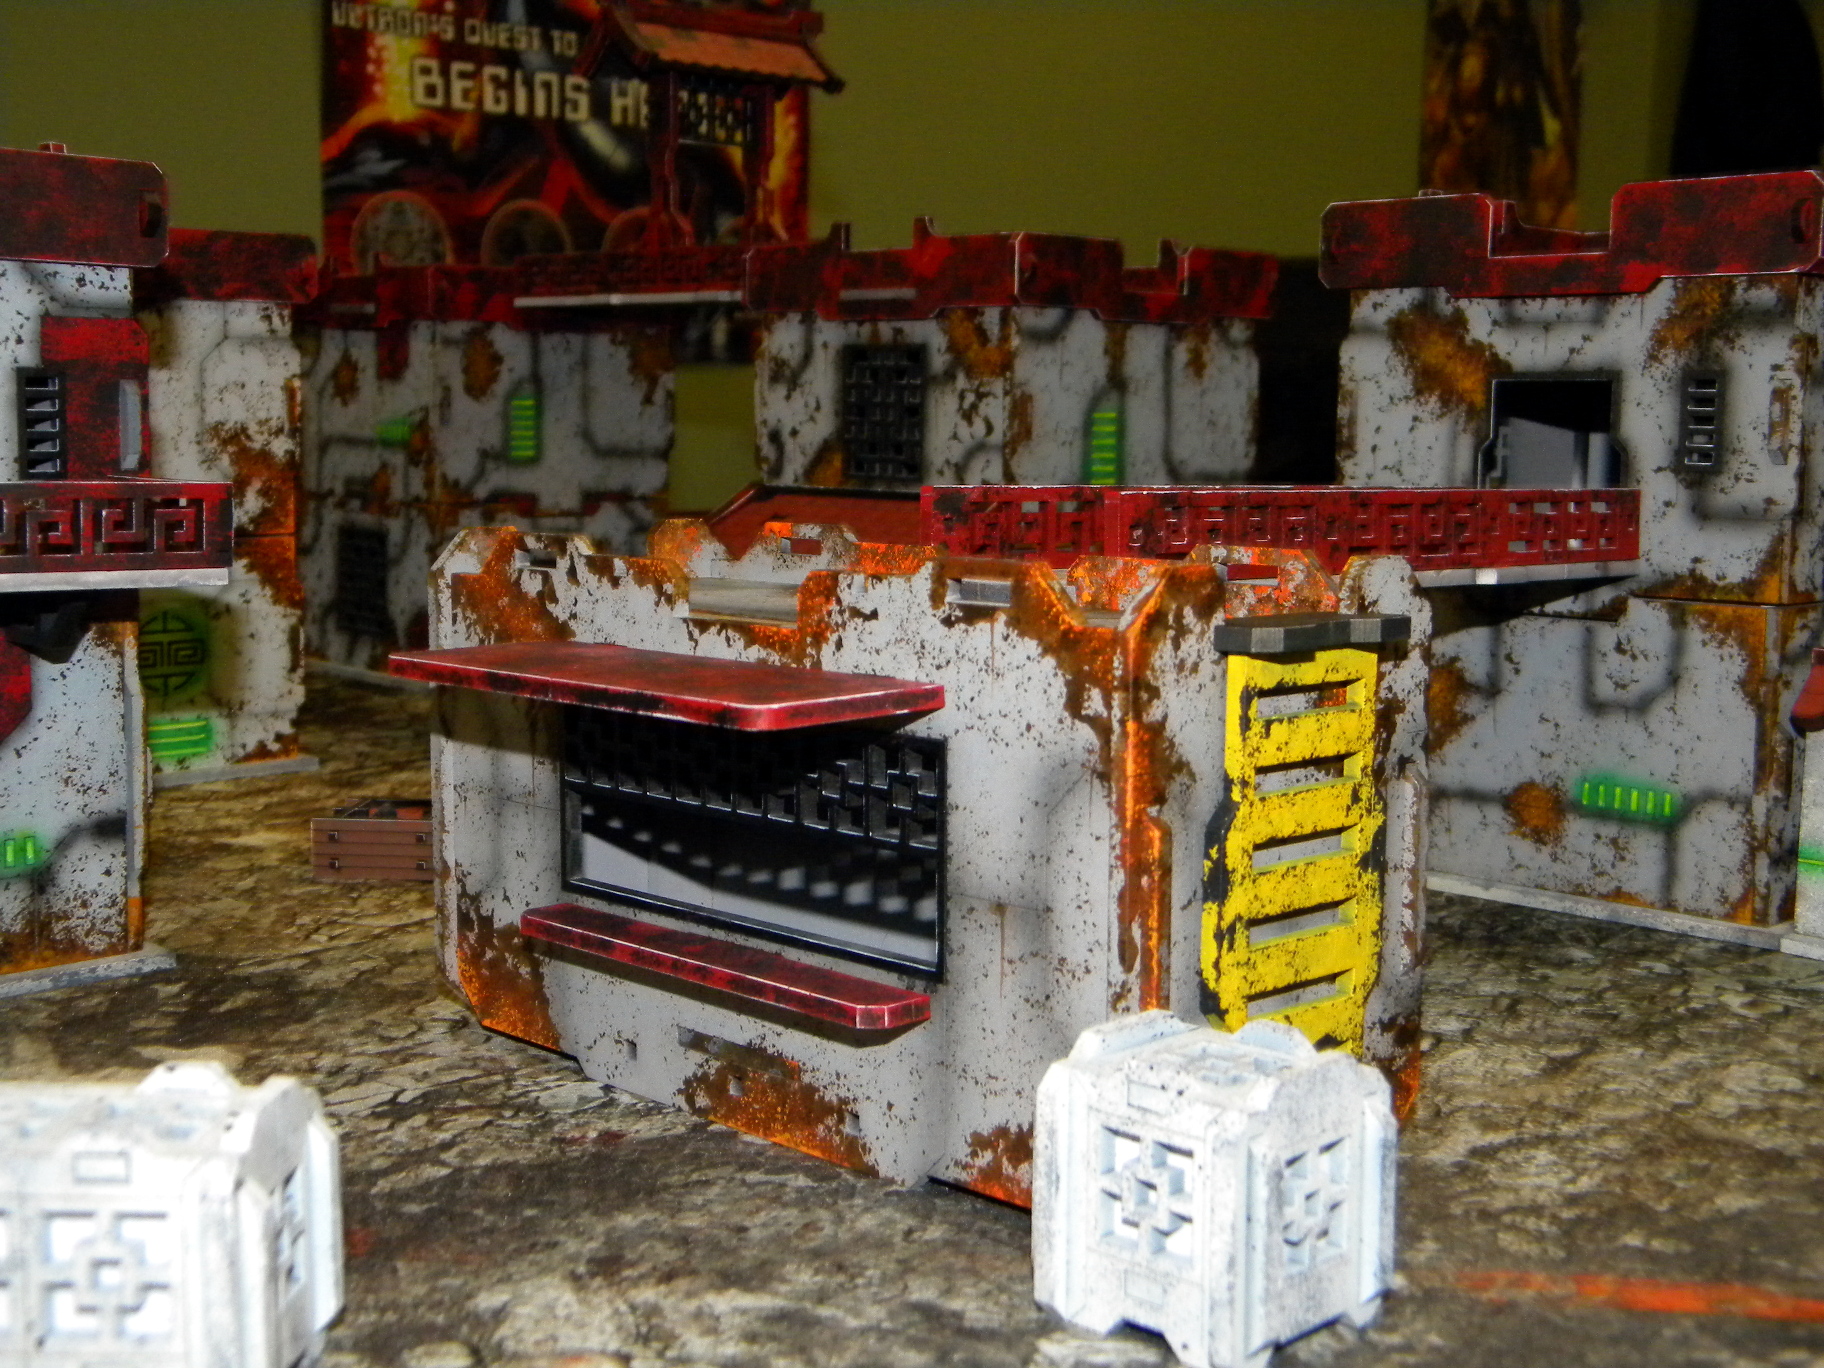
I have been receiving a great deal of requests for a tutorial on how I did the weathering on my Wild Lands table. Here’s a quick rundown:
I painted this terrain set using inks primarily. They are perfect for painting MDF terrain for two reasons; first, they go through an airbrush with no need for dilution. Second, the MDF is porous and absorbs the paint/ink cutting drying time.
 |
 |
Color’s used:
Daller Rowney – Burnt Umber 223
Liquitex Ink – Carbon Black
Citadel (GW) – Mournfang Brown
Vallejo Game Color – Hot Orange 72009
Vallejo Model Color – Light Orange 70911
Vallejo Surface Primer – Gray
Materials Used:
Egg foam
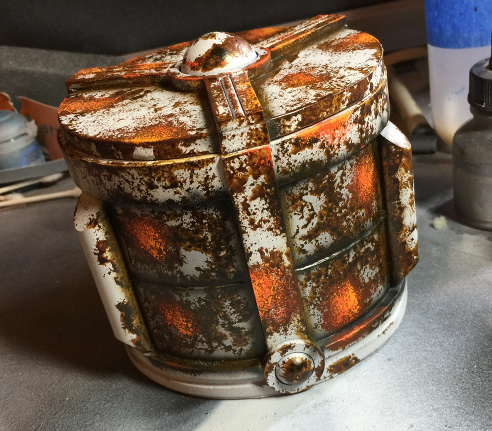
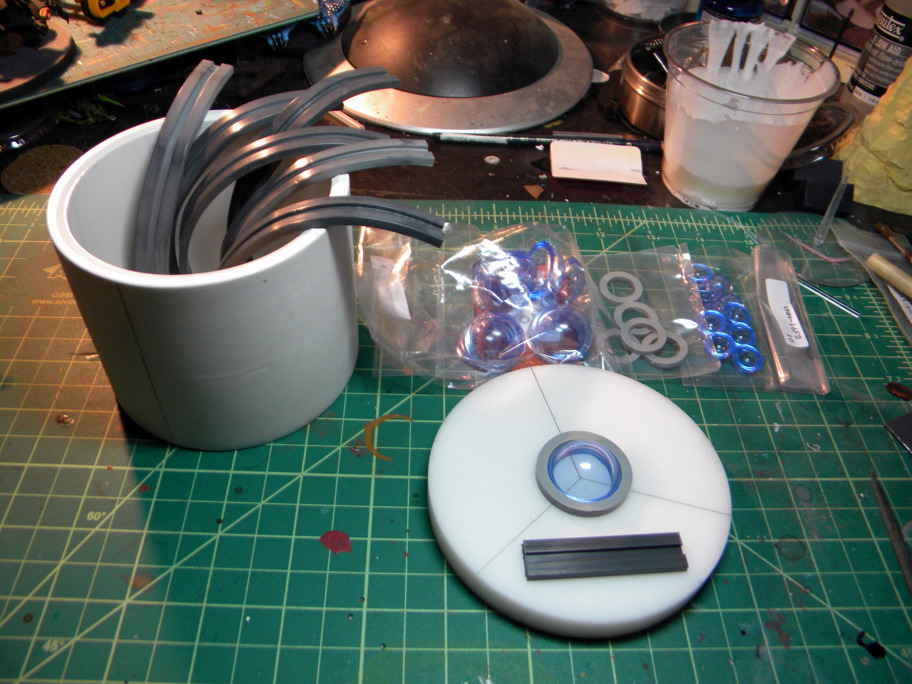
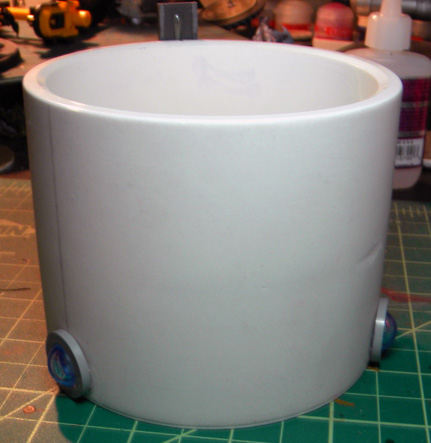
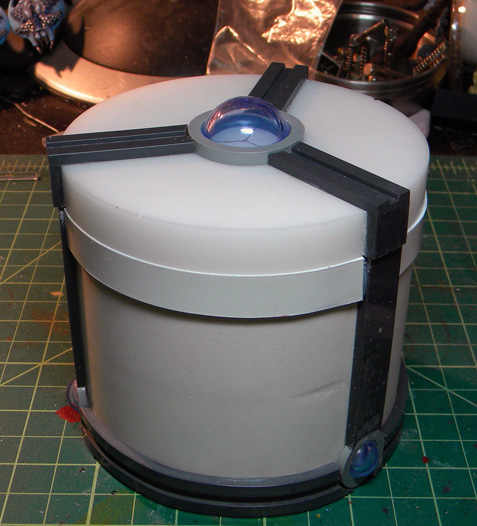
I currently don’t have any new terrain pieces prepped for painting so I’m using a cast of the dice box I made for my Necrons a few years ago. It was sitting around and looked like it would make a pretty cool cistern for my table.
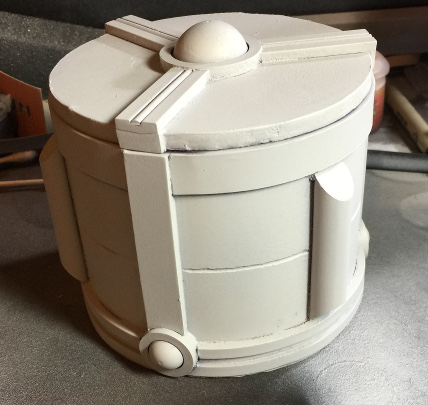
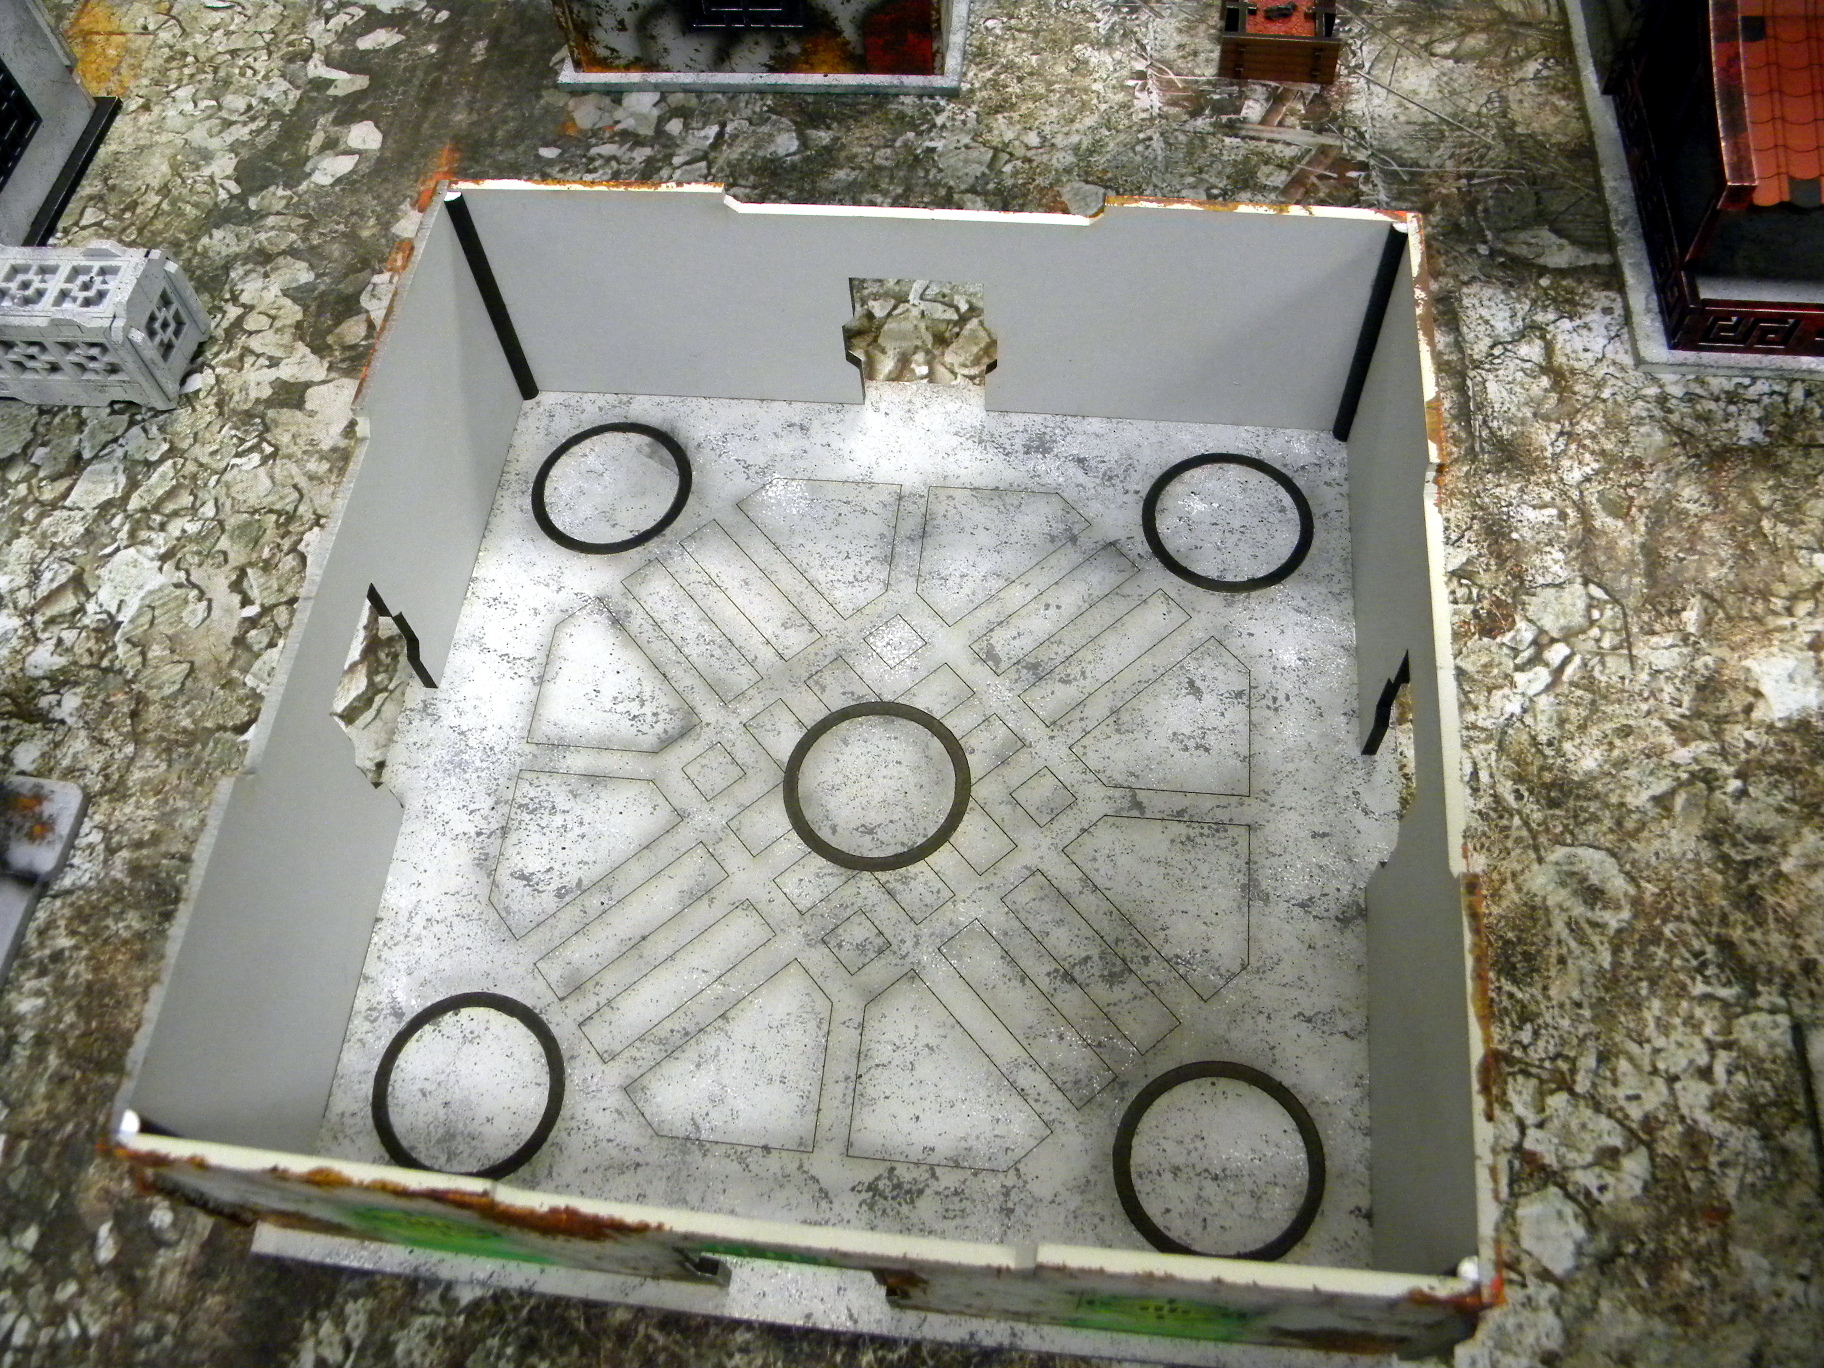
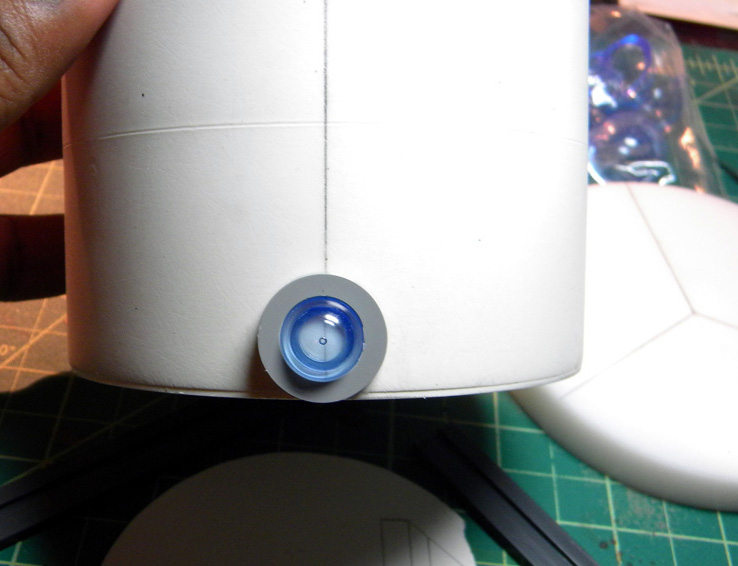
Step I – The box was primed gray. Since the cup is made out of resin it lacks the nice quick drying quality of MDF, I used a hairdryer to speed up the process. In fact I did the same thing with the MDF terrain. Really helps to keep stuff rolling.
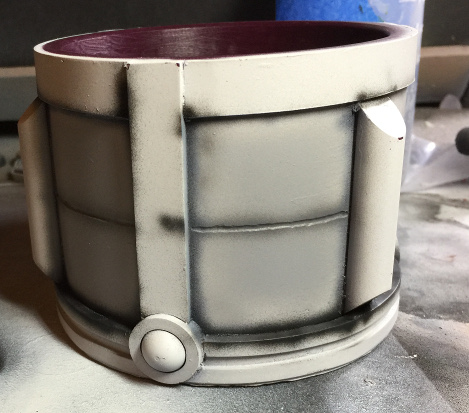
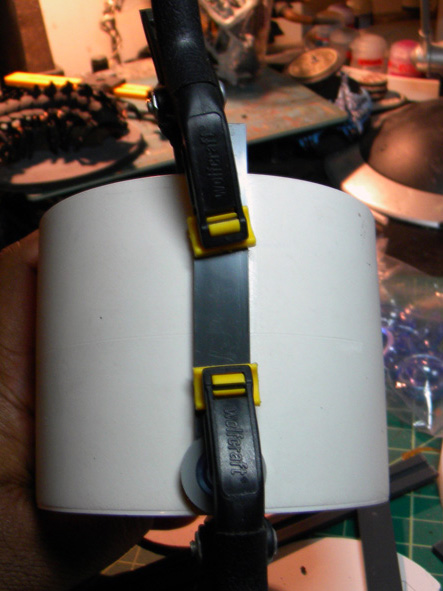
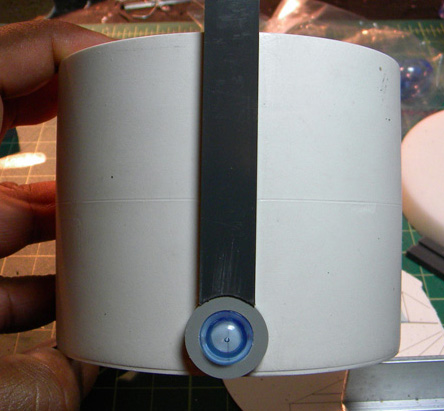
Step II – All the cracks & crevices were airbrushed in black. It looks heavy at the start but once you start weathering you’ll be glad for it.
 |
 |
 |
 |
 |
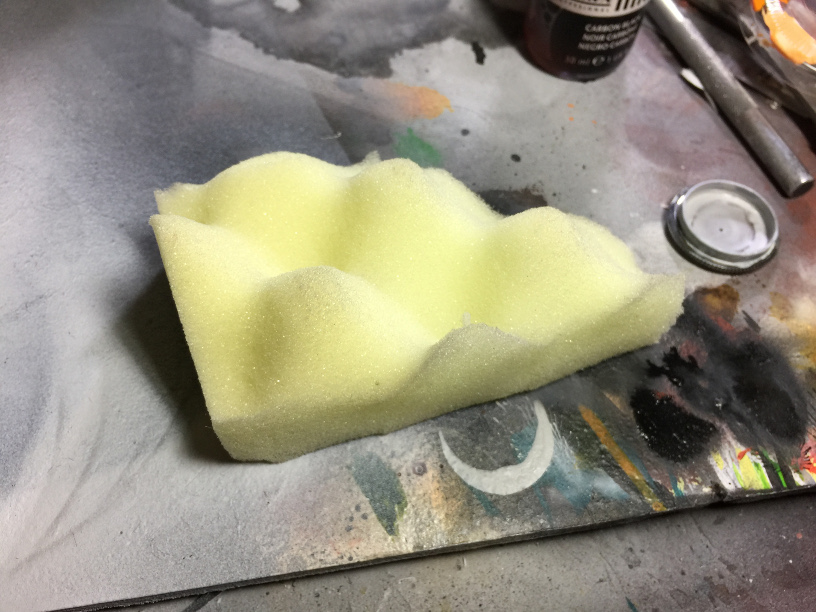
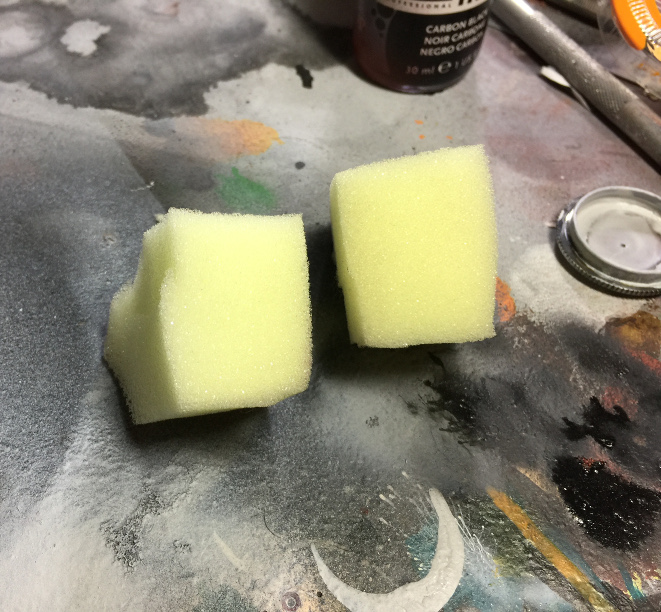
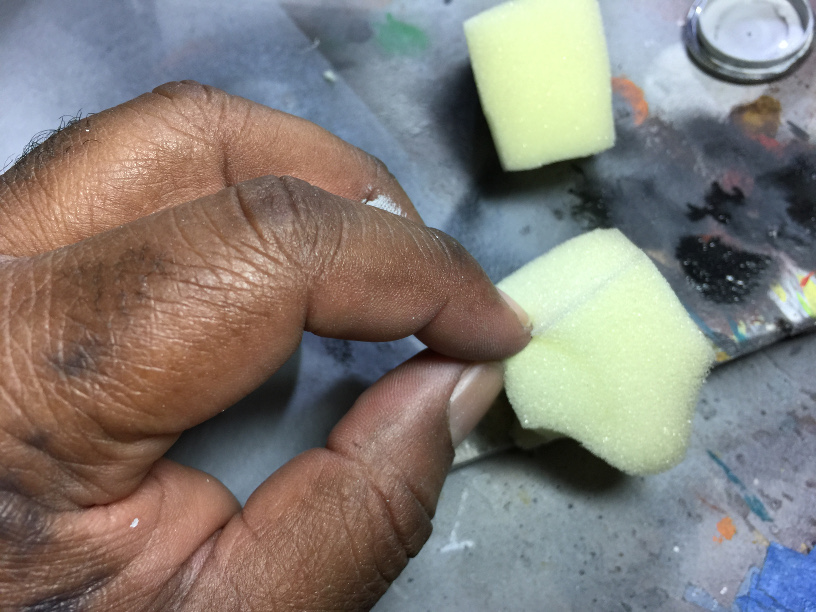
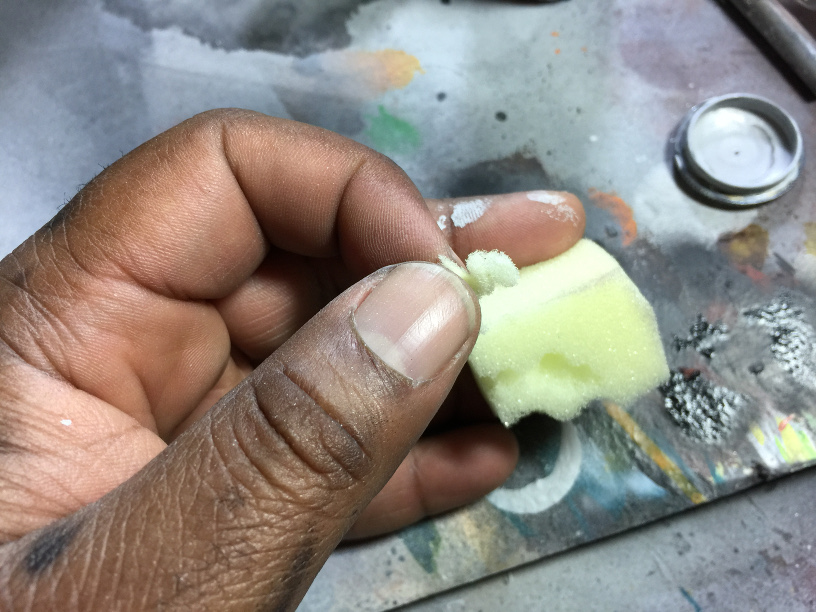
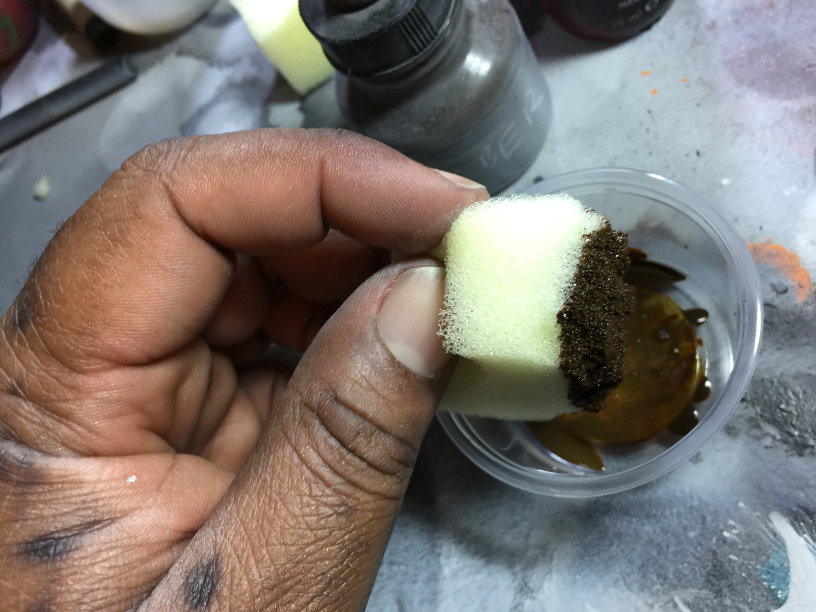
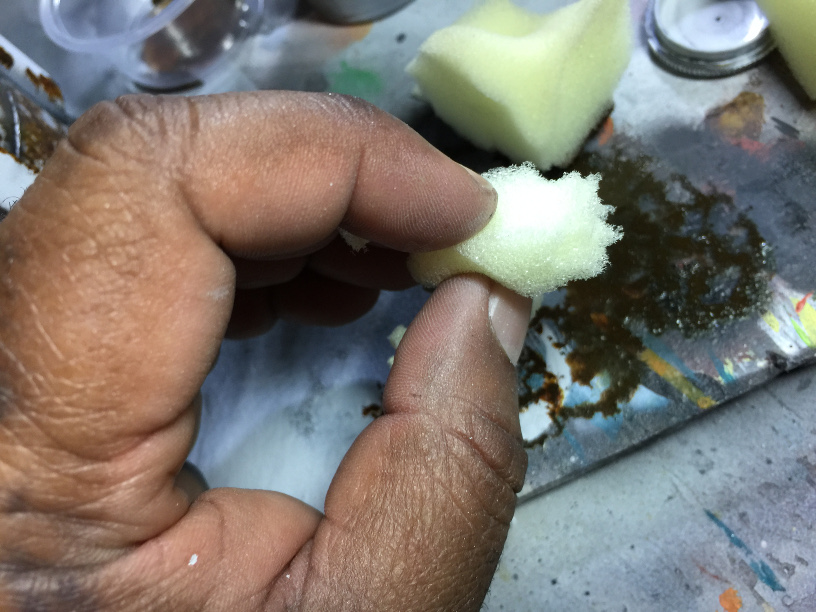
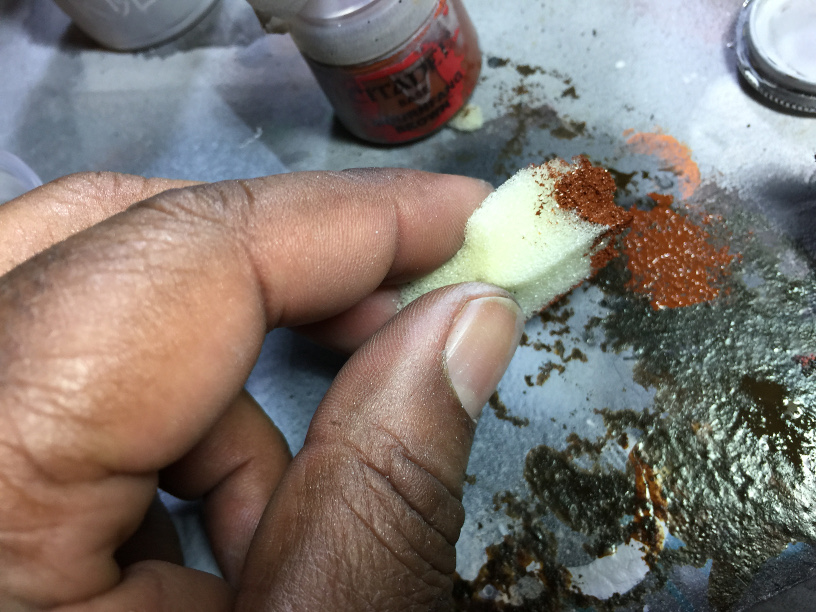
Step III – I took a piece of egg foam I had sitting around and cut it into pieces about 1 by 1.5 inches wide. Then, using my fingers I pulled plugs out of the flat side to make the surface uneven. It’s important to pull the edges as you don’t want a ‘square’ sides on the sponge. I like using the egg foam for this process as the ridged side have little finger holds.
 |
 |
 |
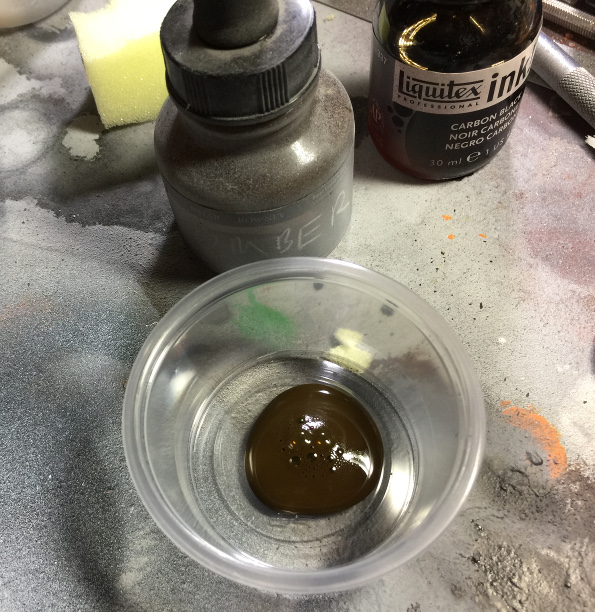
Step IV – Break out the burnt umber. I used condiment cups for this but a palate is fine. Dip the textured end in the ink and place a few practice dabs on your palate to get full coverage on the sponge. These practice dabs also help to control the amount of ink on the sponge as it can be heavier then you expect and you don’t want to make any mistakes on your piece.
 |
 |
 |
 |
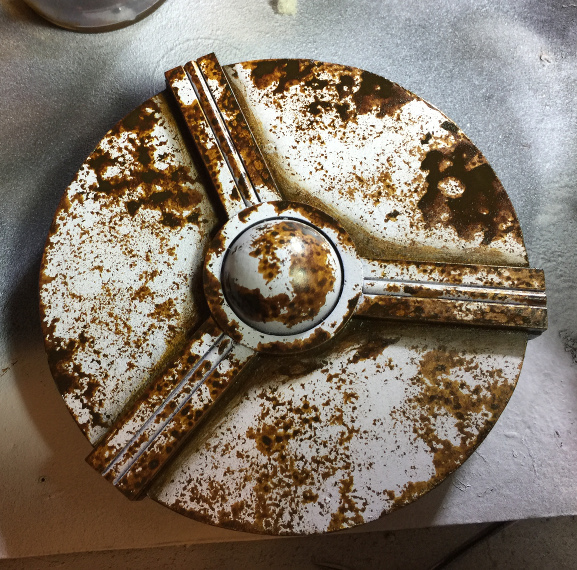 |
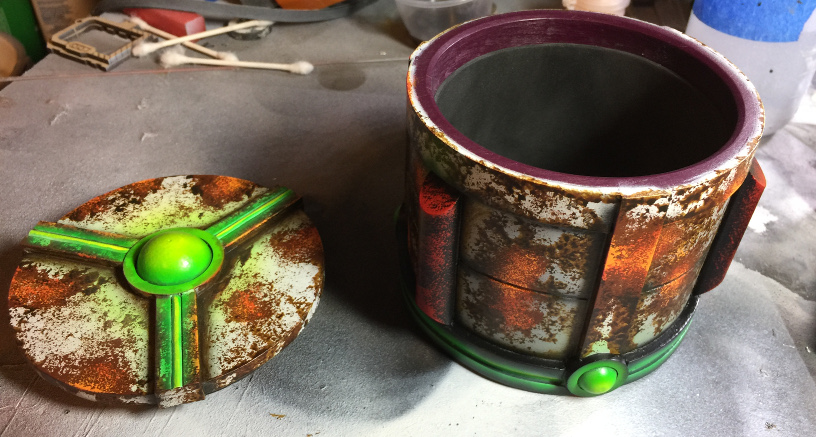
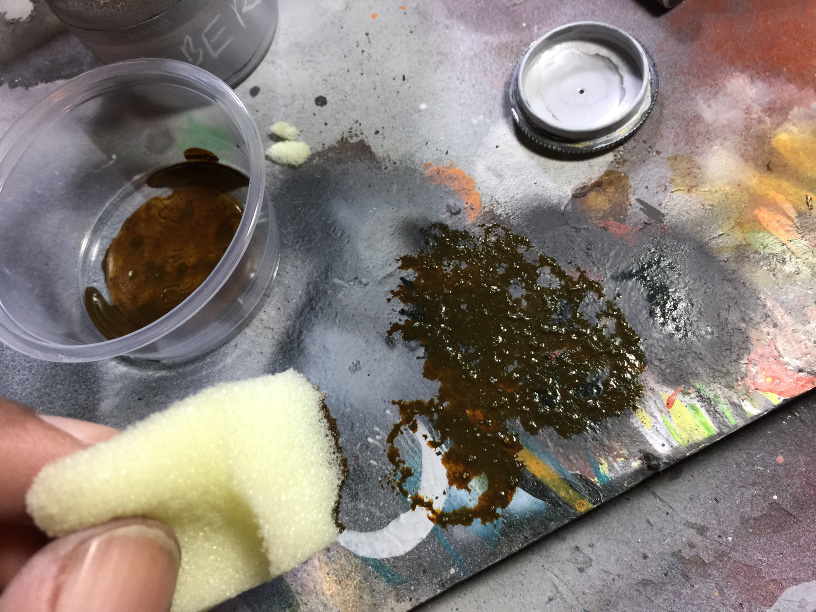
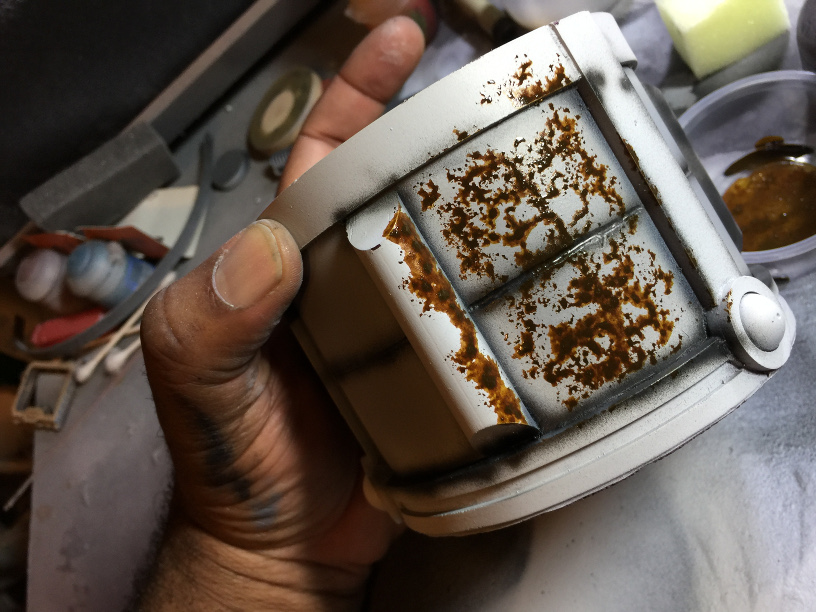
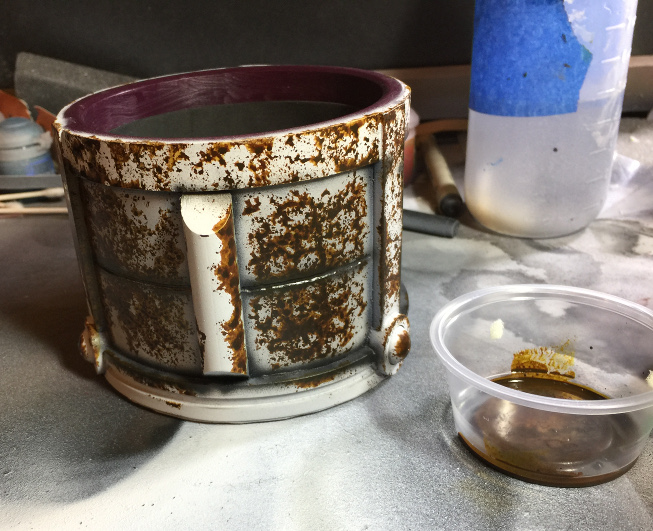
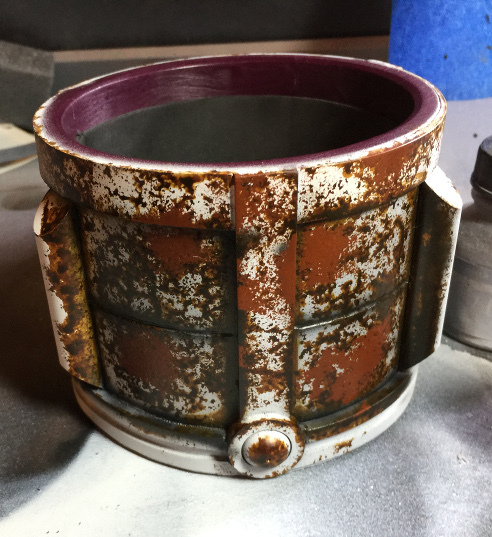
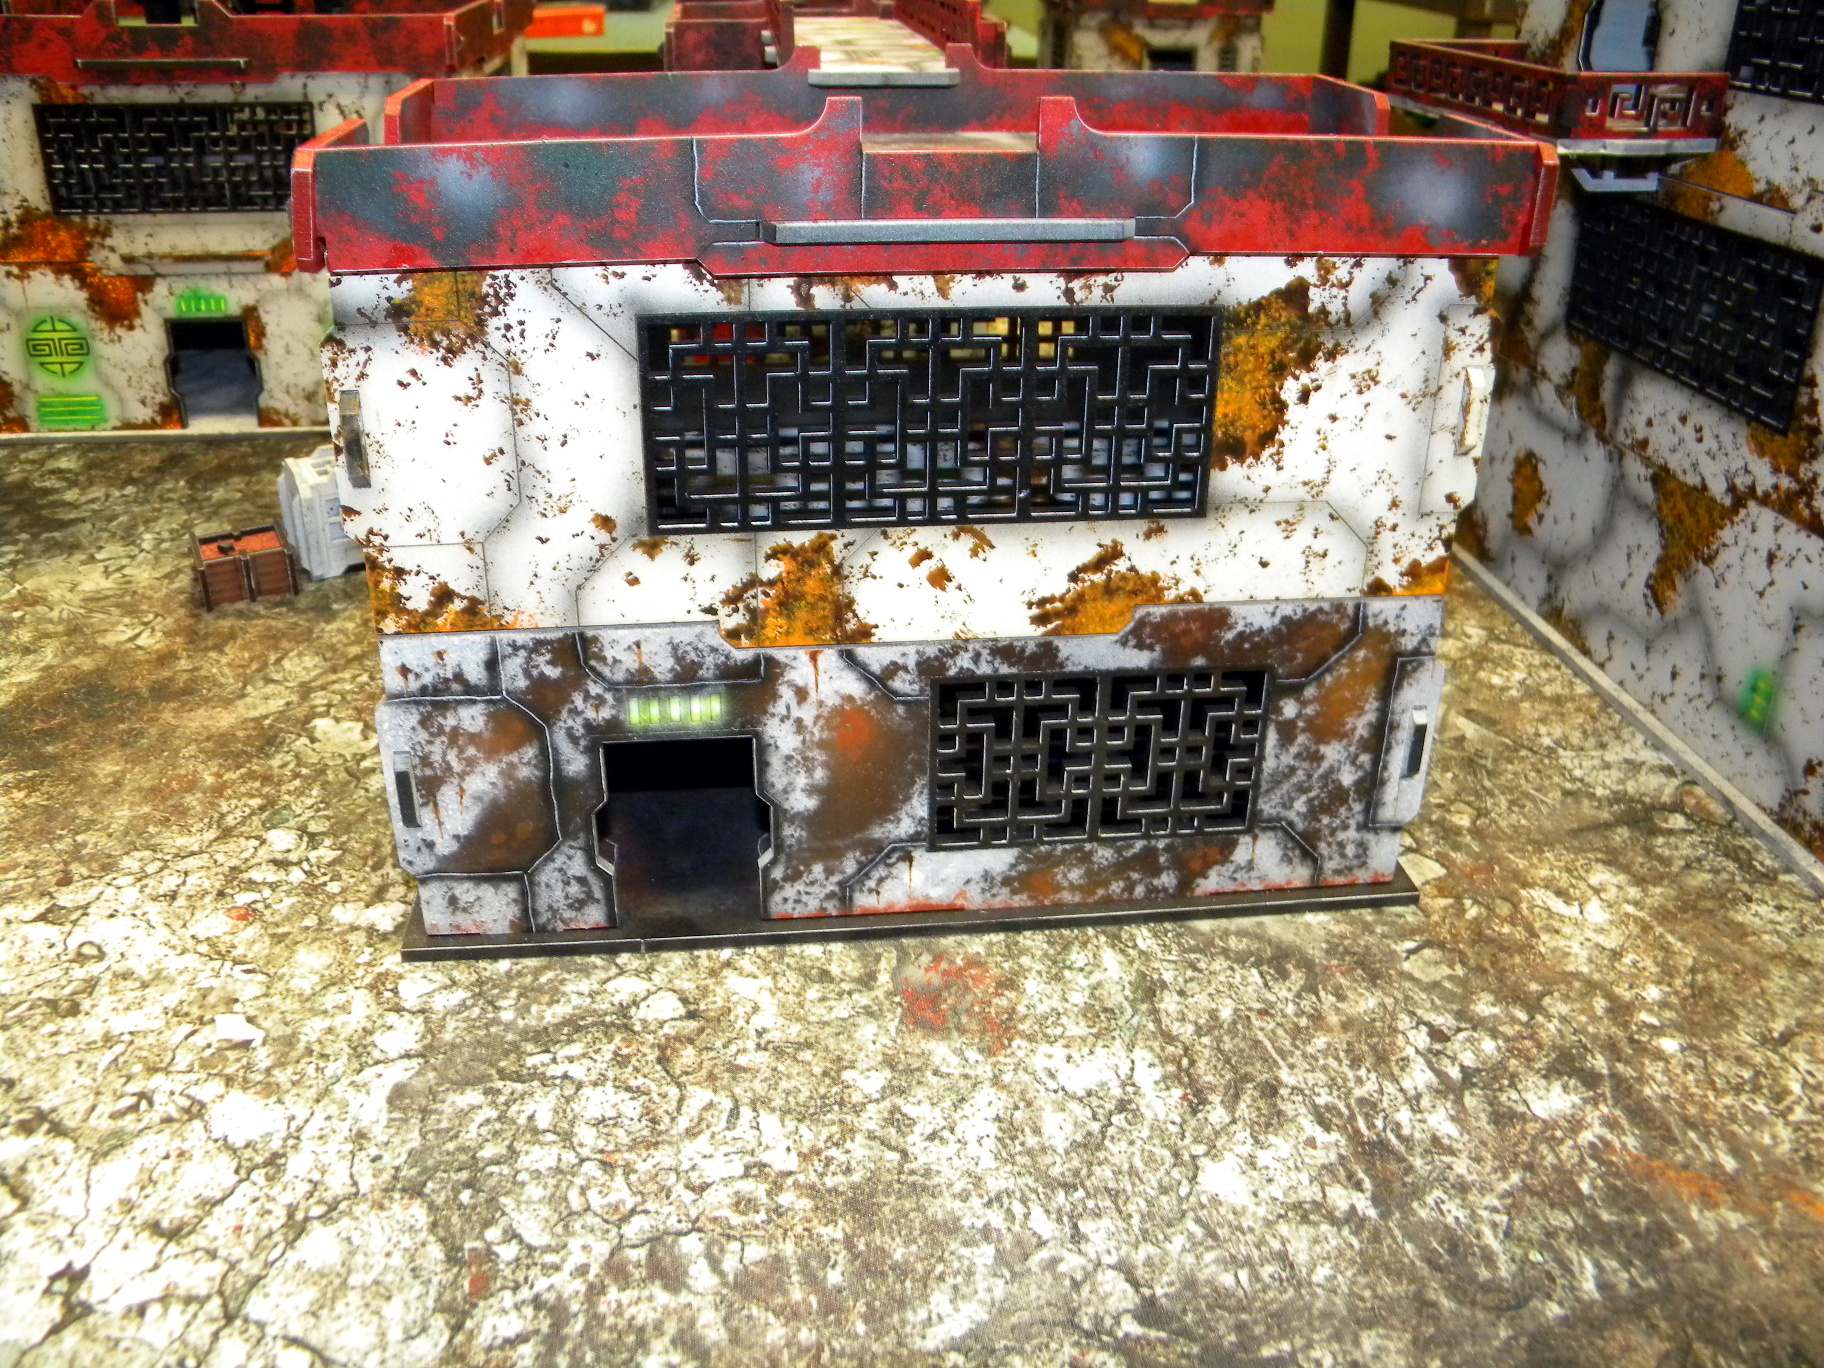
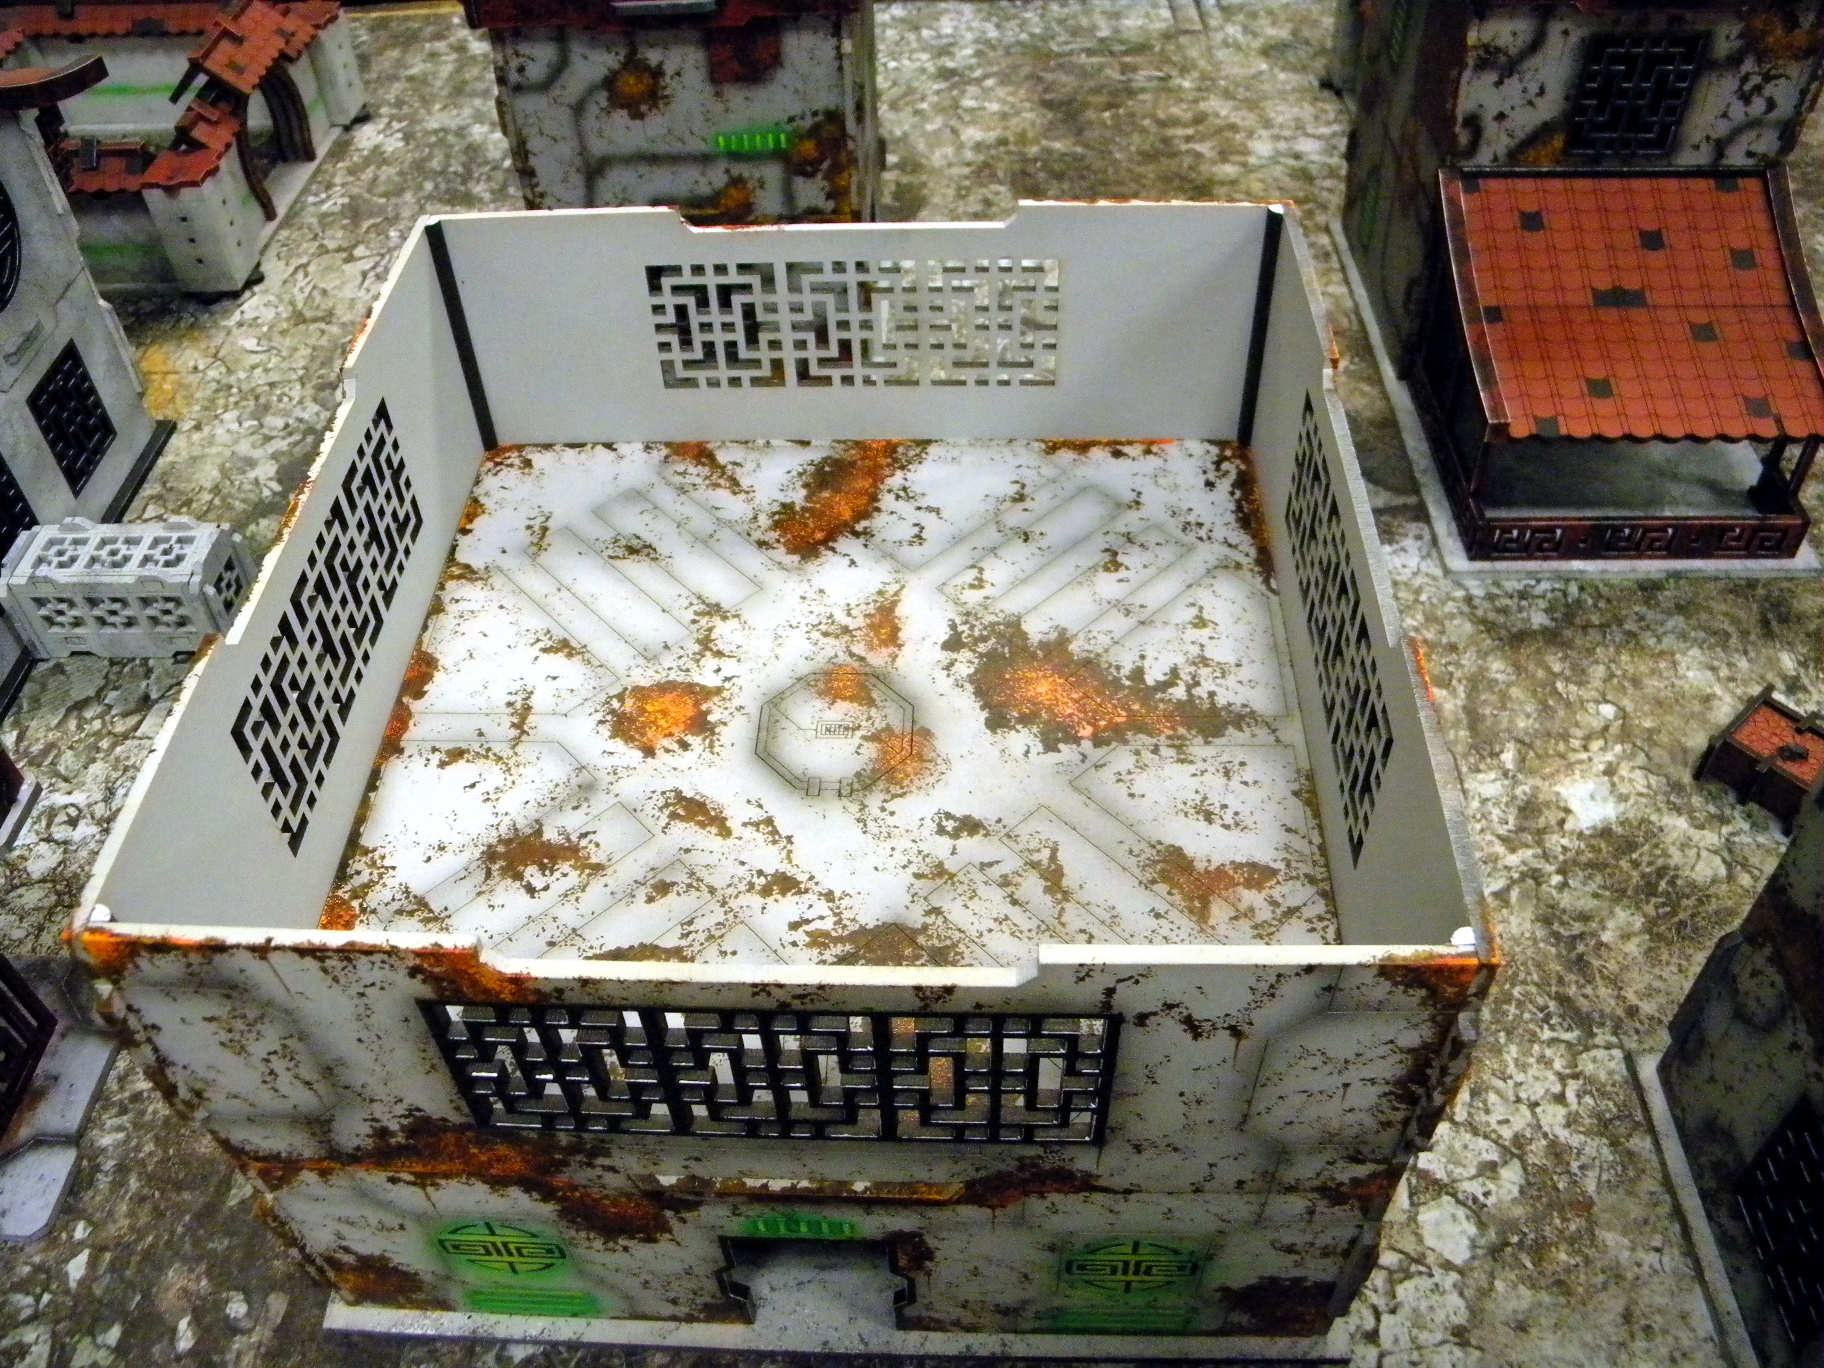
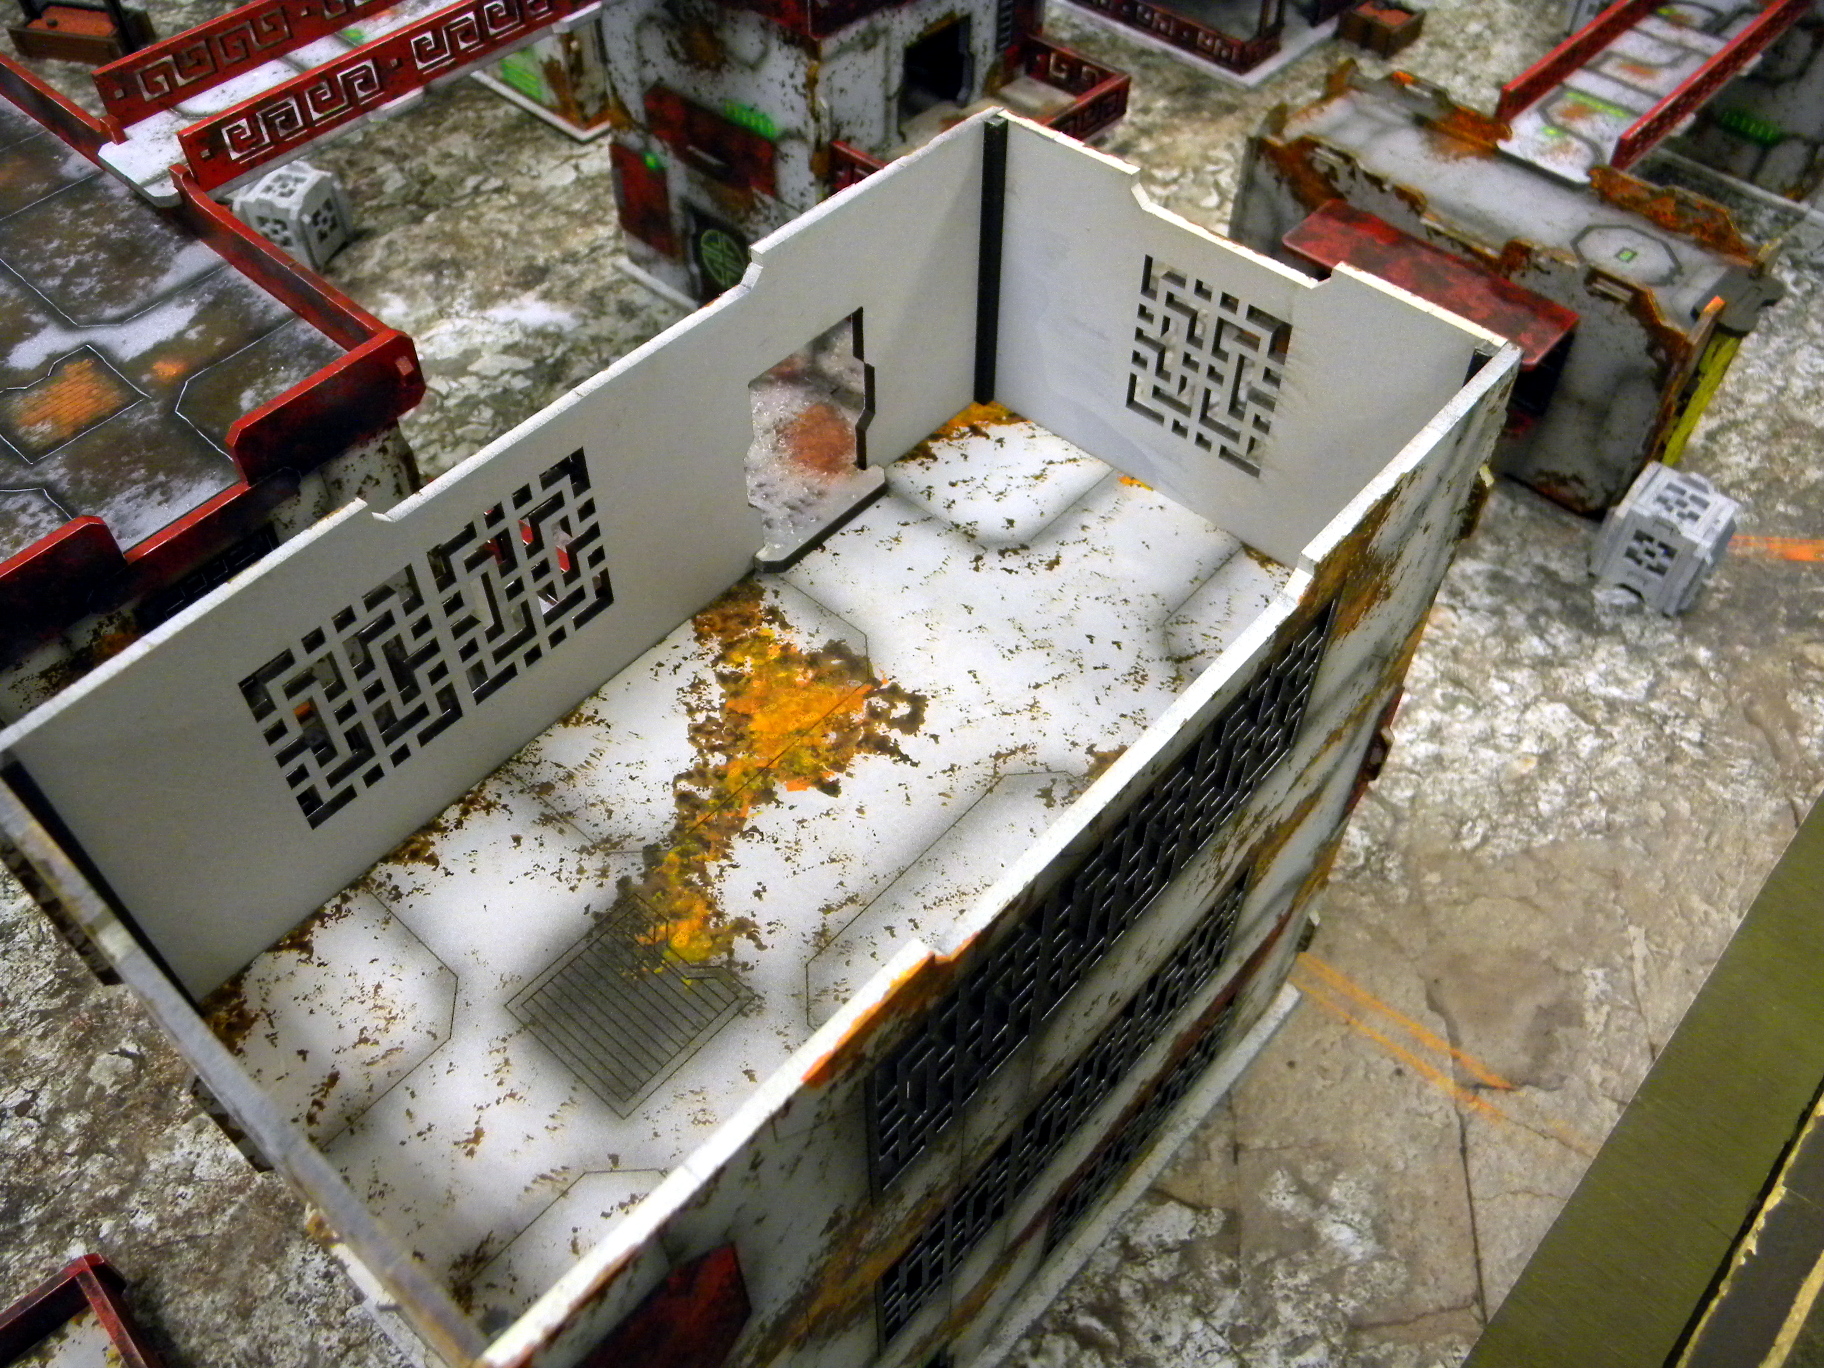
Step V – Lightly dab the surface you want weathered. I turn the sponge around to add to the randomness of the ‘splatter’ look. As this surface is not porous, I had to use the hairdryer between panels. I decided to go with a heavy rust/corrosion look on the cup. I went lighter on the buildings.
After the large panels were done I noticed I had a great deal of ‘white space’ along the edges. I ripped up a smaller sponge and used that to get ink in the corners/edges as that’s where rust would accumulate first. The smaller sponge was also used to color the rest of the box and to create some areas where the ink is applied heavily. These heavy splotches are needed for the next step.
 |
 |
 |
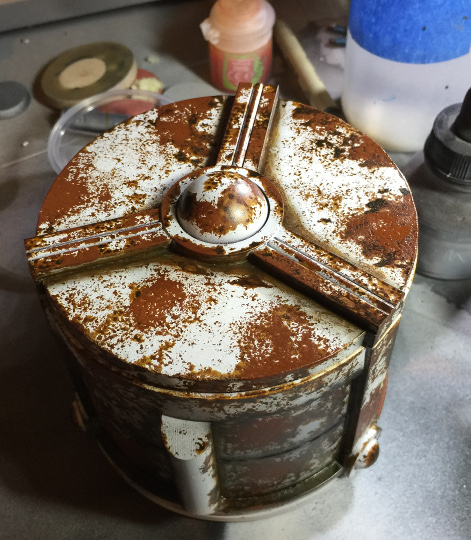 |
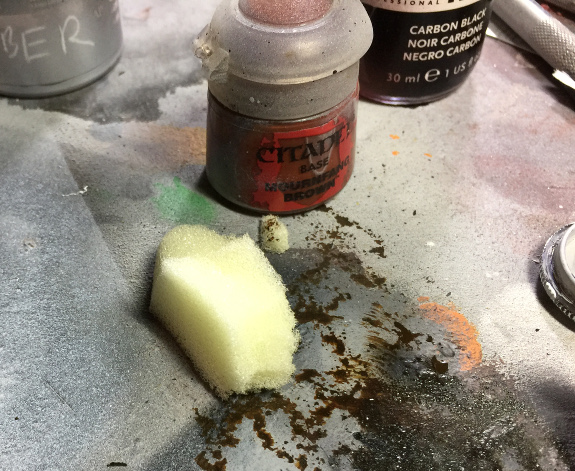
Step VI – Rip up an new small piece of sponge. You can also wash the smaller piece you made for the umber phase. Using the Mournfang Brown, add new splotch patches over the umber. You want to aim to cover the areas (not completely) where the umber was heavy as these spaces will represent your rust areas.
 |
 |
 |
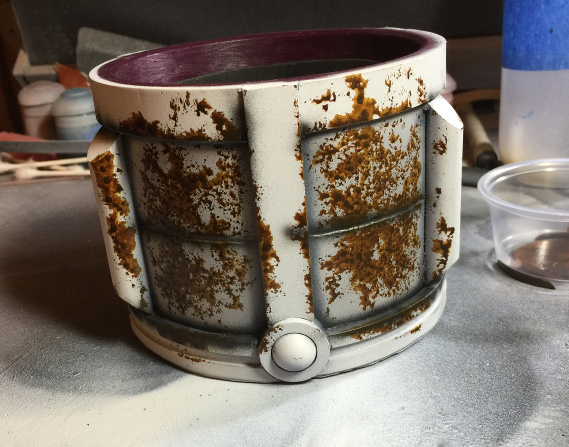
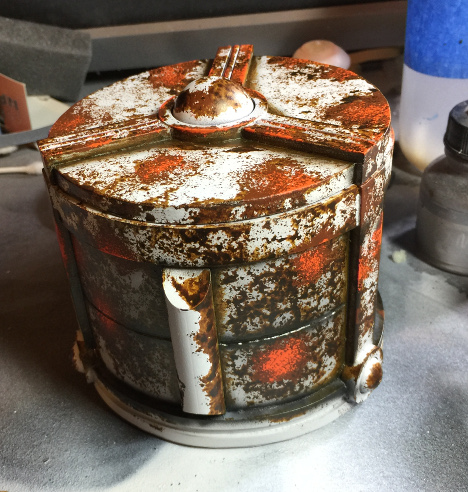
Step VII – These last steps go fast. Repeat the process you used for Step VI but this time using the Hot Orange followed by the Light Orange. Cover the brown with patches of orange but again not completely. You want the previous color to show underneath. The key to this phase is to go easy. Less is more.
And that’s it! I painted the rest of the cup with some glow effects and called it a day. The weathering process took about 10-15 minutes to complete and 20-25 minutes for the whole paint job. You’ll kick yourself at how easy this is to do in the end. Feel free to shoot me any questions.
Shawn G. (SoI)
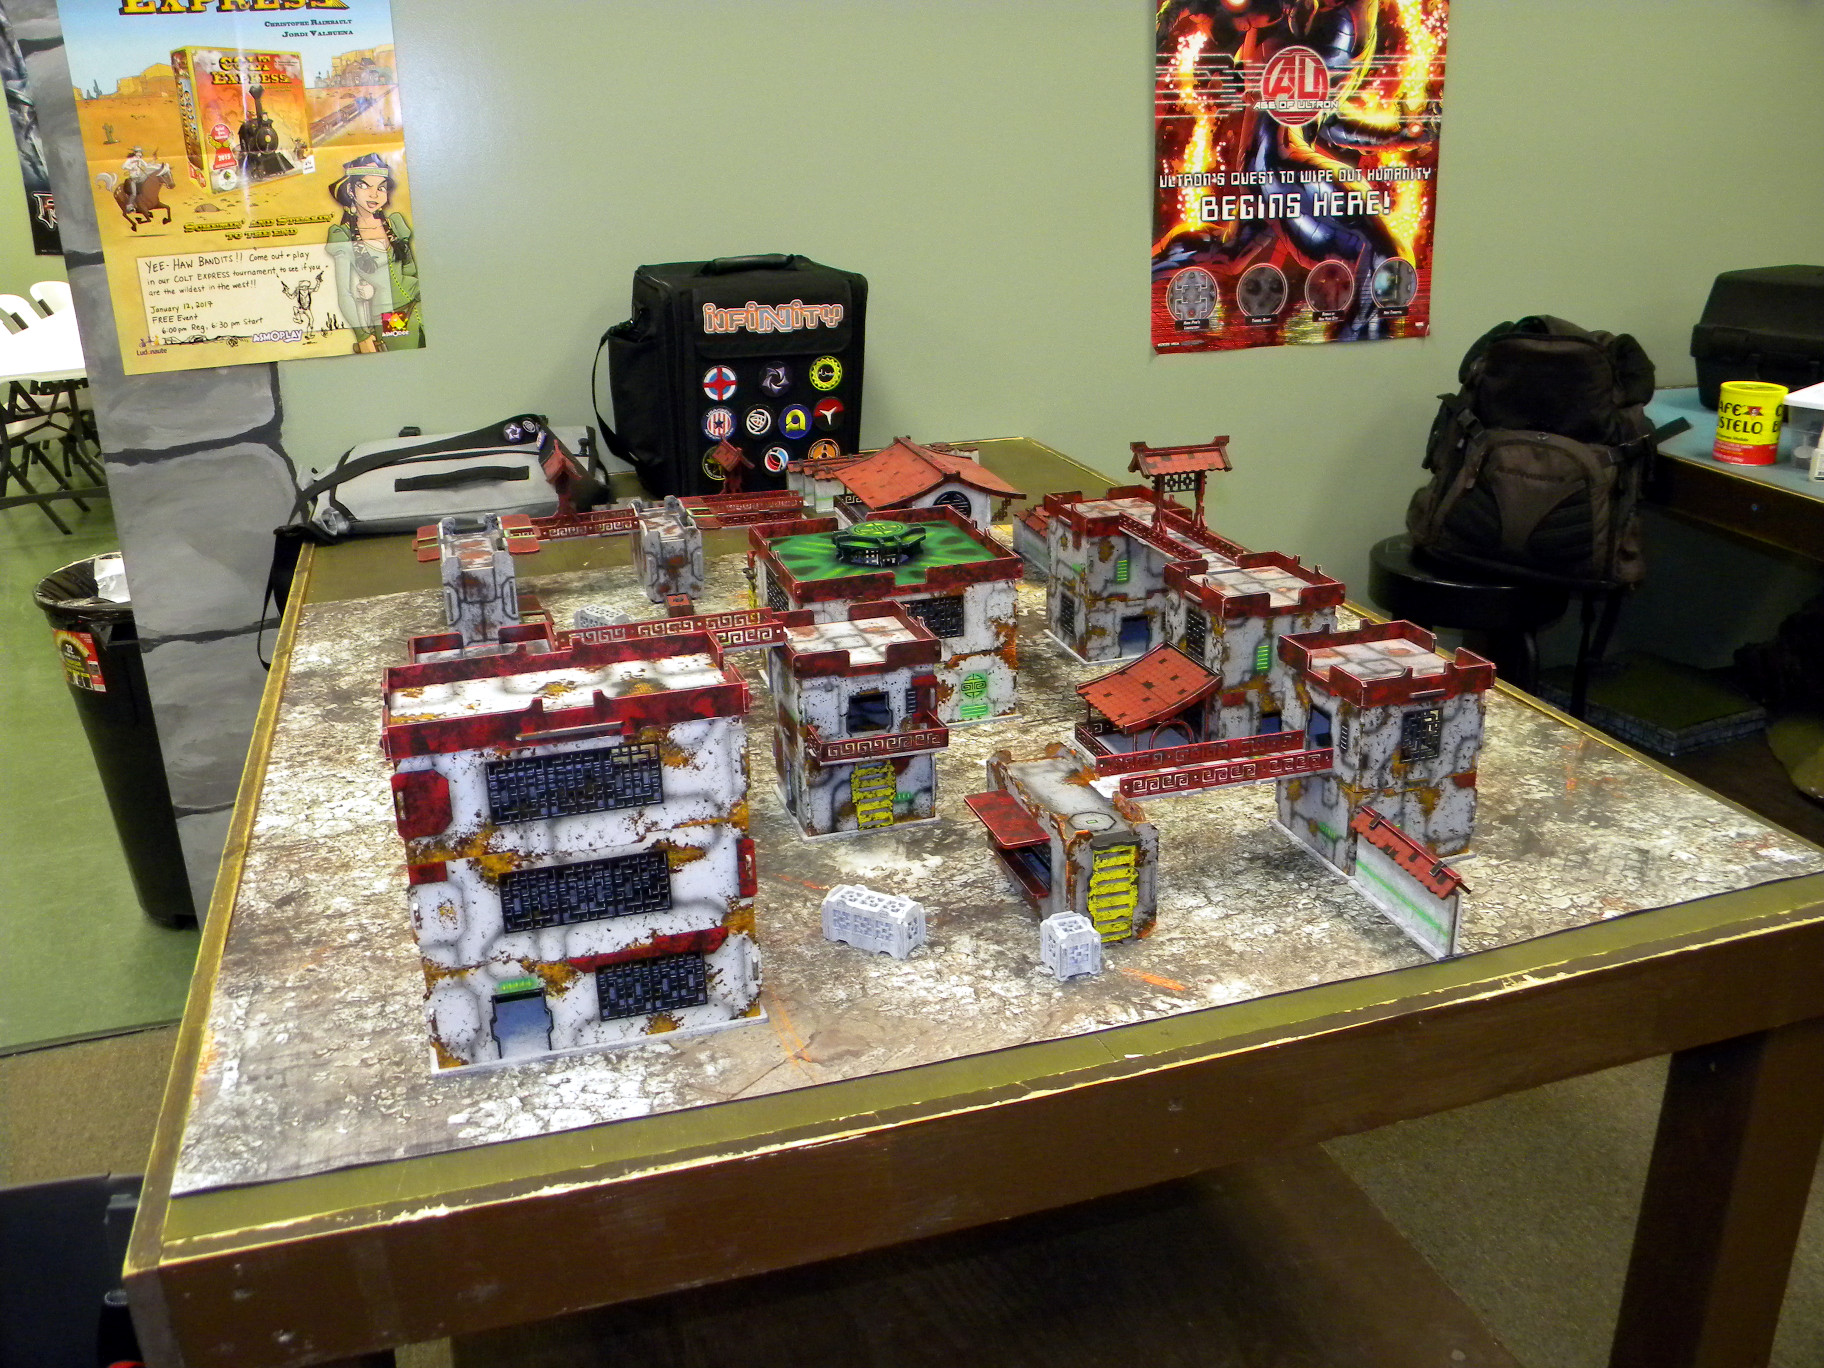
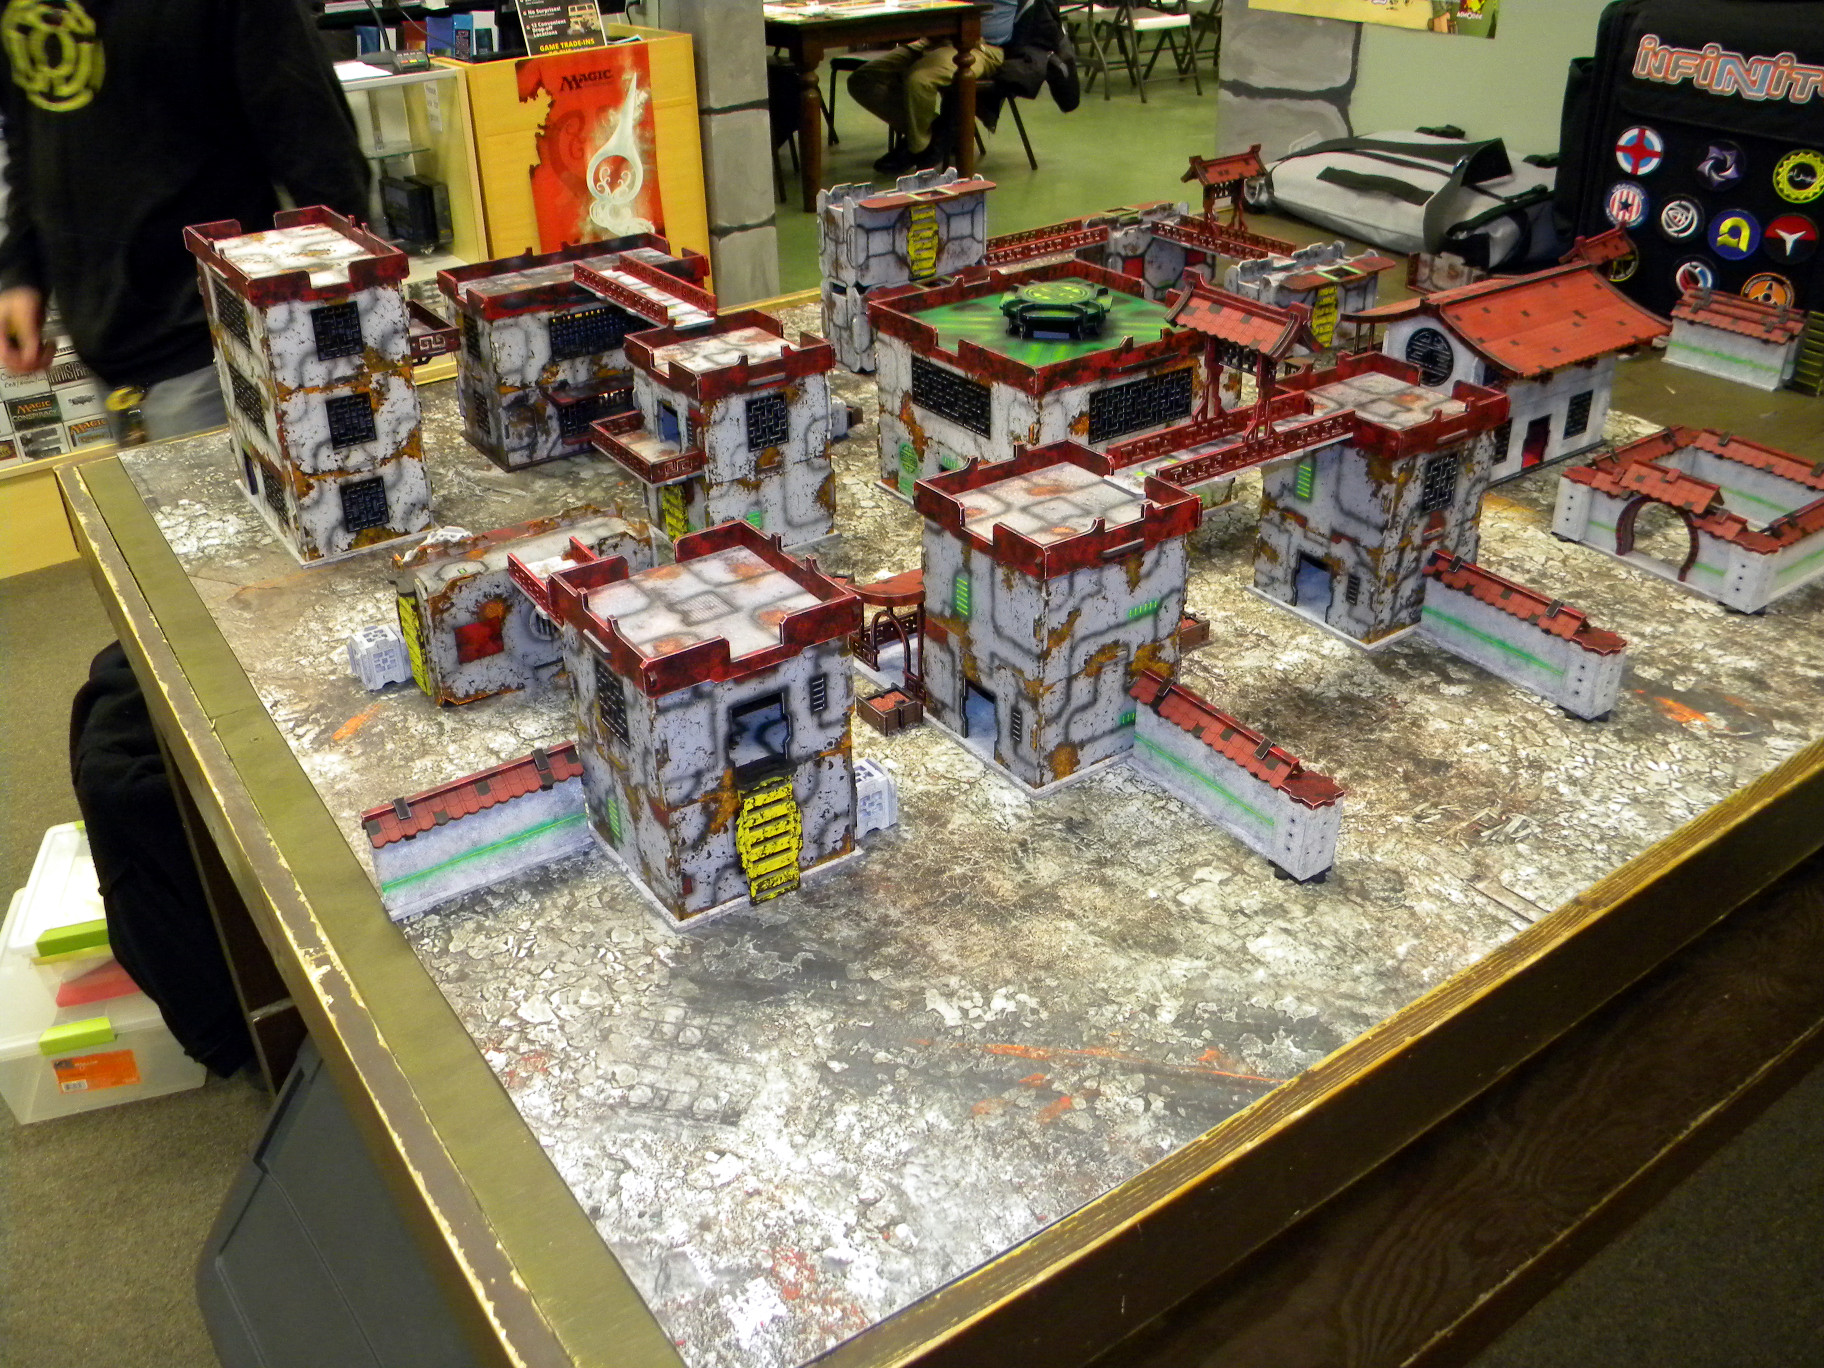
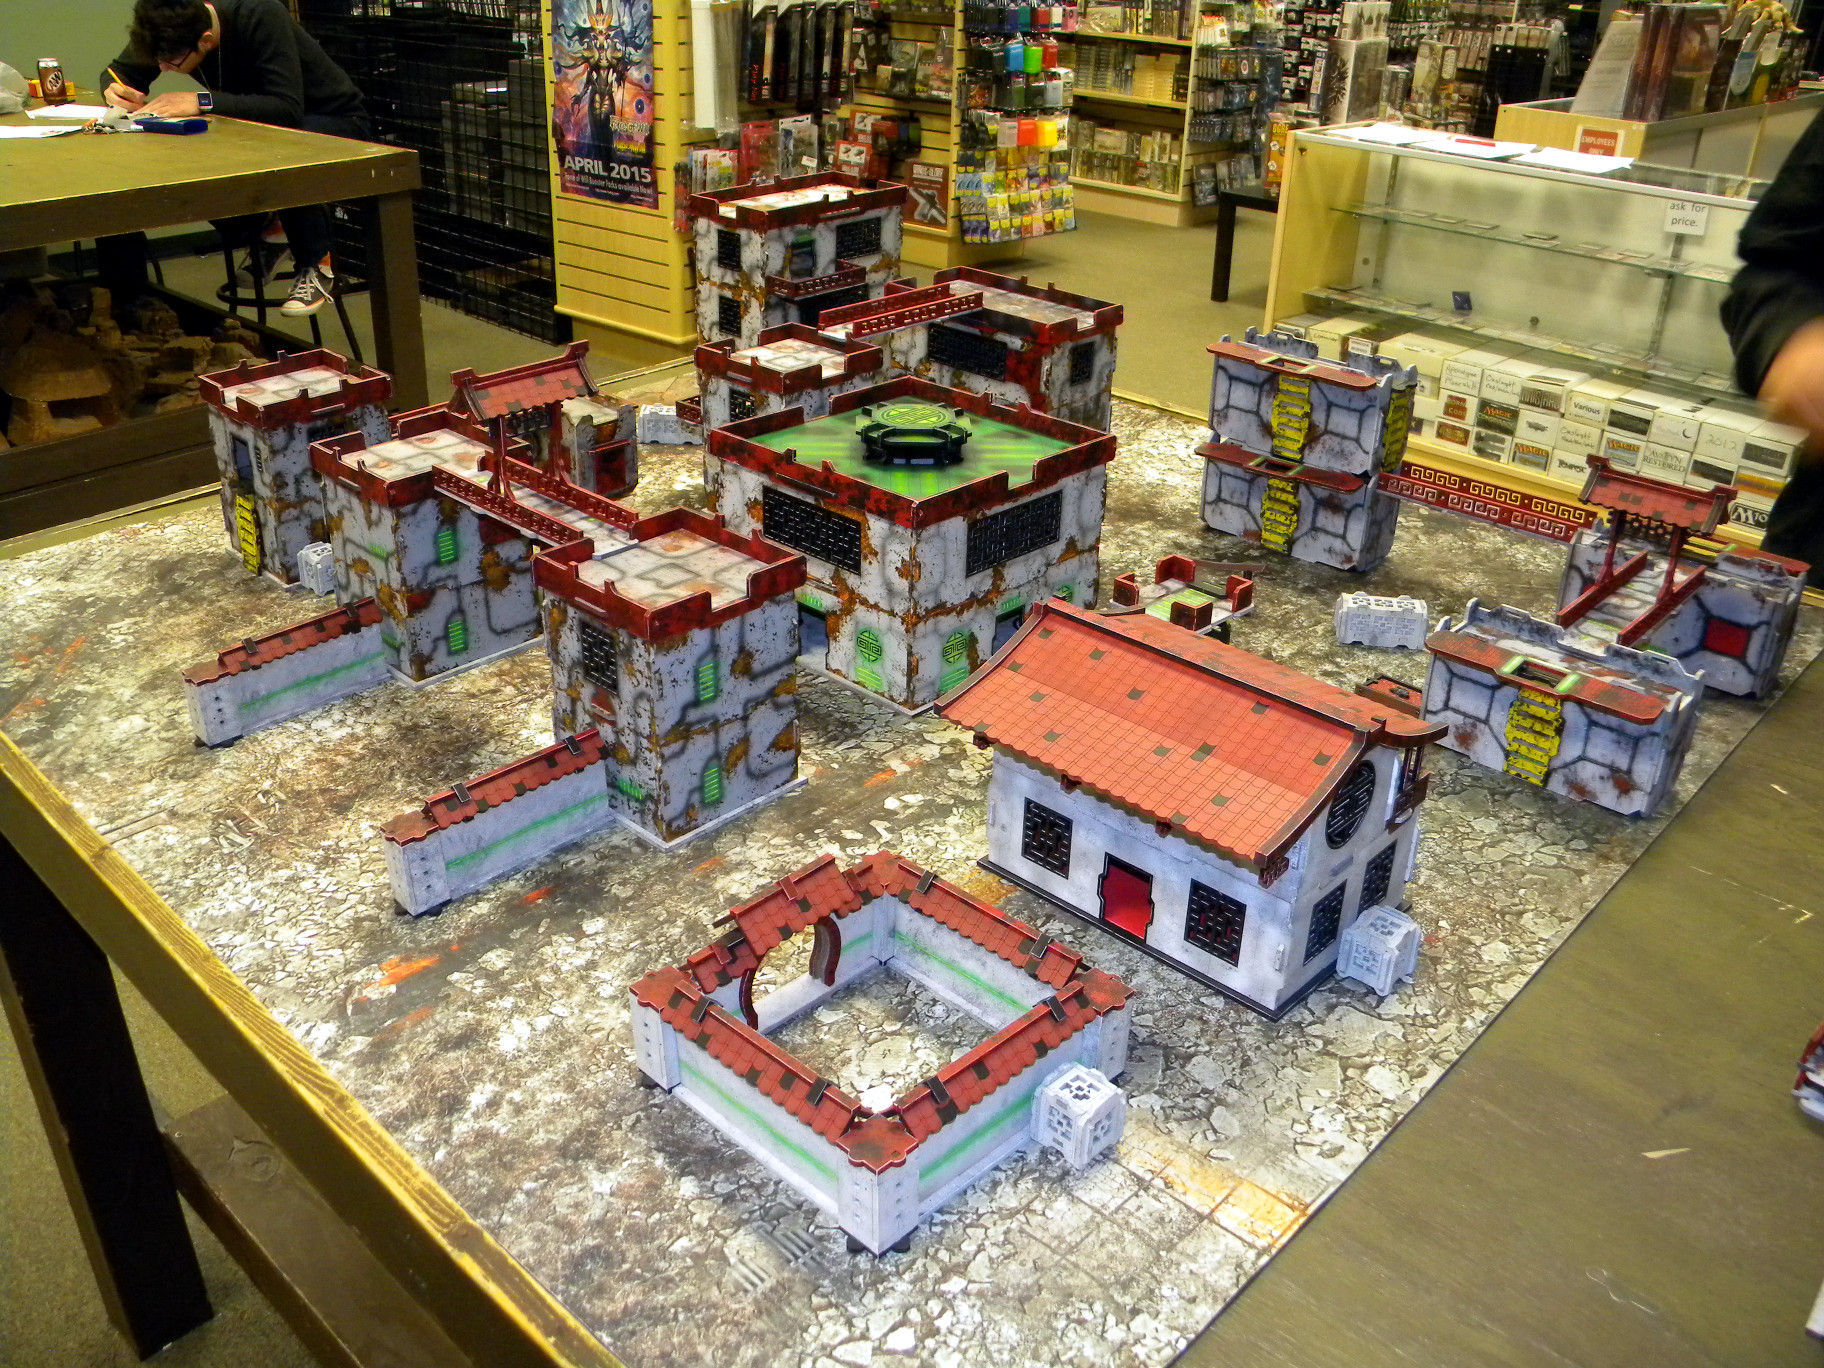
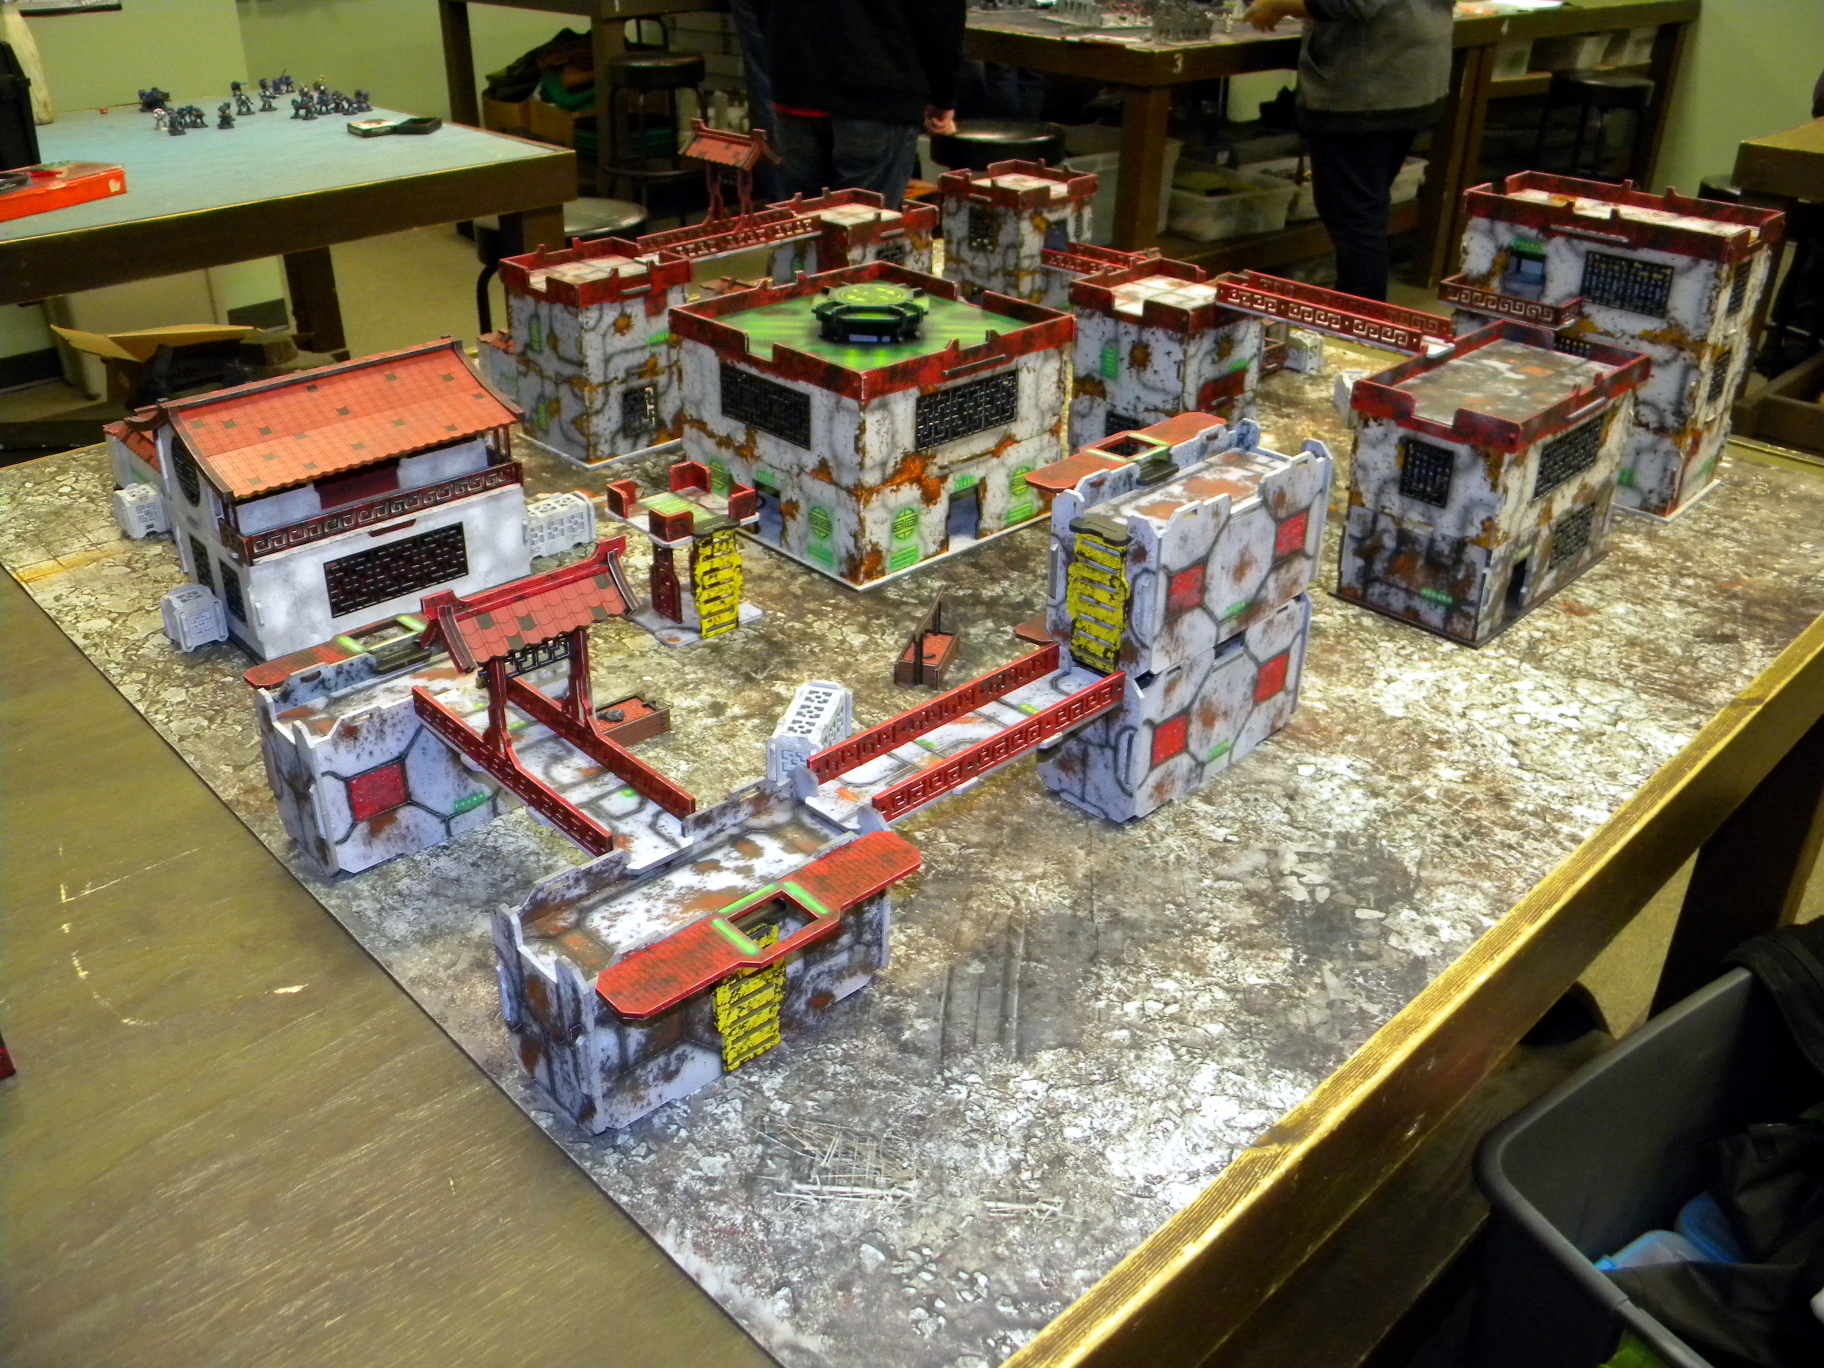
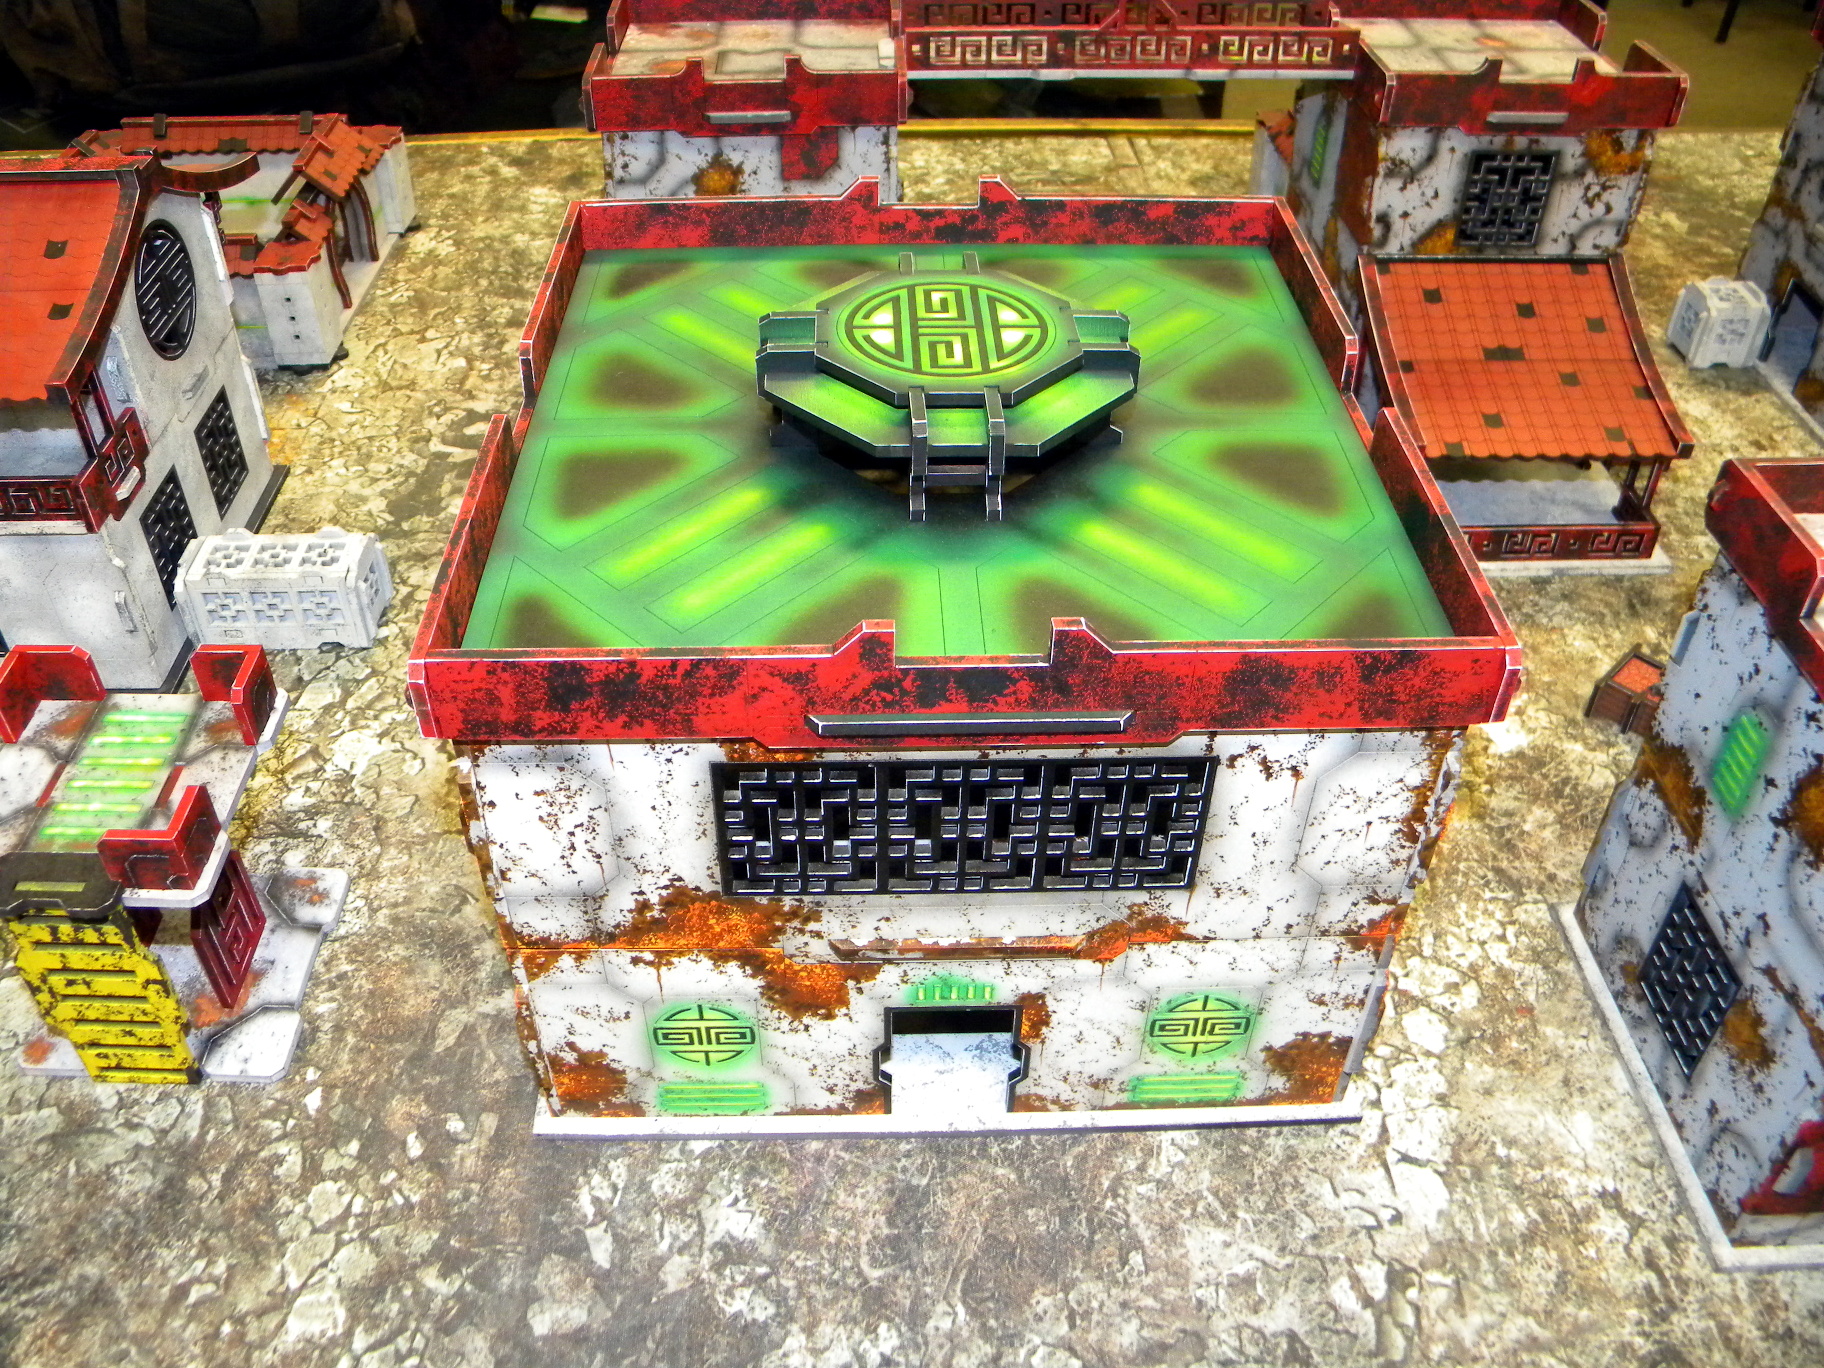
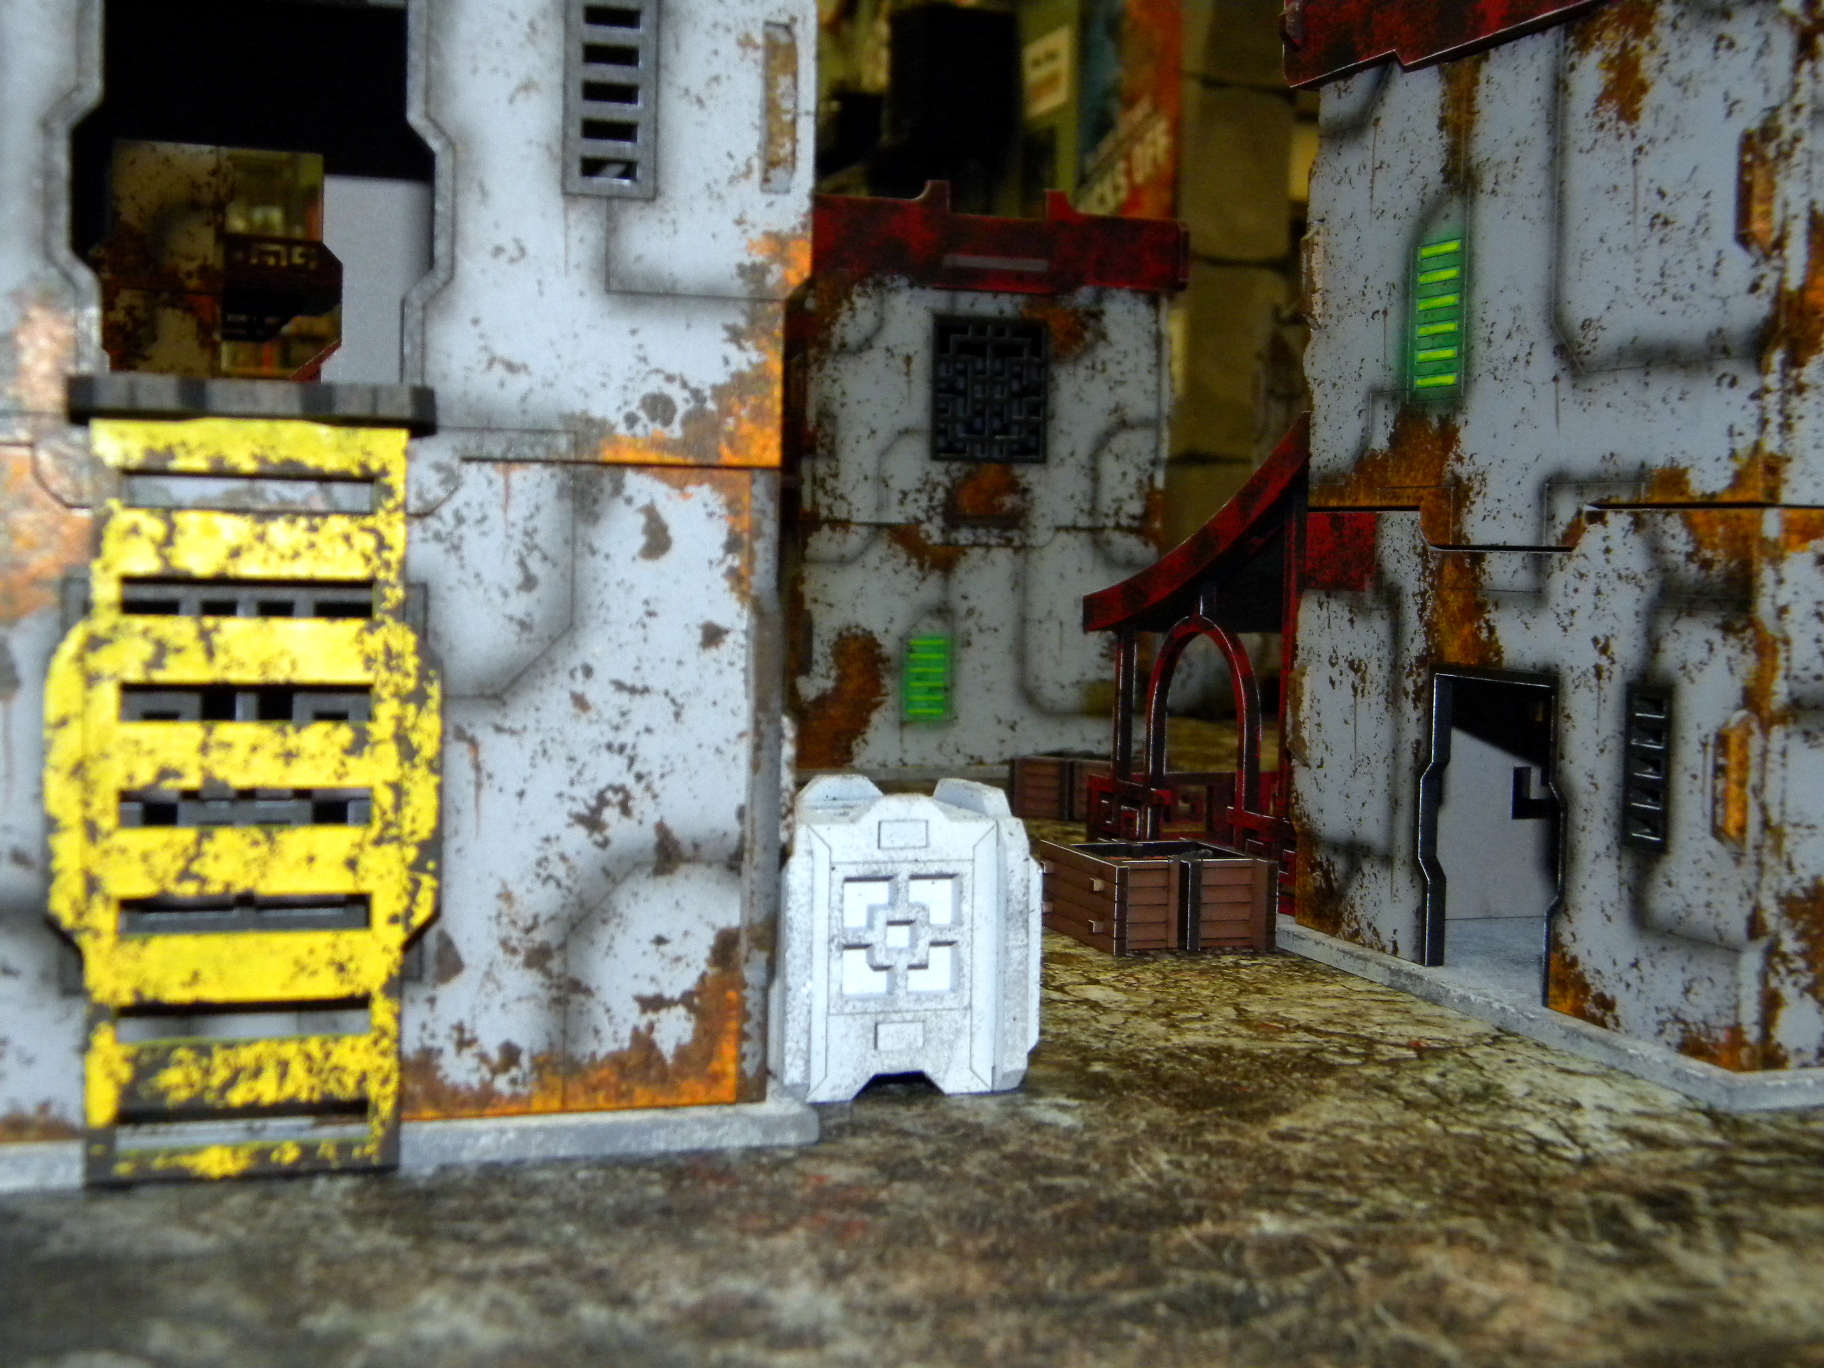
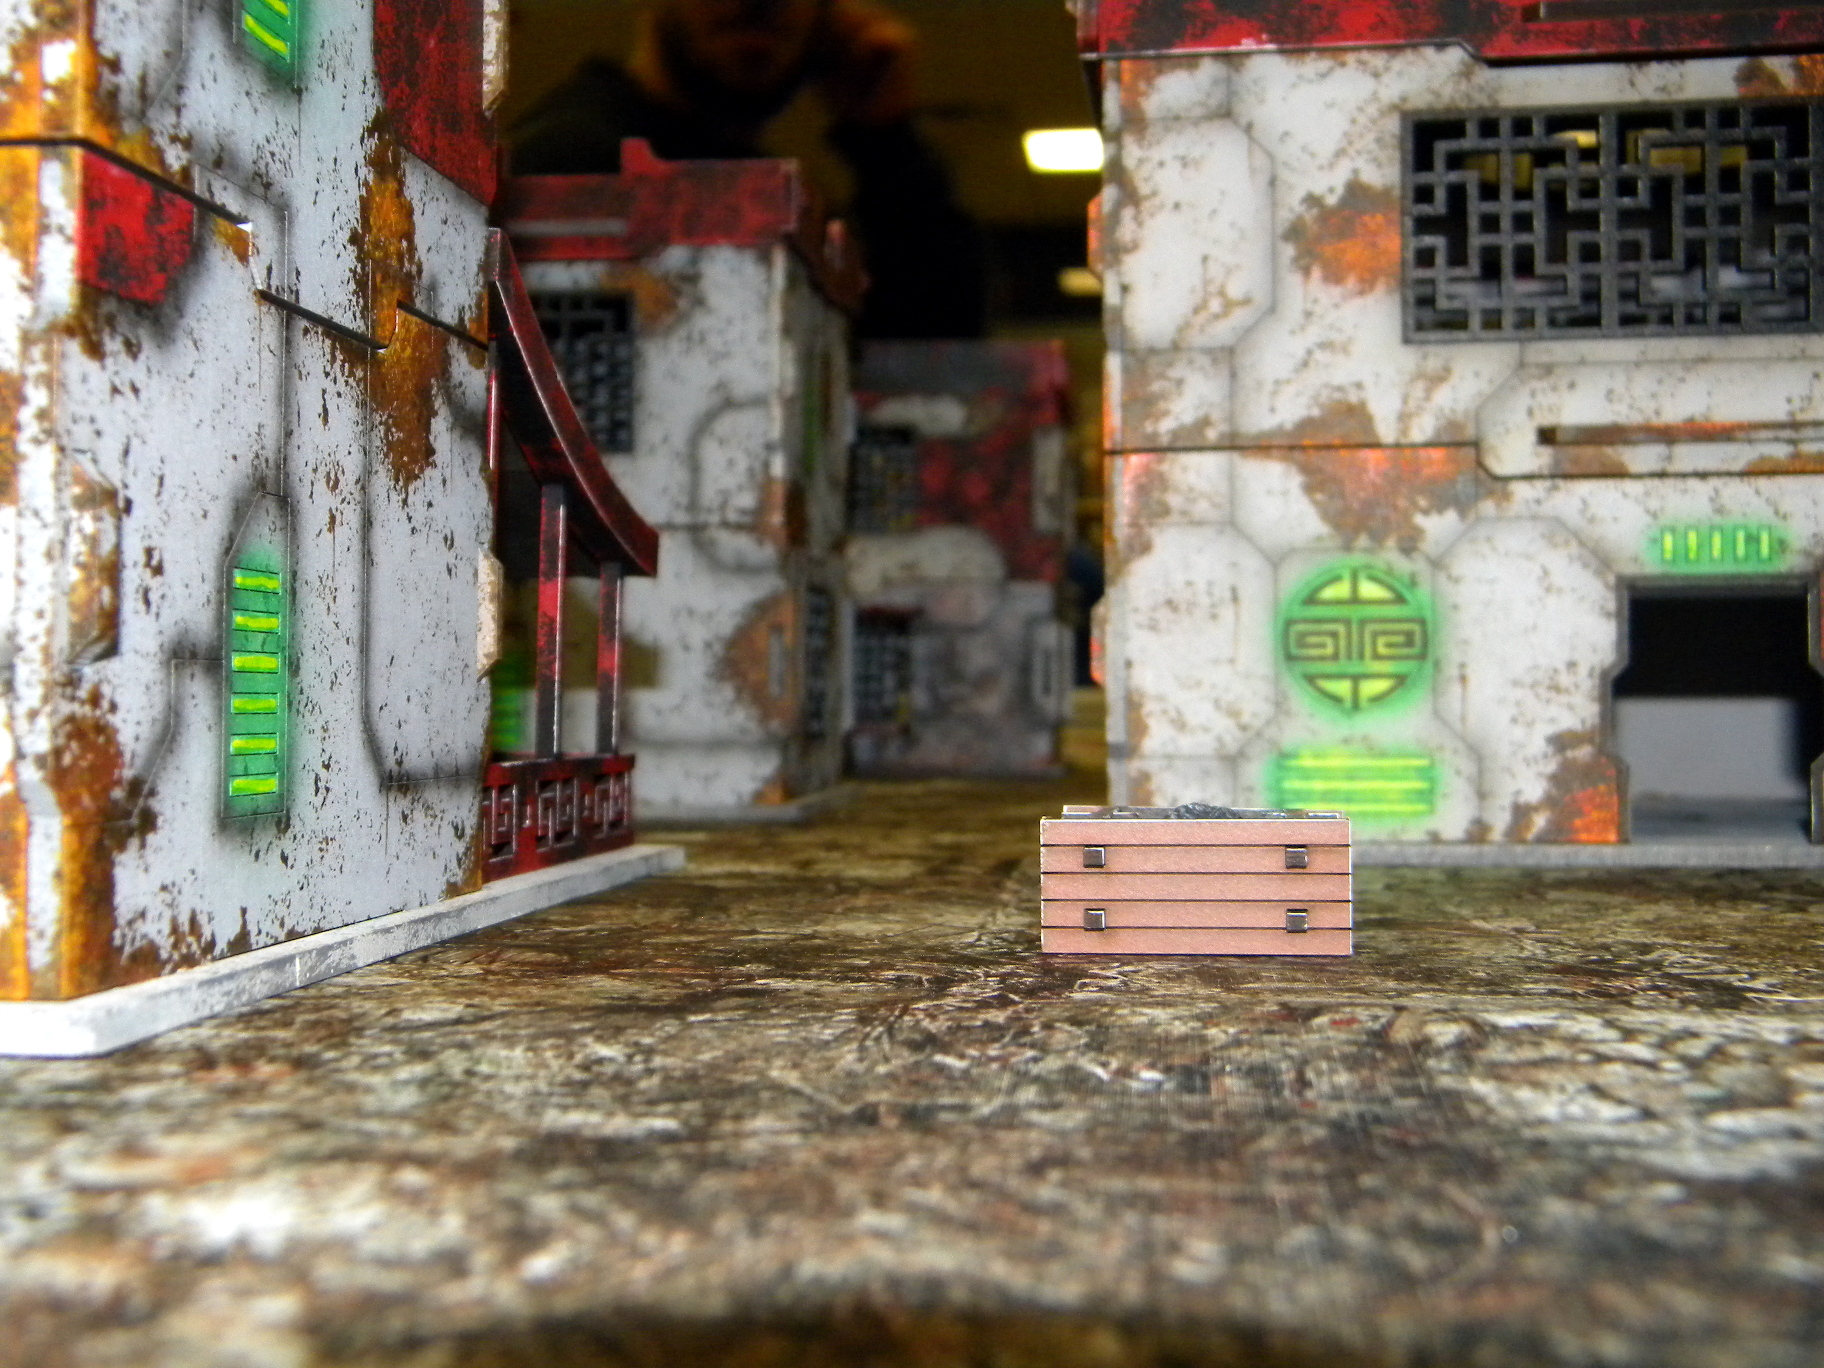
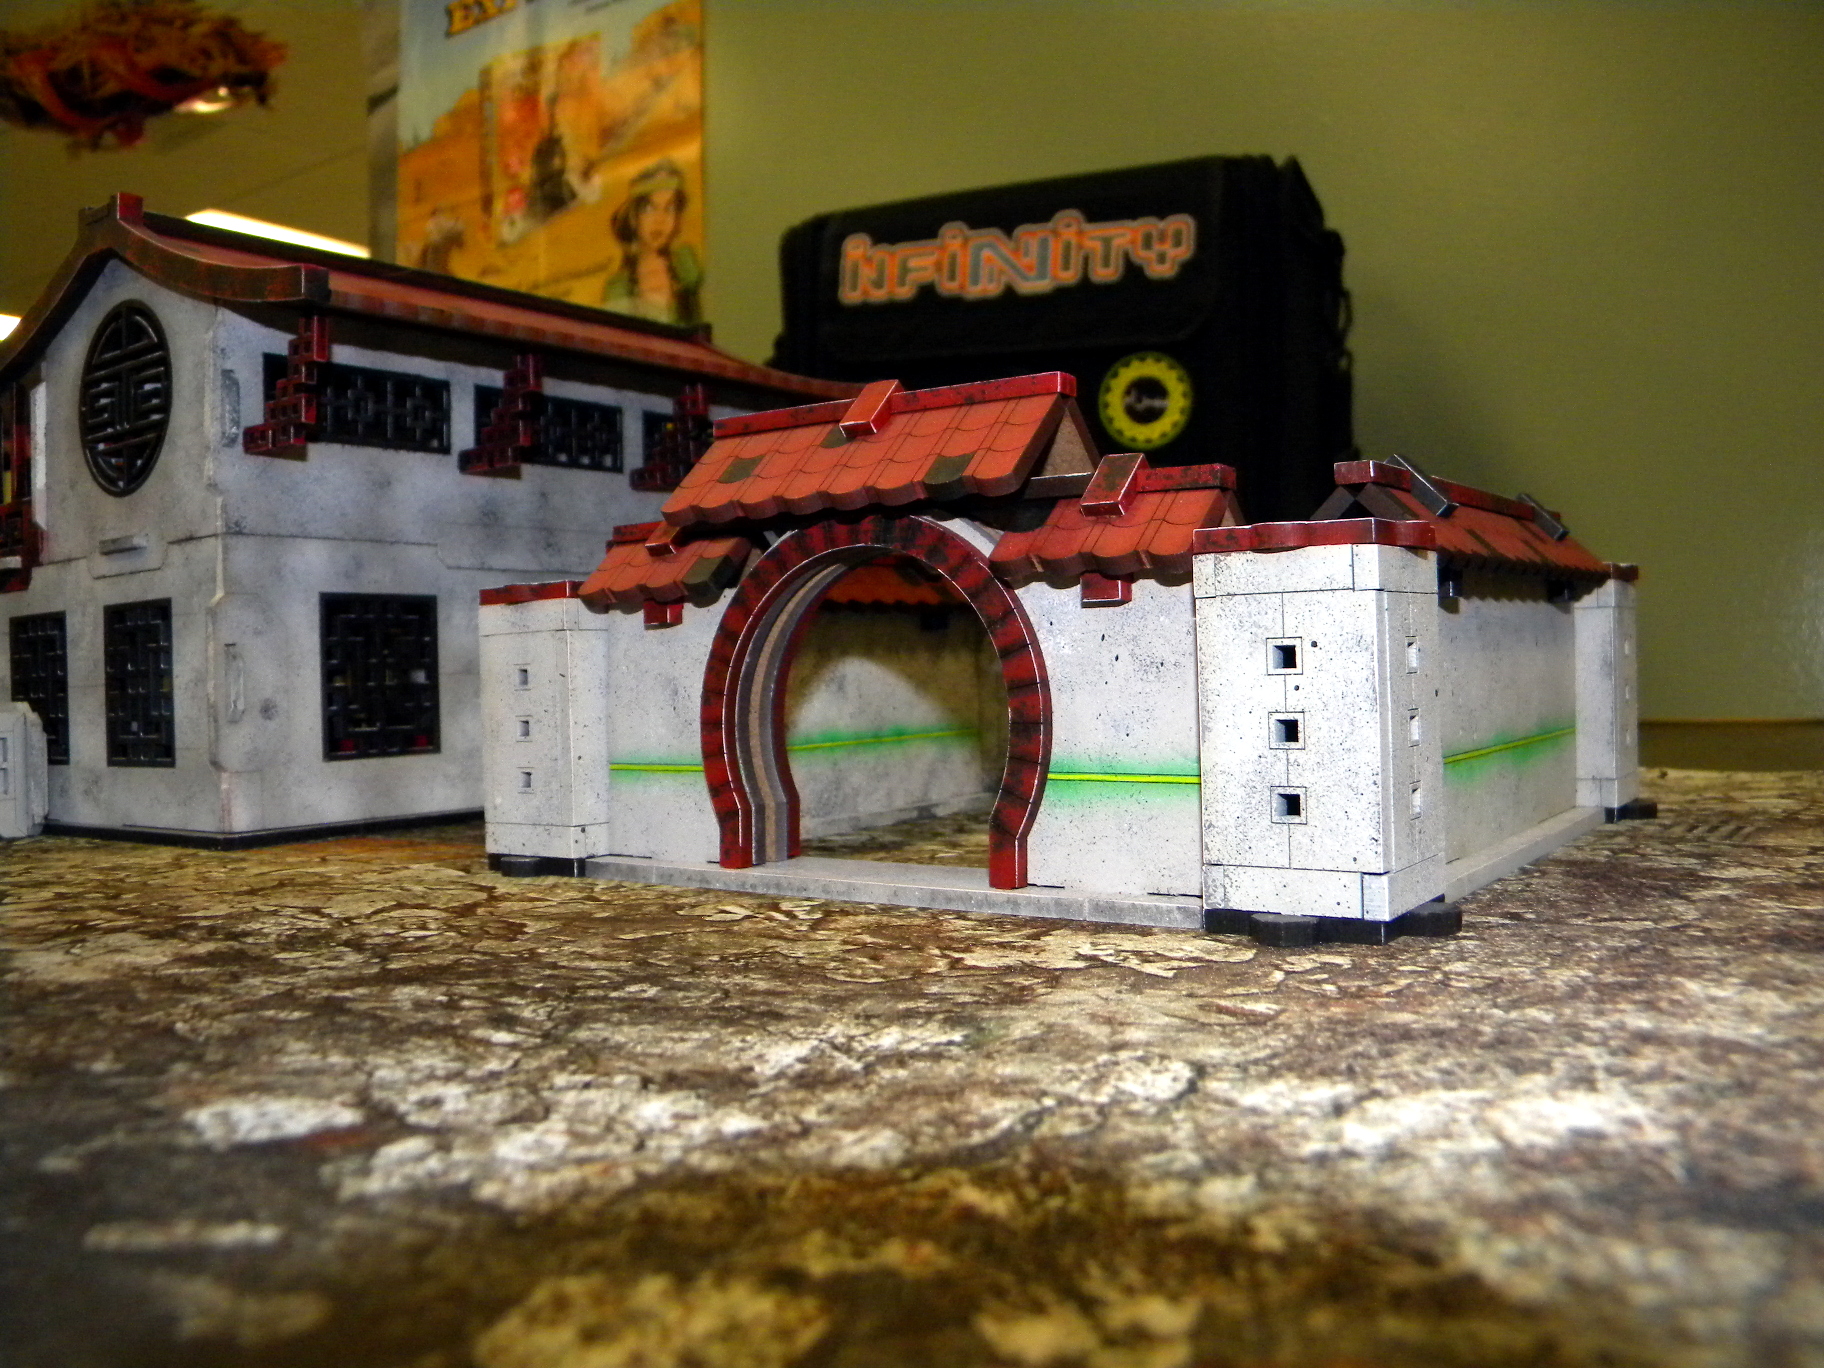
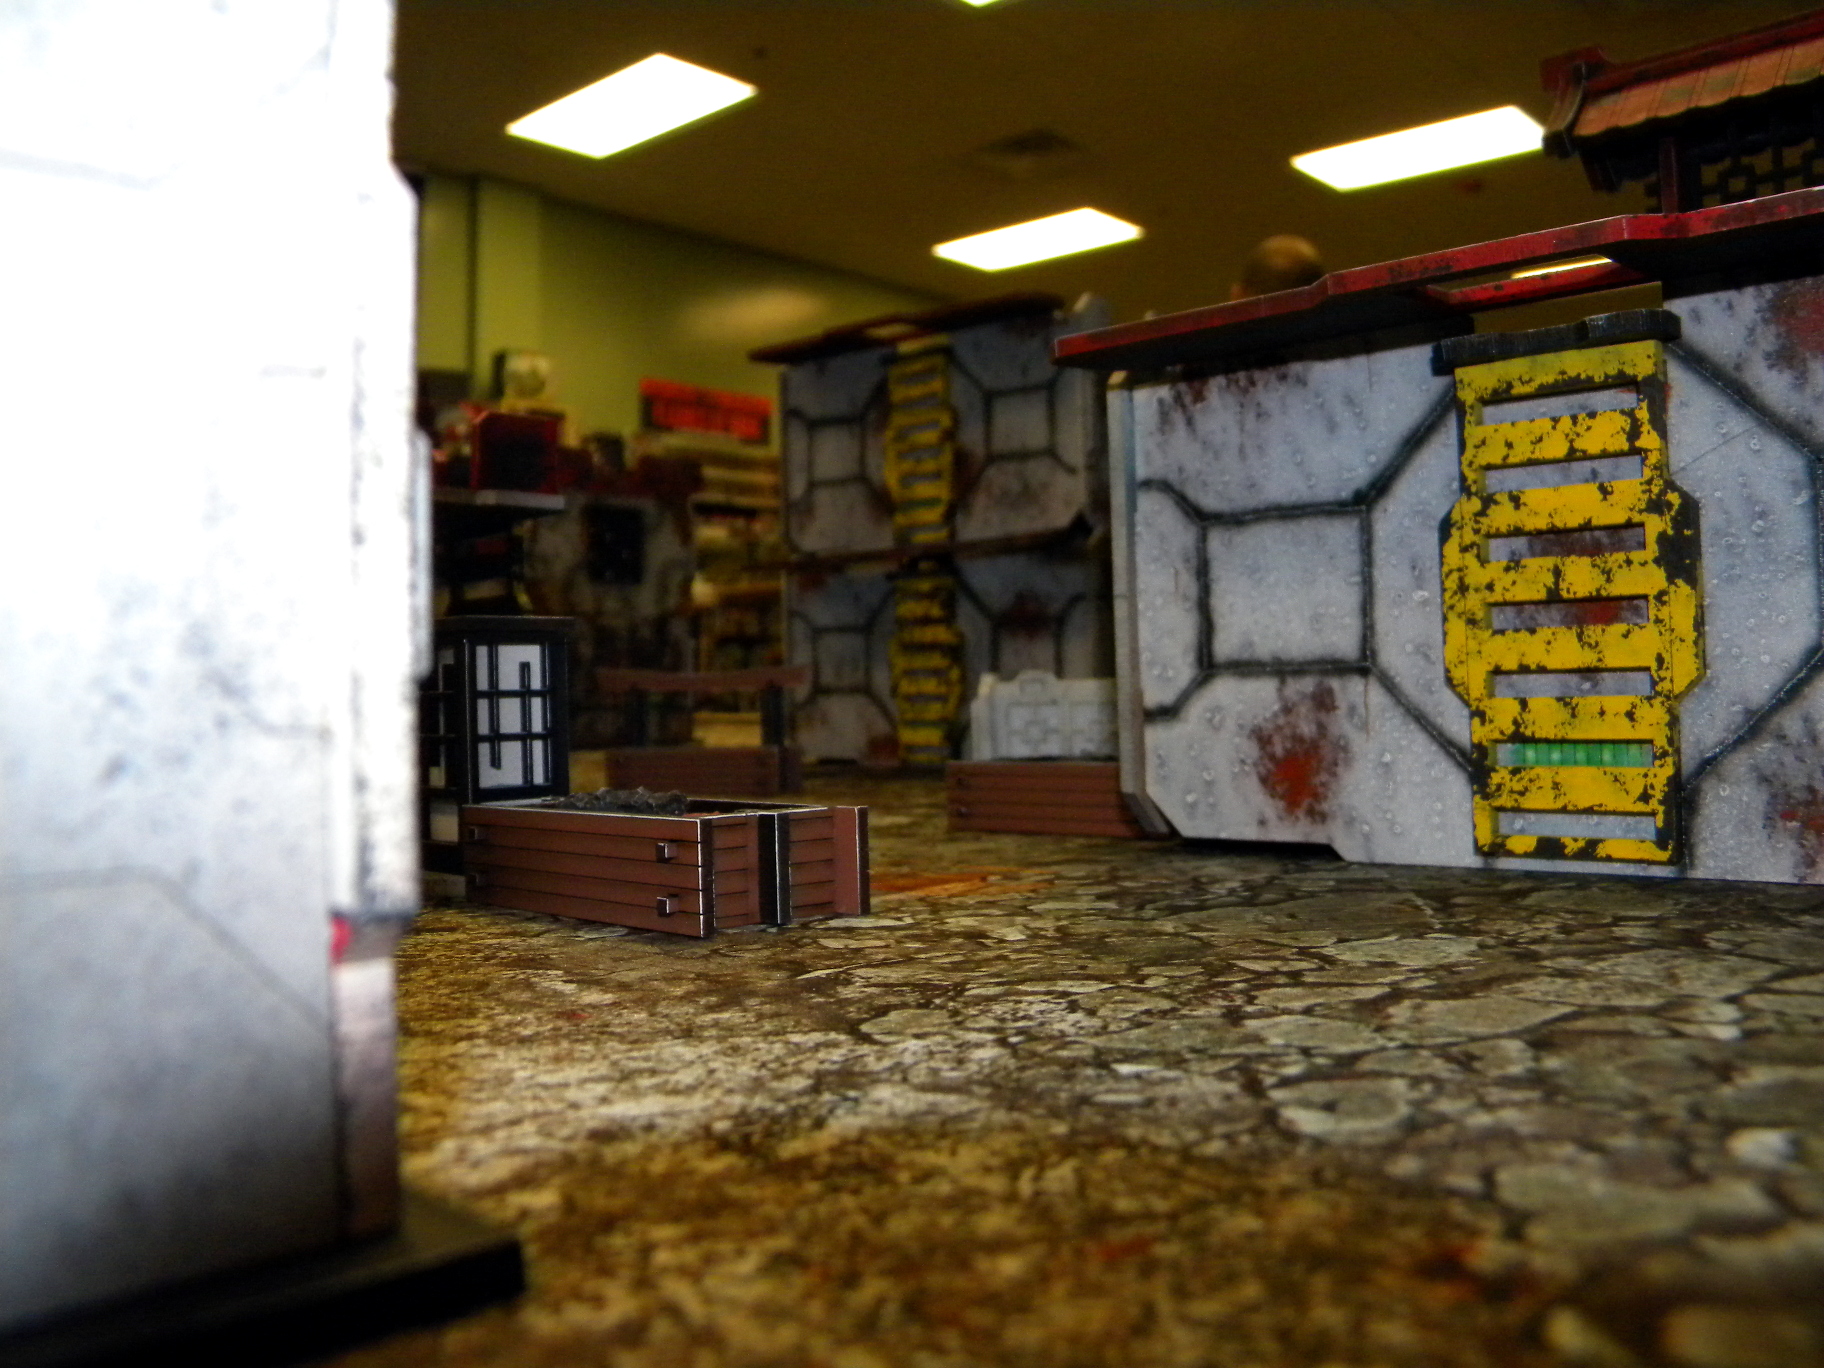
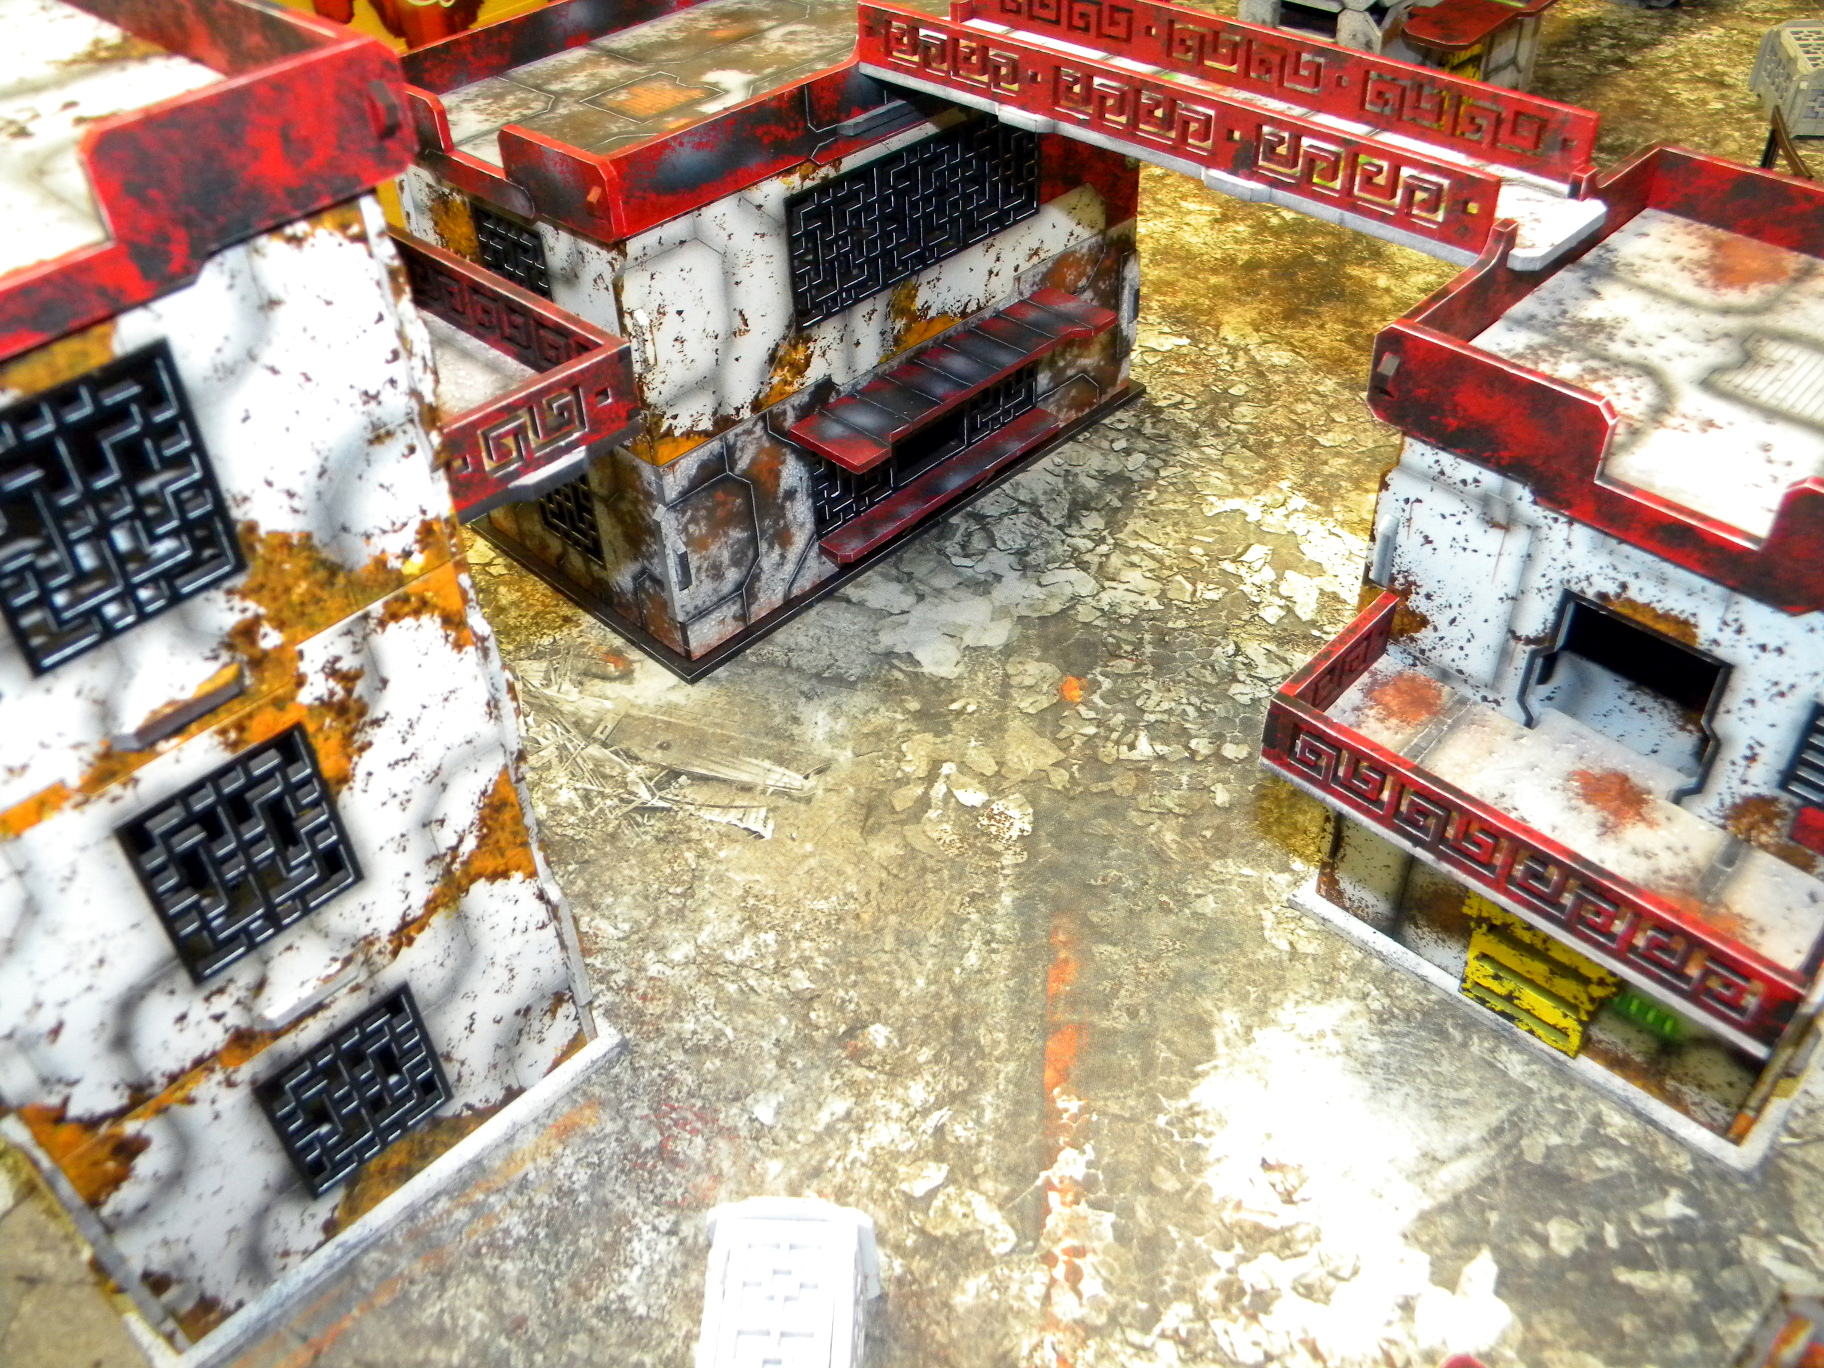
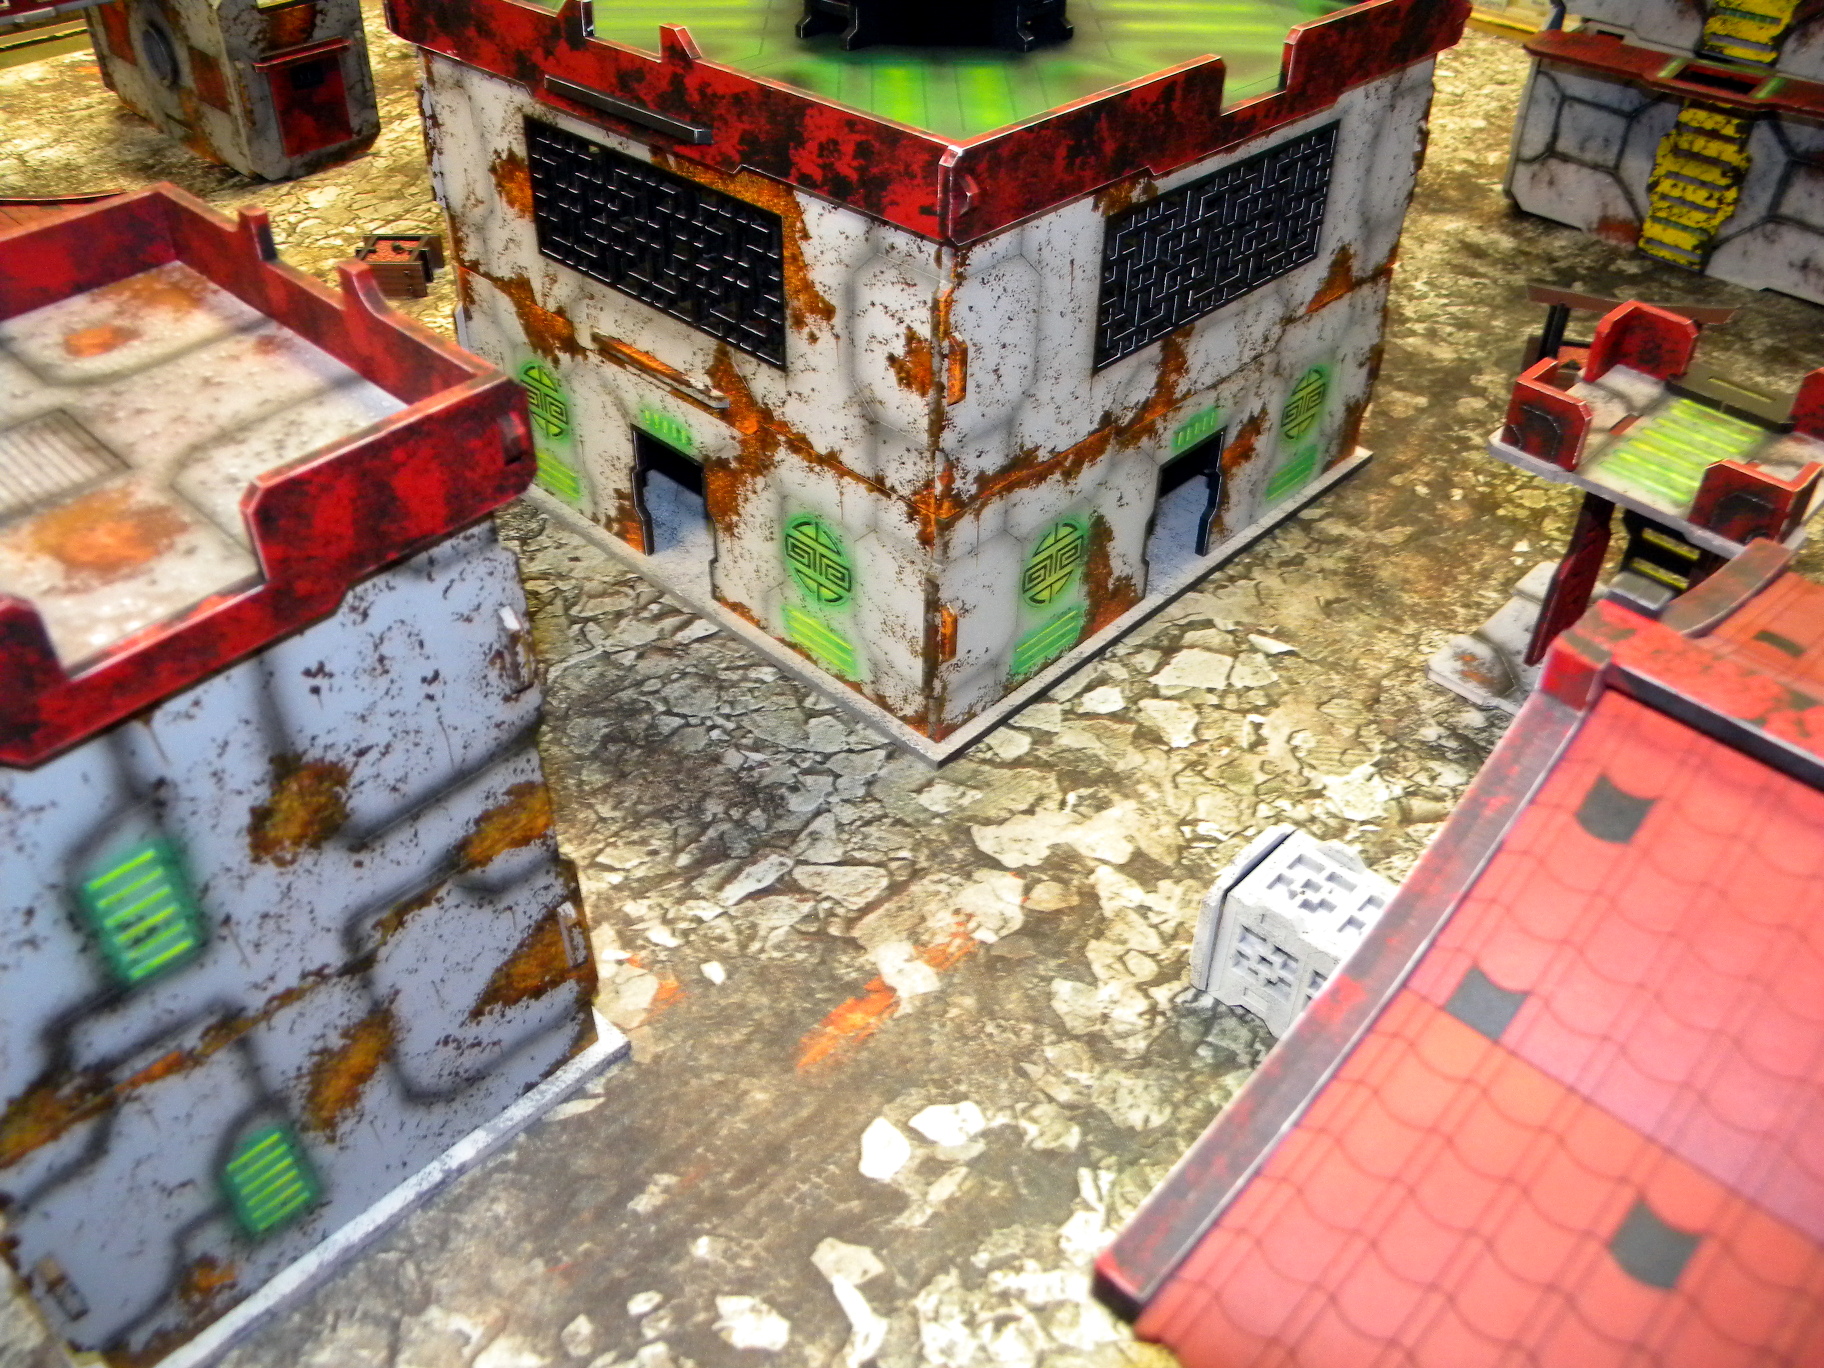
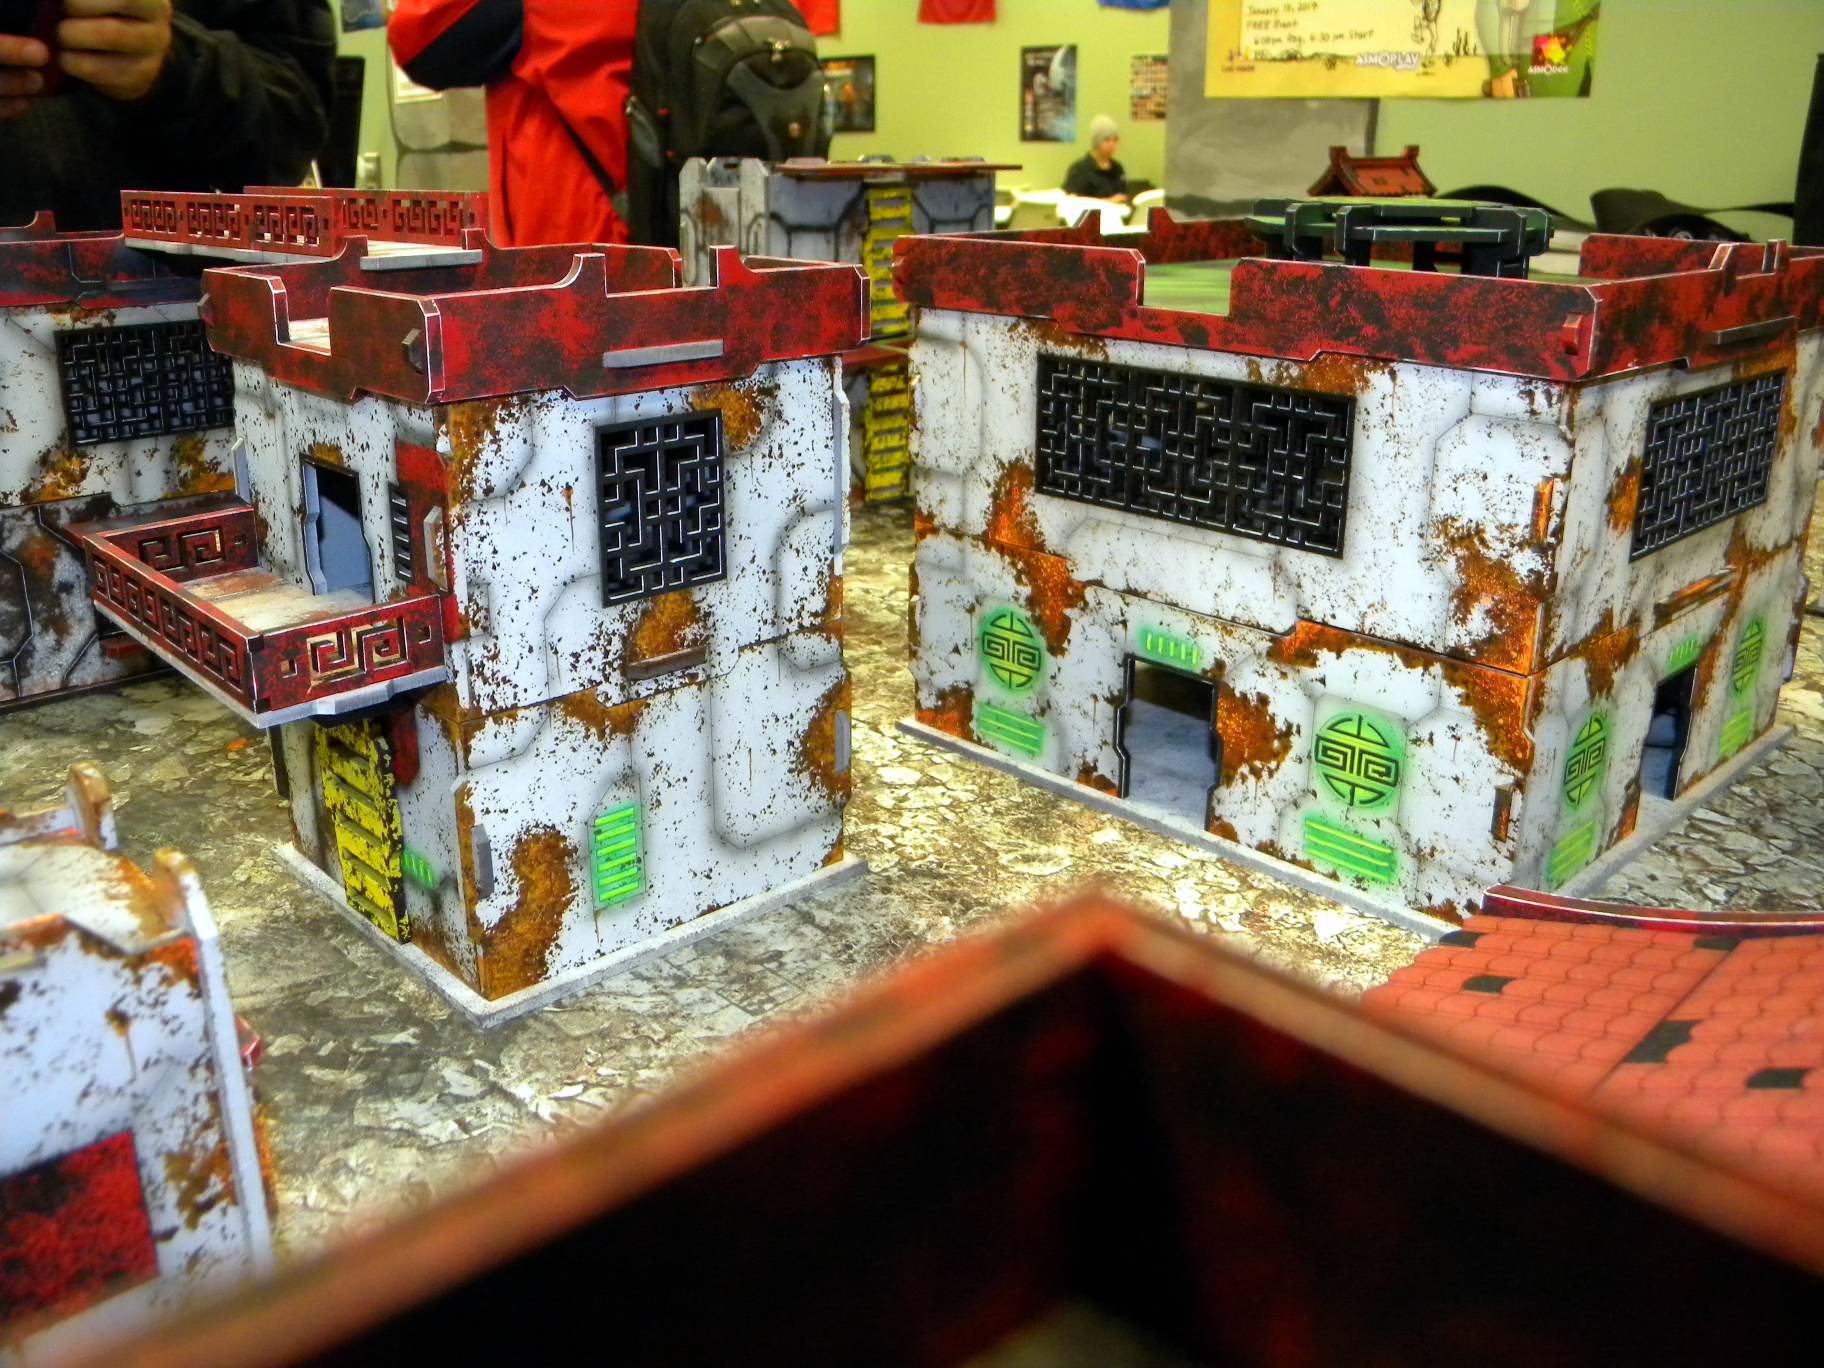
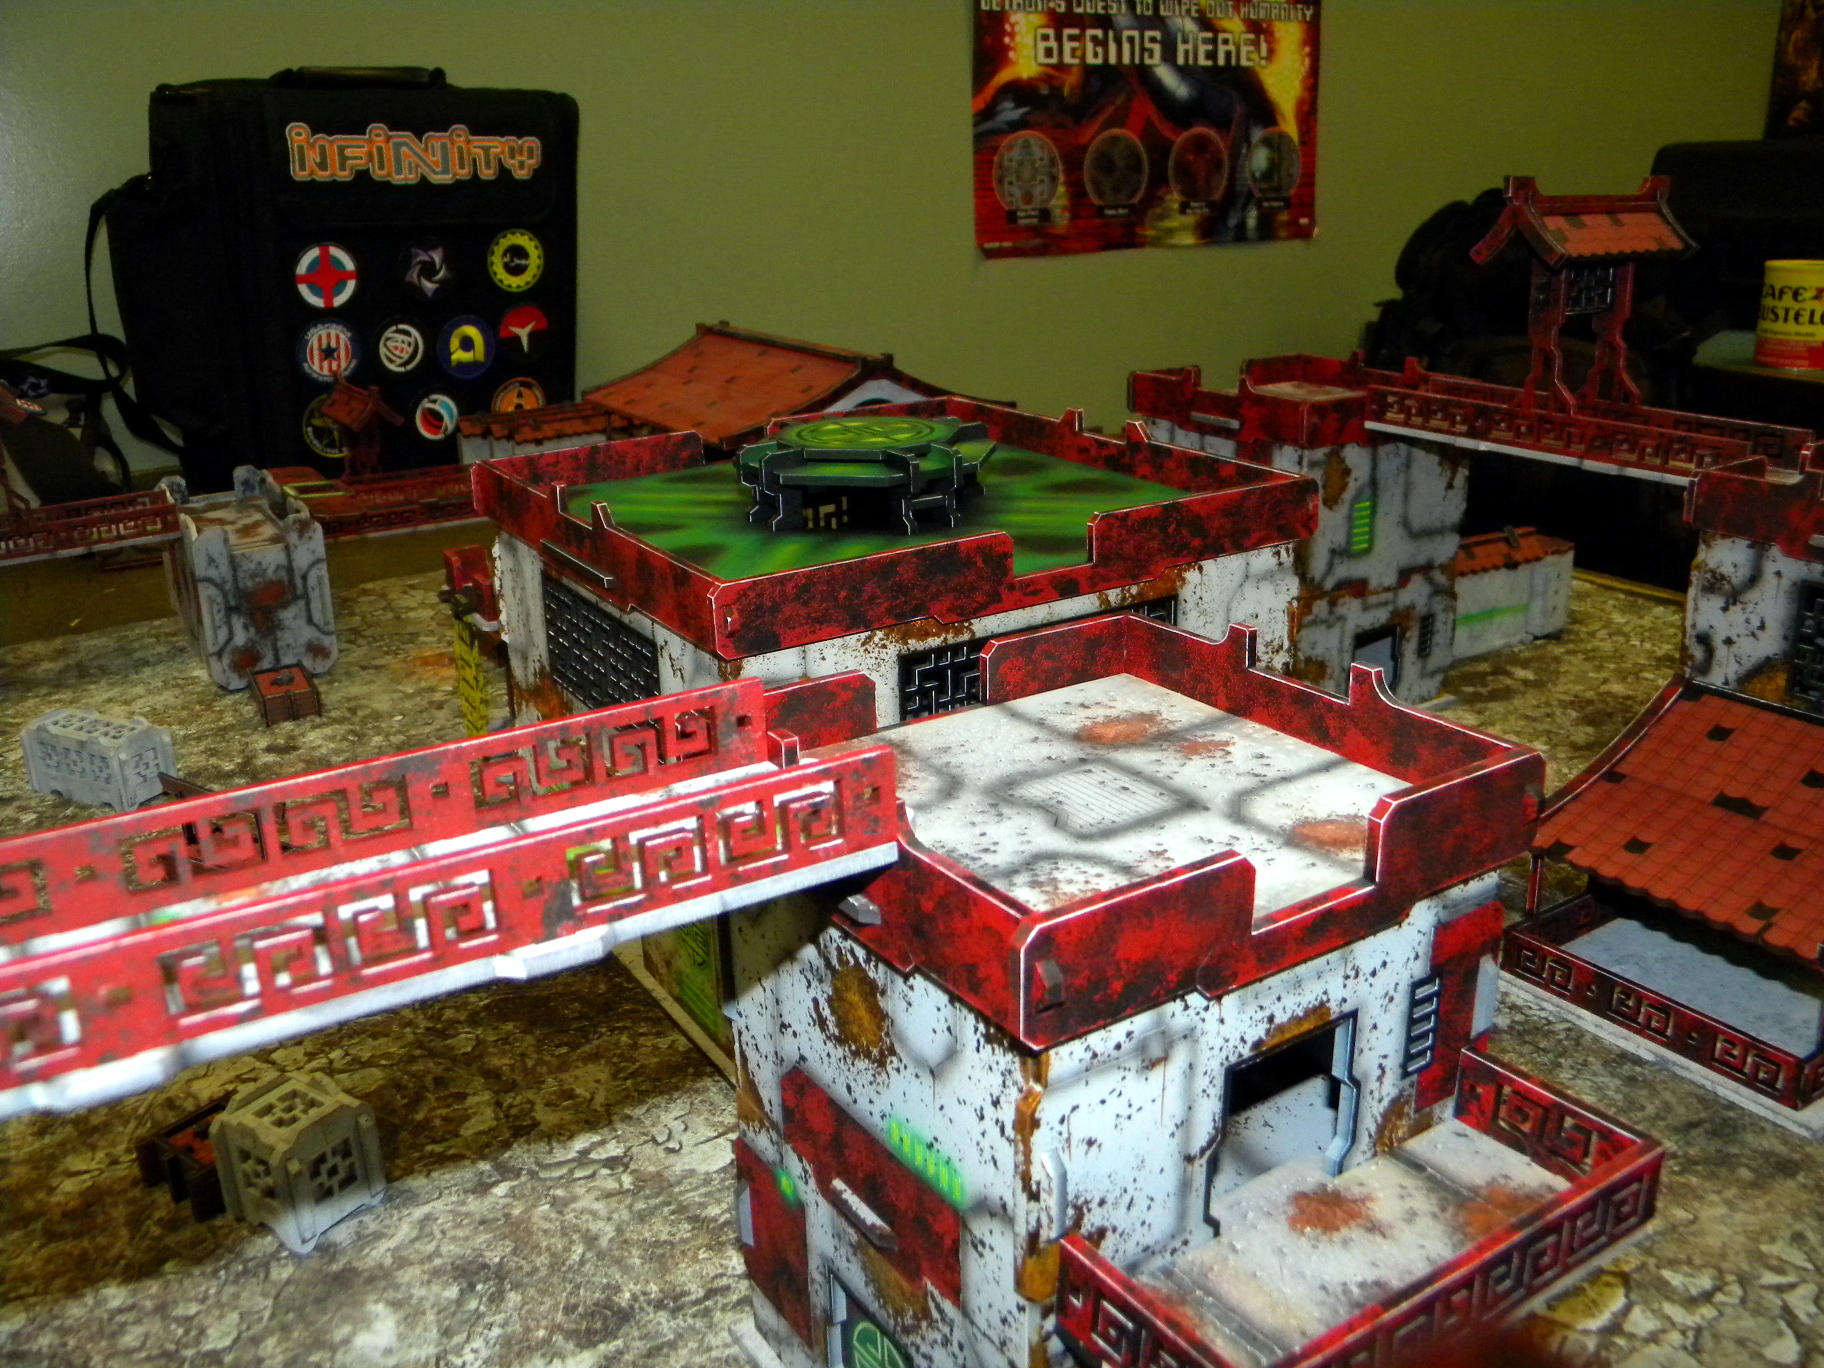
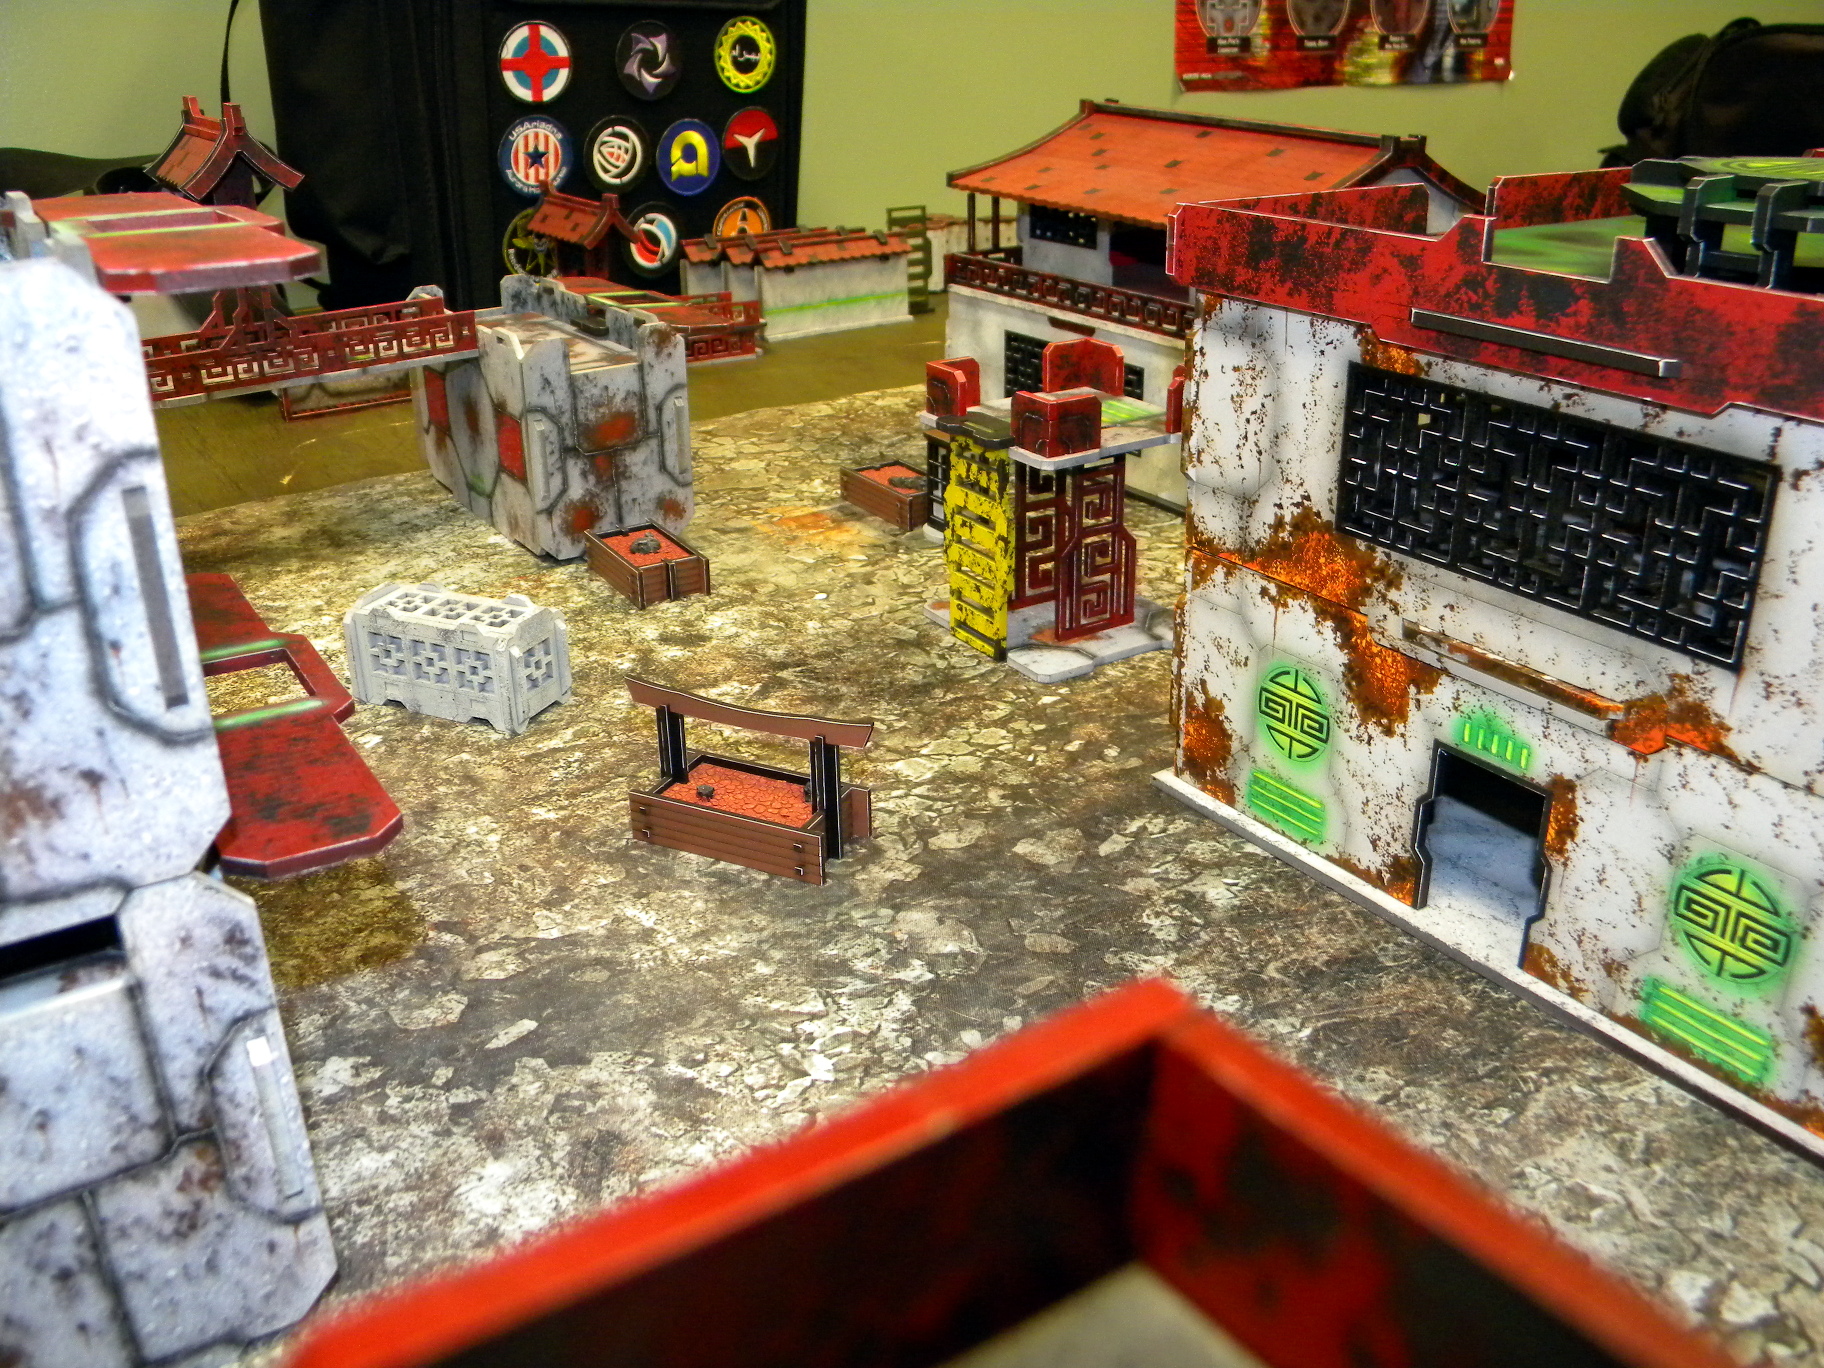
This is the project that got me back into painting again. I painted this table to represent a Yu Jing mining compound/facility. The table is from Wild Lands. You can find them on Facebook.
It’s the largest project I’ve painted since my Thokt Necrons. The whole thing was painted with my airbrushes, sponge/salt weathering, and touch of brushwork.
Feels good to be inspired again.
Shawn G. (SoI)
 |
 |
 |
 |
 |
 |
 |
 |
 |
 |
 |
 |
 |
 |
 |
 |
 |
 |
 |
 |
 |
 |
Hey people. I don’t know if anyone still follows this blog but I’m back. Again…
I laid off this hobby for nigh 2 years as I tried to figure out what I wanted to do as a hobbyist. Without boring you with details soaked in nerdy bitterness, I have ceased all activities with Games Workshop products.
Henceforth this blog will revolve around Infinity wargaming/painting. and terrain painting/building.
Feel free to hit me up with questions on my older work.
Shawn G. (SoI)
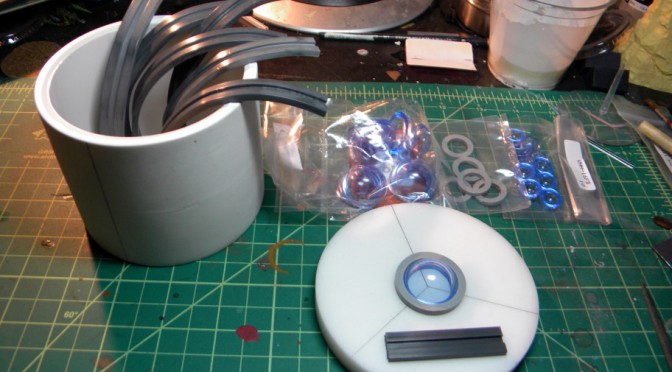
So anyone familiar with me is aware of my love for a good dice box. I’m always on the look out for one for my armies. I have two for my tomb kings; one I’ve shared and the other I’ve been sitting on for a few years. And I’ve one that is actually Imperial designed that I recast and painted to go with my Necron army. The second box while awesome, never settled well with me. The colors may match, but the theme is all wrong! And my neurosis would not grant me satisfaction until I found a suitable replacement. I searched and searched but never found one that was acceptable and years ago, 2012, I said to myself you’re going to have to build one. I never got around to it, and then I fell into my funk and everything went to the wayside. Till now.
Last month I started conceptualizing this dice box project. I sketched some ideas out on paper (badly) and ran it past some friends. After some re-working I started gathering parts.
First off it needed to be round. I went digging around the plumbing isle in Lowes and found a 3” repair coupling that fit the role perfectly. After a bit of sanding the piece was perfectly smooth. I did have to grind some ugly parts off and it will need some additional filling/sanding closer to the end but so far so good. I started hunting for the parts add onto the frame. Off to Plastruct!
After perusing Plastruct’s catalog for several days, I built myself a nice list of parts and made my order. Also need a lid and that took several days to find. I found this company, MSC Industrial Supply, which sold plastic disks perfect for my project. I piced up two 4” plastic disks. After they arrived, only took a day, I measured the coupling and it was just shy of 4 inches. Damn my luck. I’ll just have to fix that flaw in production.
It took another few days for the Plastruct order to arrive and by then the lid disk was nicely sanded and line divided into three parts. I also divided the coupling into three parts to make adding the plastic elements easier.
Time to begin production!
I knew a round design was going to be a pain, I had no idea. Bending that plastic was a chore that took hours. First I boiled some water and dumped the pre-cut pieces into to soften them up for bending. Little did I know that 100 degrees was not hot enough to work this plastic. I need to go HOTTER!
The oven was right out there was not way I’d be able to keep the parts from melting if it got to warm so I decided to give my wife’s hair dryer a run. The air that rushes out of the business end is really hot on the highest setting and I bet it would warm the plastic up perfectly if I was patient and careful. It took a little trial and error, but I managed to get 6 pieces bent around the coupling frame with some strong clamps. With that done, it was time to start to glue.
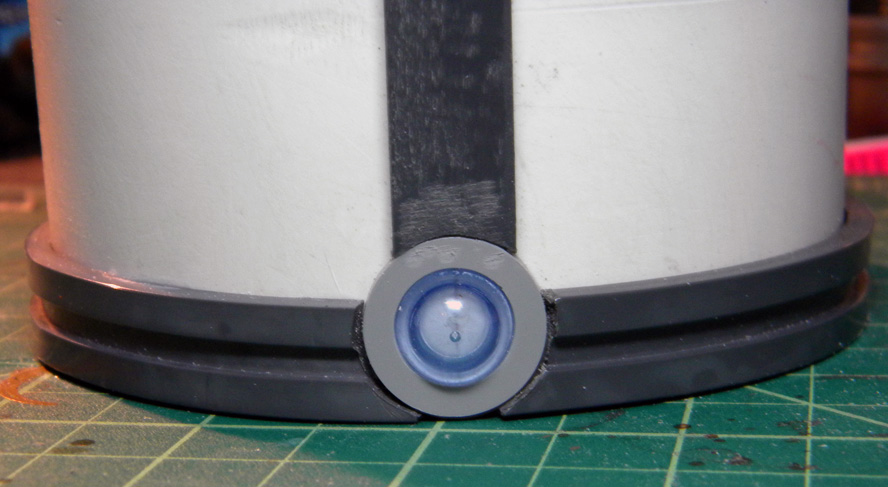
I got the first elements on with no problem. The hard part was getting the bent parts around the bottom of the box. I used my dremel and a round sanding bit to get the parts to fit around what I call the glowing elements. It was pretty damn difficult to get it right and I used of four of the six parts I made getting it right. I glued them down and clamped it tight for a few hours. I had to finish it one section at a time so this phase took a day or so. ~ I was so busy working on this part that I forgot to take pictures. This is a close-up the finished work. ~
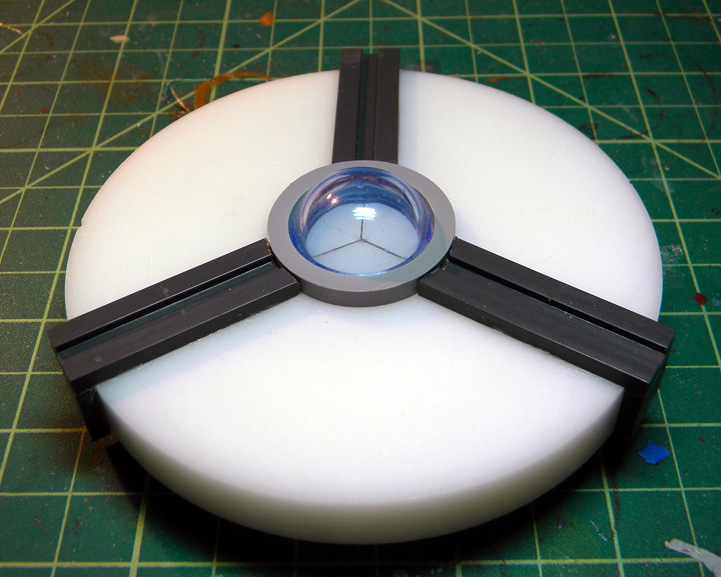
The lid was easy. The pre-measured lines made adding the parts a breeze though I did have some trouble getting the vertical bits to line up correctly. I had to tear a part off and re-glue it because it was crooked. You can actually see it in the pic above.
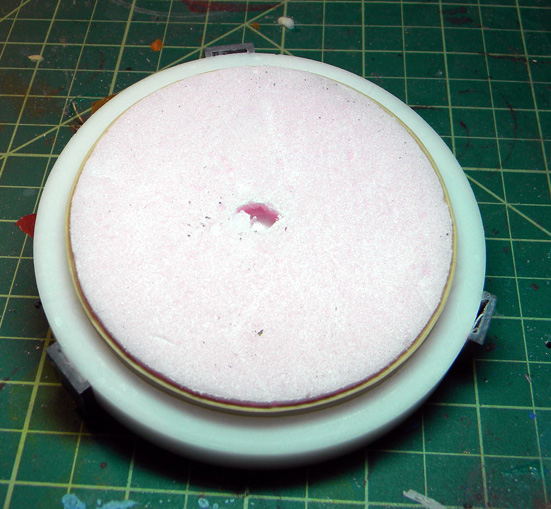
Getting the inside of the lid has been a real trial. I could not for the life of me find a part to fit in there correctly. I settled with using some foam and some rubber bands to fill the gap. I’ll be casting this whole thing when I’m done so those parts will blend seamlessly.
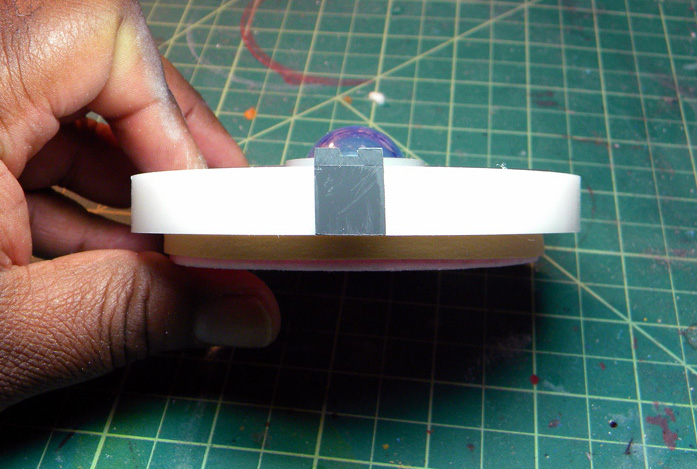
I added some ½ inch plastic strips to the top of the box. These were not too hard but I did discover that my measurements for trisecting the box were off by about ¼ of an inch. Never did this before so I think that and acceptable degree of error.
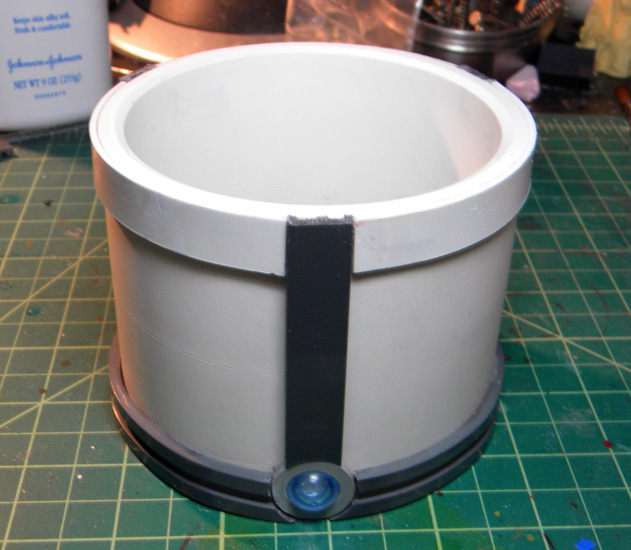
Here’s the whole thing so far. Not too bad. I’m no sure on the lid as it looks like a replication of the top of the box. I don’t know what I’ll do about that at the moment. I’ll just continue with production and fix that design bug later.
Please let me know what you think so far. Feedback is very helpful!
Shawn G. (SoI)
Greetifications Upon Ye!
So I haven’t updated this blog in a few weeks but I have been busy. I managed to finish all the models we needed for Adepticon and we went and had a blast. I think I’ll making that an annual event from now on. I may go to the NOVA Open this year but I’ve yet to make up my mind. If I do it will be for the Narrative. I’m done with the GT events.
Anyway, here’s what I’ve been picking at lately:
Forgeworld Tomb Stalker
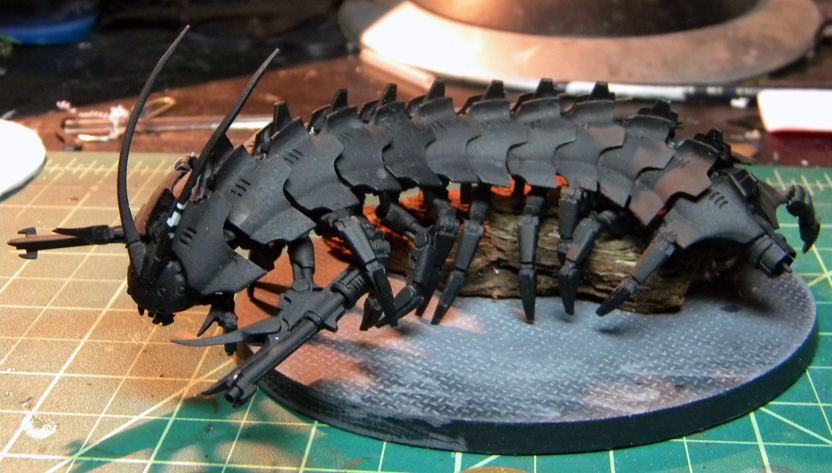
I built this model back in 2012 and never finished it. Now that I’m in the process of rebasing my army (up to 32mm), I’ve pulled it out of cold storage and will be slapping some paint on it. I think it will go really quickly as I’ve incorporated my airbrush into my paint scheme and it’s cut my completion time down by a considerable margin. I have a few things up in the air at the moment but I’ll be finishing this model soon. I just wish the rules for it weren’t so terrible…
Necron Obelisk
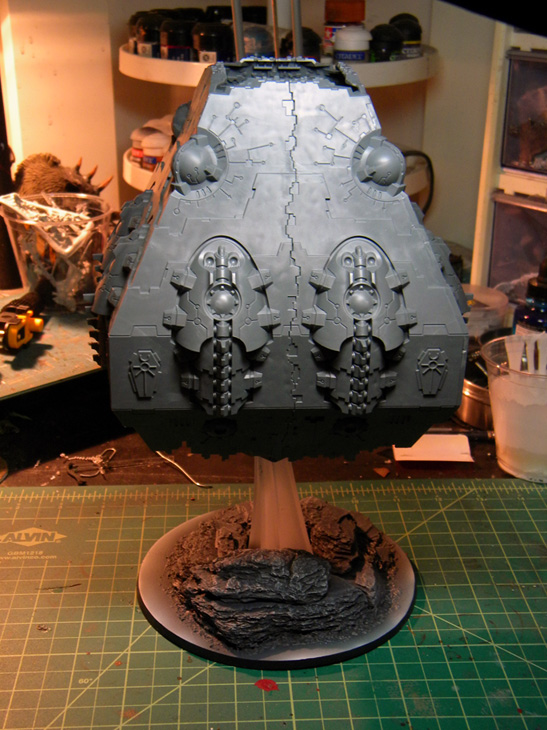
I’ve wanted one of these for years and the wife gave me the go to buy one a few weeks back and I was cheesing pretty dam hard. It wasn’t too hard to build (80% done), and once things settle down this will get painted. After the stalker I believe. I gave it a 120mm round base in my new Frozen Wasteland theme. It just needs snow to polish it off.
New Frozen Bases
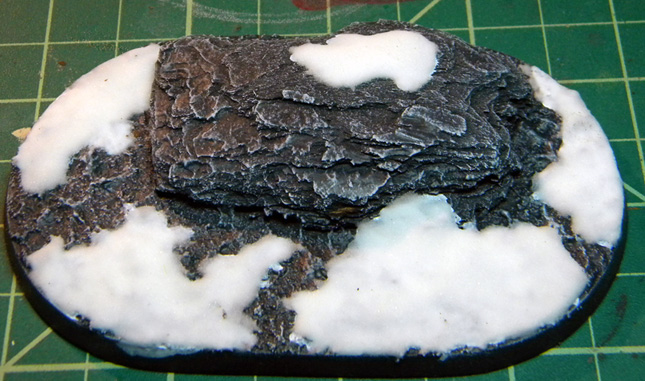
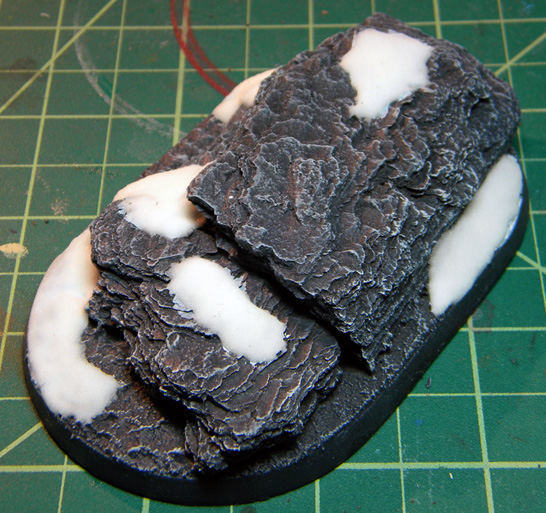
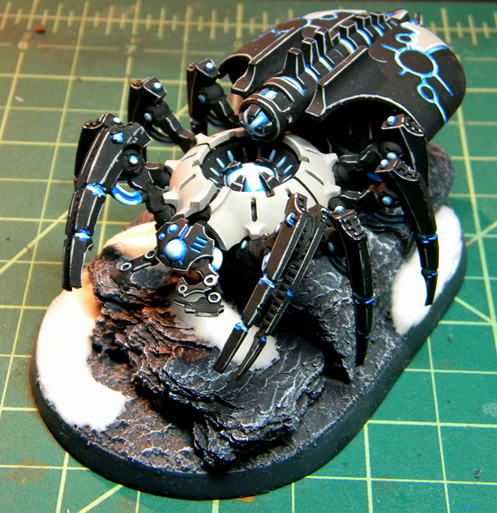
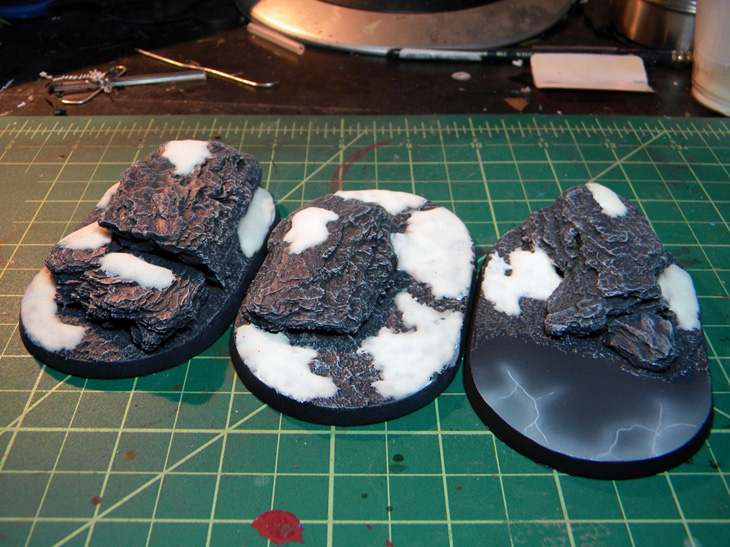
I’ve been continuing to create new bases for my units and I cranked out 3 new bases for my Canoptek Spyders. One of them snapped off his base a few weeks back so I can see how the Thokt theme goes with this new style. I kind of like them, but I believe this whole style/theme will come together once the models are done and the army display is designed for it.
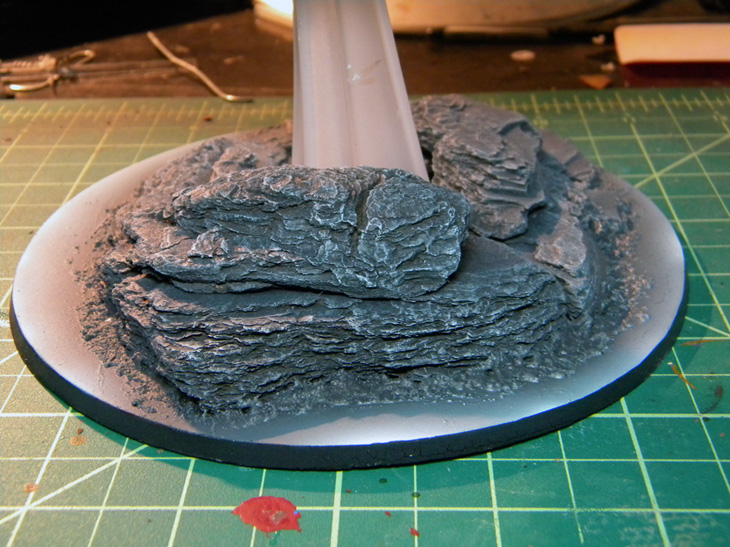
I’ve also found the perfect base in which to mount Necron Arks. The oval base that comes with the Imperial Knight is perfect. Here’s my prototype:
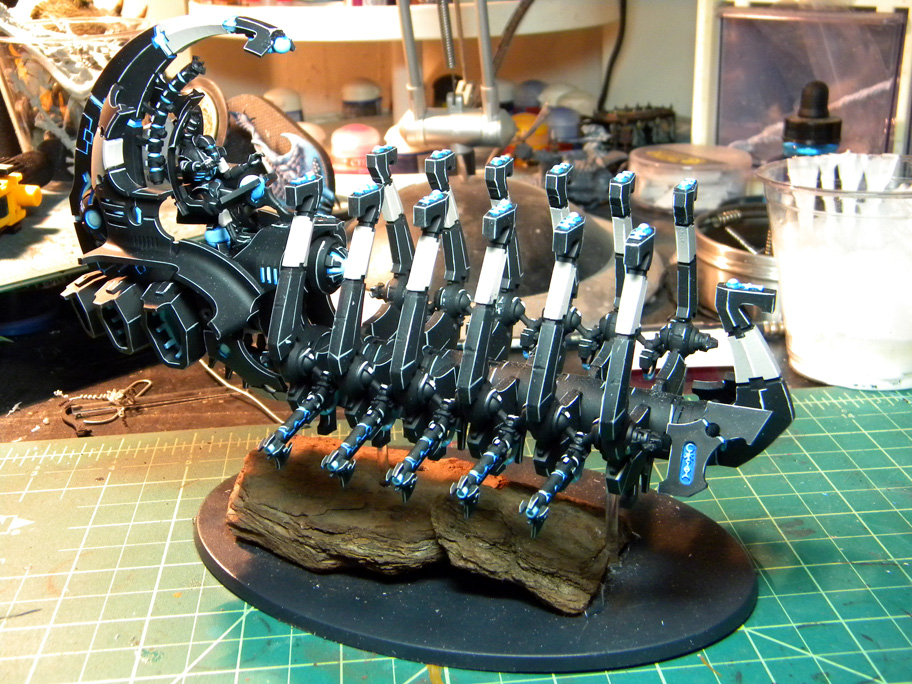
That’s all for now but stay tuned, I’ve got a BIG project lined up! More on that shortly!
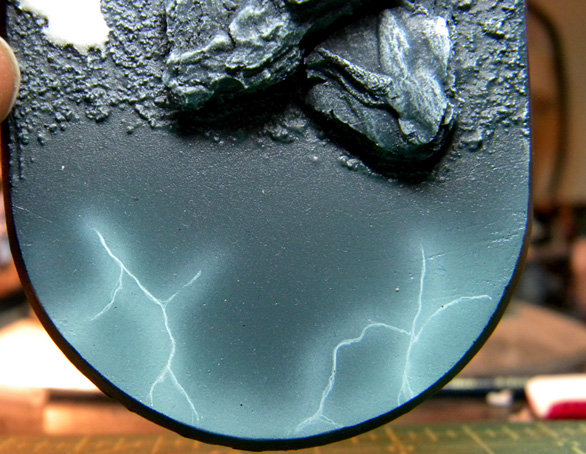
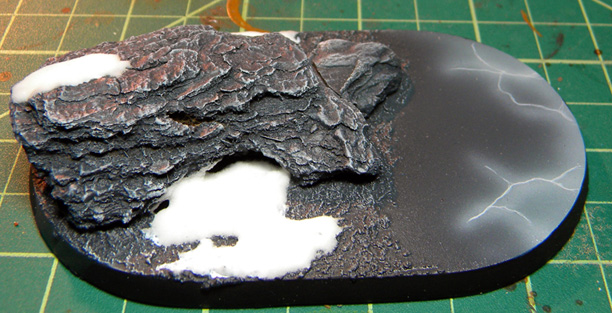
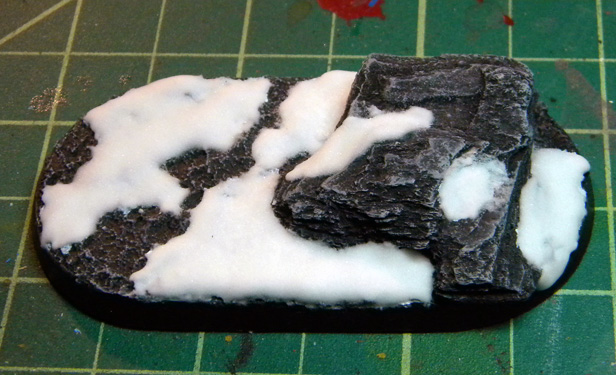
So I’ve admitted several times that I’m terrible at basing. I just never got the knack for having my bases match my paint schemes in look or design. My techniques just don’t translate to terrain. I have only one style I know how to do well because it’s kind of brainless. Snow.
I’ve been kicking around the idea of rebasing this army to a snow theme and while it would be a little time consuming, it really wouldn’t be hard. Cold soulless robots marching across a frozen lifeless wasteland? Sign me up!
Here’s the style I’m looking at so far:
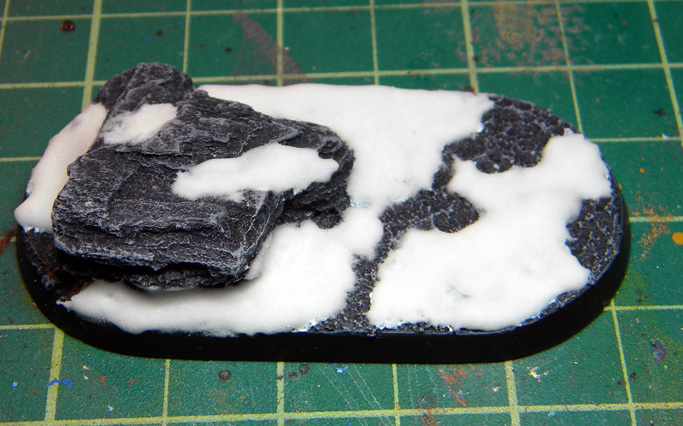
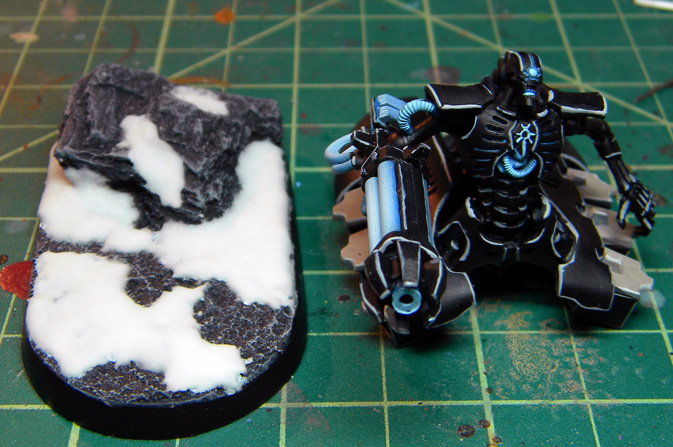
Here’s it next to one of my new destoyers. I’ll have the unit finished this week and I’ll post and go over the revision of my paint scheme.

Shawn G. (Soul)